
How to Lighten Your Backpacking Pack Without Cutting What Keeps You Safe
Your gear is spread across the floor before the next overnight, and you’re deciding what can stay home. Last trip, your shoulders were burning by the second climb and the hip belt had rubbed your hips raw.
Every list online says to buy a lighter tent, bag and pack, and you only just paid for yours. That’s the usual first-overnight pack, and it isn’t your fault.
Beginners pack their fears, and most weight-cutting advice is written for ultralight thru-hikers with a different budget and different risks.
What you came for is how to lighten your backpacking pack with the gear you already own, without leaving home something you’ll wish you had.
By the end, you’ll know which changes cost nothing and come first, which purchase to make later and when, and what never comes out of the pack.
TL;DR: How to Lighten Your Backpacking Pack
- Weigh and list everything you carried, and leave home whatever went unused on your last trip.
- Start with the free changes: repackage food and toiletries, skip the stuff sacks, share the tent, stove and filter, and carry only the water you need to reach the next reliable source.
- Replace the shelter, sleep system and pack only when each one is due, and buy the pack last so its load limit matches your lighter load.
- Never cut treated water with a backup method, the rain and warm layers, spare socks or the Ten Essentials.
How to Lighten Your Backpacking Pack: Weigh Everything Before You Cut Anything
Before you cut anything, weigh each item on a kitchen or luggage scale and list it. Base weight is the pack and its contents minus food, water and fuel. After each trip, sort gear into used often, used occasionally and never used, and the never-used pile is your first cut.
If you only do one thing this week, lay out what you carried last trip and weigh it before you change anything.
I’d weigh before buying anything, because guesses about what’s heavy are often wrong. Bulk and weight aren’t the same thing, so a soft, puffy item can look like the problem while something small and dense is doing more of the damage.
A written list also changes how the cutting feels. Each item has a number next to it, so leaving something home becomes a decision you can see instead of a worry you carry.
Use a kitchen scale for the small things and a luggage scale for anything too big to balance on it. Write each item down with its weight, in a notebook or a phone note, grouped the way you pack it.
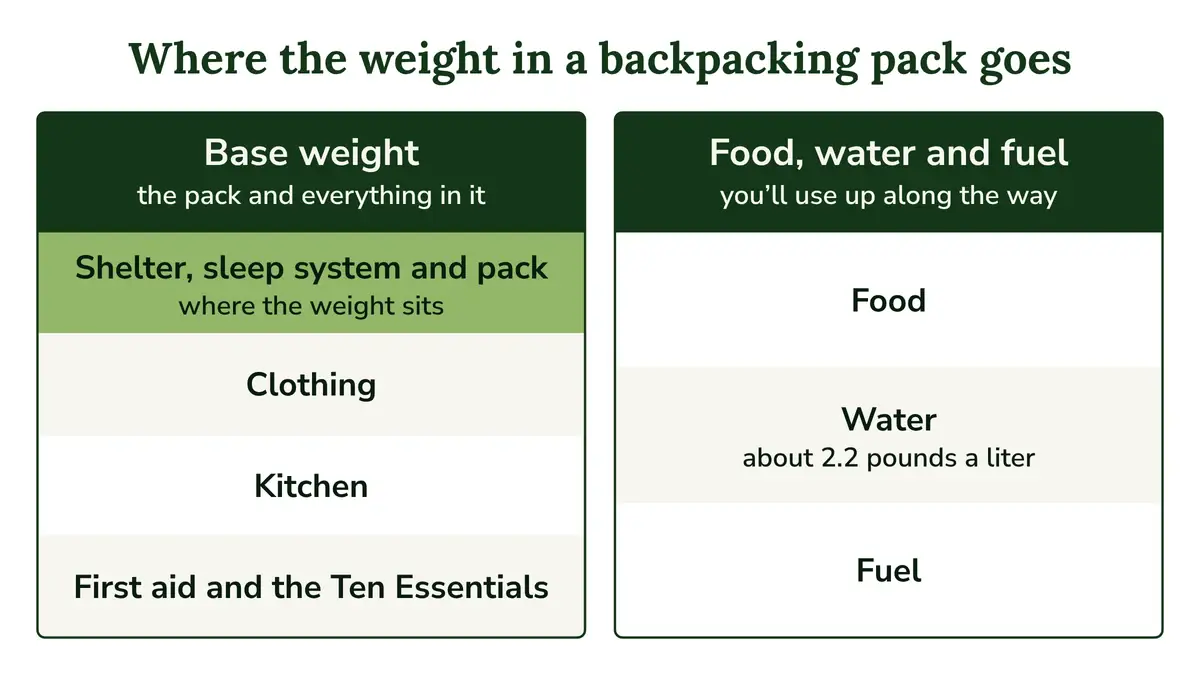
Then find your base weight: the pack and everything in it, minus the food, water and fuel you’ll use up along the way. Those three change during the trip, so leaving them out gives you a number you can compare from one trip to the next.
After each trip, sort what you carried into three piles: used often, used occasionally and never used. Most first overnights leave a few things that rode in the pack all weekend and never came out, like a second fleece, a book or a gadget that seemed useful at home.
That never-used pile is your first cut. The occasional pile is where you think harder, because some of those items earned their place on one bad evening.
On most lists, the shelter, sleep system and pack are where the weight sits. They get their own section further down, after the free changes, because replacing them costs money and the free changes don’t.
REI’s two-minute video below covers the same starting point: using a scale to judge each item, and paying attention to the four big pieces (the pack, shelter, sleeping bag and sleeping pad).
If you’re not sure how heavy your pack should be for your body and your trip, that guide gives you the numbers. Its check is also where to start if your pack isn’t that heavy but still hurts.
Quick Tip: Weigh the loaded pack on a luggage scale before your cuts and again after. The difference shows you what the changes actually saved, not what you hoped they would.
You Don’t Need Ultralight Gear to Carry Less: Start With the Free Changes
You don’t need to buy ultralight gear to carry less. The first changes cost nothing: leave home what went unused, move food and toiletries into reusable freezer bags, skip stuff sacks and use the pack’s own spaces, and share one tent, stove and water filter with your hiking partner.
The purchases come later, and for good reason. A common belief is that a lighter pack starts at the checkout. Buying lighter gear is on every list, REI’s included, but weighing and sorting cost nothing, and so do repackaging and sharing.
That matters if you already repacked once and the pack still felt heavy, with a tent and bag bought on a budget that won’t stretch again yet. I’d start here because it costs nothing, and one trip with a sorted kit shows you what you use before you spend anything.
Leave Home What You Never Used
Start with the never-used pile from your sort. If it rode in the pack all weekend and never came out, it stays home next time, along with any single-use item that does one small job.
REI lists a camp pillow as a single-use item to skip. Plenty of hikers carry one on purpose because they sleep better with it, and that’s a fair trade once you know what it weighs.
A comfort item you chose with the number in front of you is different from one you packed out of worry. Keep the first kind if it matters to you, and let the second kind go.
Repackage Food and Toiletries, and Skip the Stuff Sacks
Retail packaging is built for a store shelf, not your pack. REI suggests moving dehydrated dinners into freezer-safe zip-top bags, and snacks and the first-aid kit into reusable freezer bags.
Store-bought freeze-dried meals are the exception: REI says to carry those in their own pouch, since that’s what you add the water to.
Toiletries go the same way. Small containers in place of full-size bottles is the whole idea behind a small hygiene kit, and it cuts weight you’d otherwise carry for days without using.
Stuff sacks are the next easy cut. Each one adds its own weight, and the pack’s own compartments and pockets already do the job of keeping things in place, so use those spaces instead.
Share the Tent, Stove and Filter
If you hike with a partner, one tent, one stove and one water filter can serve you both. Split them between your packs, and each of you carries part of a shared kit instead of a full set of your own.
Agree on who carries what before you leave, so nobody packs a second stove “just in case” and undoes the saving.
Keep the Kitchen Small
The kitchen is where the sort pays off quickly. Cook on the shared stove, carry the repackaged meals, and bring only the utensils you actually used last trip.
For scale, REI says a light canister stove may weigh only 2 to 3 ounces and an alcohol stove about an ounce, though a fuel canister is heavy even when empty.
So the stove itself is rarely the problem. Look at what else sits in the kitchen bag, like the spare utensils and packaging you didn’t need.
Pack a Sensible Clothing Kit: Fewer Spares, Never Fewer Layers
A lighter clothing kit means fewer spare outfits, not fewer layers. Keep the rain layer and a lightweight puffy, and carry two pairs of underwear and two or three pairs of socks. The weight you save comes from the just-in-case extras.
Clothing grows because beginners pack for what might happen: a fresh outfit for each day, just in case. On a first overnight, that outfit often comes home folded and clean, which tells you worry did the packing, not need.
The rain and warm layers can look like easy cuts on a dry forecast. They aren’t, because they’re what you have when the weather turns or the evening gets colder than expected.
REI’s ultralight backpacking basics treat a lightweight puffy as a safety margin for sudden temperature drops. I’d keep it even on a warm forecast, because it’s the layer you reach for when you stop moving and camp cools down faster than you planned.
For the rest, two pairs of underwear and two or three pairs of socks are enough for a weekend. Spare socks stay in the pack, since a dry pair at camp is something no other piece of clothing gives you.
Once you see how hiking layers work, the spare outfit loses its job. A base layer, the puffy and the rain shell cover the cold, wet evening the extra clothes were packed for.
Plan Your Water Between Reliable Sources, and Treat Every Liter
Water weighs about 2.2 pounds (1 kg) a liter, so every liter you don’t carry between sources is weight you save for free. Plan refills between reliable sources, drink at each one, and treat every liter, because clear water can still carry germs. Carry a filter plus backup tablets.
On a first overnight it’s common to fill every bottle at the trailhead and carry all of it up the first climb, even when the map shows a stream an hour in. That’s two or three liters doing nothing but adding pounds.
Before you leave, mark the water sources on your route and ask the ranger station or land manager which ones are reliable at that time of year. At each source, drink half a liter to a liter, then carry enough to reach the next reliable one.
In desert parks there may be no reliable source at all. The National Park Service at Big Bend tells hikers to carry all the water they need, so in dry country, plan the whole trip’s water ahead.
None of this means drinking less. The saving comes from where you fill up, so rationing water to keep the pack light isn’t the answer.
Treat every liter, however clean it looks. The CDC’s water treatment options note that clear water can still be unsafe.
The Minnesota Department of Health adds that lake and stream water can carry viruses, parasites and bacteria, and says to always bring at least one backup treatment method in case one fails.
The methods don’t cover the same germs, which is why the backup matters:
- Boiling kills viruses, bacteria and parasites. The CDC calls for a rolling boil for 1 minute, or 3 minutes above 6,500 feet (about 2,000 m).
- Most portable filters remove parasites, and filters of 0.3 micron or smaller also remove bacteria, but most don’t remove viruses.
- Chemical disinfectants kill viruses and bacteria but may not kill parasites.
That’s why the CDC recommends filtering first, then disinfecting. It also says boiling or disinfecting can’t make water with harmful chemicals or toxins safe, so if a source looks polluted, or has a scum or bloom on the surface, find another one.
Treatment is the one place I’d never save weight. REI notes that many mini filters weigh about 2 ounces, and a strip of backup tablets adds very little on top.
Bottles are an easier saving. REI says soft collapsible bottles can be about 80 percent lighter than hard plastic ones. If you’re swapping, my guide to water bottles for hiking covers which kind suits which trip.
Quick Tip: Keep backup purification tablets in the kit even when you carry a filter. Most portable filters don’t remove viruses, and tablets do. If the filter fails, tablets alone may not kill every parasite, so boil water on your stove when you can.
Lighten the Shelter, Sleep System and Pack When Each One Is Due
Replace the shelter, sleep system and pack only when each one is due. Lighter versions often cost more and give up durability, padding or room. Choose the pack last, because a frameless pack of 1.5 to 2 pounds usually carries 30 to 35 pounds at most.
The question most readers have here is which piece to replace first. No single order holds up for every kit, so my answer is to replace whatever is worn out or due, and keep the pack for last.
REI suggests starting with the tent, and if yours is due, that’s a sensible place to begin. Before any swap, run it past five questions:
- Weight saved: how much the swap takes off your list, using the numbers on the spec sheet, not the label.
- Money spent: whether the saving is worth the price, since the lightest version is often the most expensive.
- Comfort or durability given up: lighter fabric, thinner padding or less room, and whether you’d notice.
- Skill needed: some lighter shelters take practice to pitch well.
- Safety margin: whether you still stay warm, dry and sheltered when the weather turns.
REI’s guide to ultralight gear essentials makes the cost point plainly: the lightest gear is often the most expensive, so buy gradually or used. Replacing each piece as it wears out spreads that cost over seasons instead of one checkout.
Here’s what the light end looks like for each of the three, and what it usually costs you in other ways.
Gear
The Light End (REI)
What Lighter Usually Gives Up
What to Check Before You Buy
Shelter
Solo under 2 lb, two-person under 3 lb
Less room, higher cost, less durable fabric, more condensation in single-wall tents
Minimum trail weight against packaged weight
Sleeping bag or quilt
Under 2 lb; 800 to 900 fill down at 1.5 to 2 lb
Quilts can let in drafts; down loses insulation when wet
A rating no warmer than the trip needs
Sleeping pad
Insulated full-length air pads under 1 lb
Less durable, can puncture, some crinkle
Warmth against weight, since warmer pads weigh more
Pack
Frameless 40 to 50 L at 1.5 to 2 lb, against about 3 to 6 lb for a traditional 65 L
Less durable, less support, most carry 30 to 35 lb at most
Its maximum load against your lighter total
Shelter
The Light End (REI): Solo under 2 lb, two-person under 3 lb
What Lighter Usually Gives Up: Less room, higher cost, less durable fabric, more condensation in single-wall tents
What to Check Before You Buy: Minimum trail weight against packaged weight
Sleeping bag or quilt
The Light End (REI): Under 2 lb; 800 to 900 fill down at 1.5 to 2 lb
What Lighter Usually Gives Up: Quilts can let in drafts; down loses insulation when wet
What to Check Before You Buy: A rating no warmer than the trip needs
Sleeping pad
The Light End (REI): Insulated full-length air pads under 1 lb
What Lighter Usually Gives Up: Less durable, can puncture, some crinkle
What to Check Before You Buy: Warmth against weight, since warmer pads weigh more
Pack
The Light End (REI): Frameless 40 to 50 L at 1.5 to 2 lb, against about 3 to 6 lb for a traditional 65 L
What Lighter Usually Gives Up: Less durable, less support, most carry 30 to 35 lb at most
What to Check Before You Buy: Its maximum load against your lighter total
The Shelter: Check Minimum Trail Weight, Not Just the Label
REI’s ultralight targets are under 2 pounds for a solo shelter and under 3 pounds for a two-person one. Its pack weight guide suggests a tent of about 3 pounds or less.
REI’s ultralight basics say swapping a conventional tent for an ultralight one can take off 3 or 4 pounds.
The tradeoffs are real. Lighter tents usually give you less room and cost more, and lighter fabrics are generally less durable. Single-wall tents save weight but get more condensation inside, and a tarp has no floor or bug netting.
Trekking-pole shelters use your poles in place of tent poles, so they only save weight if you already hike with poles. They also take some practice to pitch, which is worth doing at home before a night when it matters.
Brands use “ultralight” loosely, so read the numbers rather than the name.
Quick Tip: On a tent’s spec sheet, compare the minimum trail weight (body, rainfly and poles only) with the packaged weight (everything in the box). What you’ll actually carry sits somewhere between the two.
The Sleep System: No Warmer Than the Trip Needs
A bag warmer than your trips need is extra weight you carry every night, so match it to the coldest nights you actually camp in. When yours is due, my guide on how to choose a sleeping bag covers ratings, fill power and the pad that goes with it.
Quilts are lighter, cheaper and roomier than a comparable mummy bag, because they skip the hood, the insulation underneath and the zipper, but some people find them drafty when they roll over.
Fill power says how far down puffs up for its weight, so 800 or 900 fill gives the same warmth with less down. Down is lighter and packs smaller, but it loses insulation when wet, while synthetic fill is heavier and keeps insulating when damp.
Pads follow the same pattern. REI puts insulated full-length air pads under 1 pound, but the lighter the pad, the less durable it generally is, and air pads can puncture.
Some air pads also make loud, crinkly sounds, REI notes, which matters if a rustling pad would keep you or your tent partner awake.
Closed-cell foam is tough and cheap and almost never fails, but it’s bulky and, at around R-value 2, less warm. R-value measures how well a pad stops the cold ground from pulling heat out of you: the higher the number, the warmer the pad.
The Pack Comes Last, Because Its Load Limit Has to Match
On REI’s figures, a traditional 65-liter pack weighs about 3 to 6 pounds, against 1.5 to 2 pounds for a 40 to 50 liter frameless pack. The catch is the load: most of those frameless packs carry 30 to 35 pounds (about 14 to 16 kg) at most.
That’s why the pack comes last. Buy the light pack while the rest of your kit is still heavy, and you can trade sore shoulders for a pack that gives less support than your load needs.
Lighter packs are also less durable, need more careful handling and come with fewer features. Once the rest of your list has come down, you’ll know the load the next pack has to carry, and that’s the number to shop with.
When yours is due, start with fit before ounces. A pack that suits your torso and hips puts the load where it should go, and my roundup of backpacking packs matched to your torso compares picks by fit and load range.
Whatever you choose, make sure everything fits inside it. REI points out that gear strapped to the outside makes the load unstable.
What Never Gets Cut, and When Ultralight Isn’t a Fit Yet
Some weight never comes out: treated water with a backup method, the rain and warm layers, spare socks, first aid and the rest of the Ten Essentials. Choose lighter versions, but don’t drop them. Ultralight relies more on experience and judgment, so lighter is the safer target while you learn.
The worry underneath all of this is leaving home the one thing you’ll wish you had. These are the items that stay, whatever the scale says:
- Treated water and a backup method, because clear water can still carry germs and a filter can fail.
- The rain and warm layers, because they’re your margin when the weather turns or the evening cools.
- Spare socks, because a dry pair at camp is hard to replace with anything else.
- The first-aid kit, which REI says to keep, in a lighter version if you want one.
- The Ten Essentials, every trip. My guide to hiking essentials has the full list.
My line is simple: anything that keeps you warm, dry, safely hydrated or able to deal with a problem stays. Everything else has to earn its place on the scale.
As for ultralight, REI notes that it means relying more on your own judgment and experience, and frameless packs carry less. If you’re still learning what you use and how your kit handles a bad evening, lighter is the right target for now.
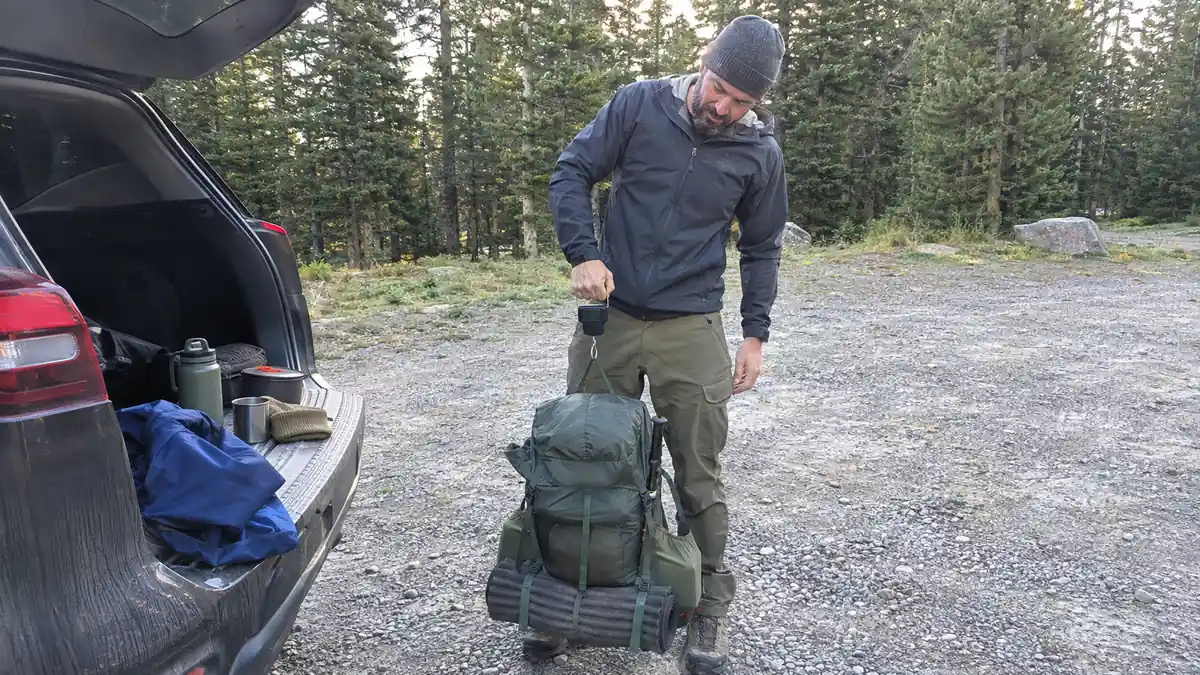
Where the weight sits matters as much as how much there is. A lighter load packed badly can still pull or sway, so packing the heavy items close to your back is worth getting right too.
Before your next overnight, lay everything out, weigh it, and set aside whatever you didn’t use last time.
Founder & Gear Research Editor
Sonia Zannoni
I’m Sonia, the founder of Best Trail Backpacks. I don’t test gear myself. For every pack I cover, I read the manufacturer’s specs and sizing charts and look for what owners report again and again.
Fit comes first, because a pack that doesn’t match your torso and hips will hurt no matter what it cost. My goal is to help you choose a pack that suits your body, your trip and your budget.
About the Founder
