
How to Avoid Getting Lost While Hiking (and What to Do If You Do)
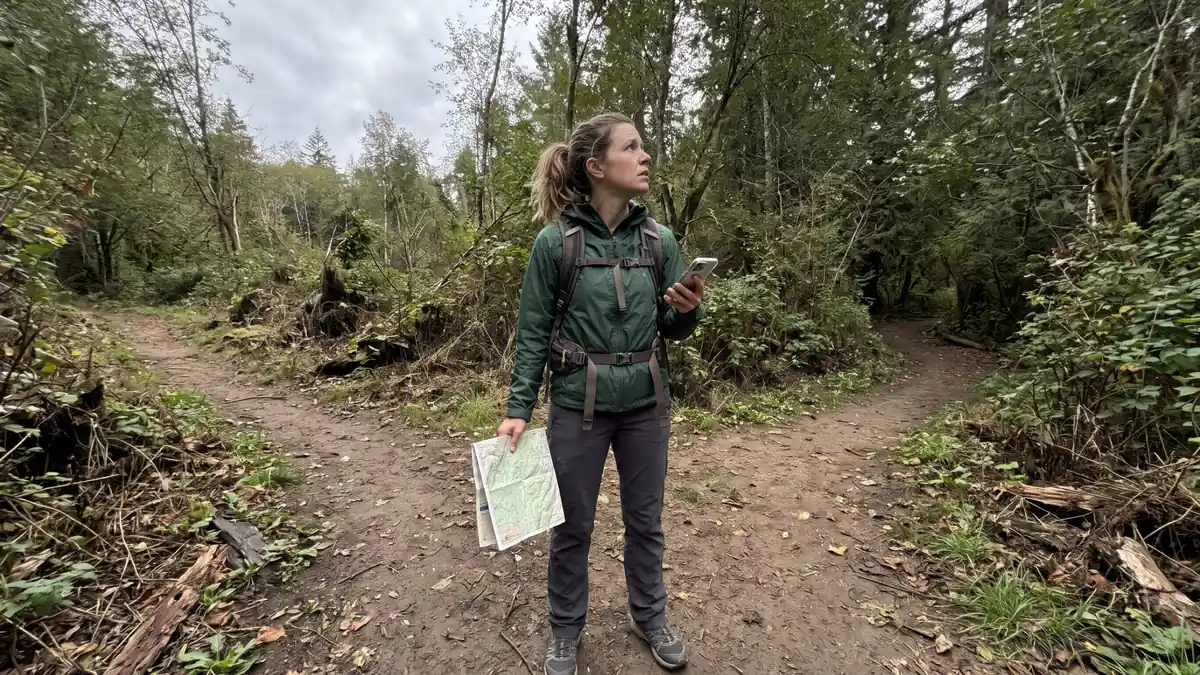
It’s the night before a hike on a new trail, and the route is open on your phone. One question keeps nagging: what if I take a wrong turn and nobody knows where I am? The advice you find is either a forty-item gear list or “just use your phone.”
Nearly everyone heading somewhere new has that thought, and it means you’re thinking ahead, not that you aren’t ready. If the advice feels confusing, that’s not on you. Most of it lists gadgets without saying why you’d need them.
You want to know how to avoid getting lost while hiking, and what to do in the first minutes if the trail stops making sense.
By the end, you’ll know the few things to set up before you leave home (most of them free), the habits that keep you on your route, and a simple rule for when to retrace your steps and when to stay put.
TL;DR: How to Avoid Getting Lost While Hiking
- Leave a trip plan with someone who isn’t coming (trail, route, return time, where you parked), not a note on your dashboard.
- On the trail, check your map at every junction and look back, because the same junction looks different on the way home.
- If you feel lost, stop. Retrace your steps only to a point you’re sure of, in daylight, if it’s safe. Otherwise, call for help if you can and stay put.
- A phone map needs battery and a paper map as backup. Add a satellite SOS phone, a PLB or a messenger when you’ll be out of coverage.
Before You Leave Home: The Plan That Tells Searchers Where to Start
Most of the work happens before you reach the trailhead. Pick a well-marked trail for your first hikes somewhere new, check the weather and your daylight, and leave a trip plan with someone who isn’t coming: the trail, your route, when you’ll be back and where you parked.
When a trail is new to you, choose a popular one with good signs, and look at the route before you go. Know roughly how long it takes, and check the map so you know where the junctions are before you meet them.
Then check the forecast and any warnings from the land manager, such as the park or the ranger district. Look up when it gets dark, too. Daylight sets the real limit on your day, because a junction that was obvious at noon is much harder to read by headlamp.
The trip plan is the part that matters most. Texting a friend “going hiking tomorrow” feels like telling someone, but if you didn’t come back, they wouldn’t know which trail, where you parked or when to start worrying.
A trip plan fixes that. Leave it with a trusted person who isn’t coming with you, by text, email or on paper. The National Park Service and the Forest Service both ask for exact details:
- The trail and the route you plan to take, so anyone looking for you knows where to start
- When you expect to be back, so your contact has a time to measure “late” against
- Your car and where you parked, so someone can confirm you started where you said
- How many people are with you, so searchers know who they’re looking for
The Washington Trails Association also suggests adding clear instructions for what your contact should do if you’re not back on time.
Search teams start from your plan and the last place you were known to be, so a clear plan narrows where they look. The park won’t hold it for you, either: the NPS says it doesn’t accept trip plans, so a person has to.
If you do one thing from this guide, I’d make it the trip plan. It’s free, it takes a few minutes, and it’s the point any search starts from.
Quick Tip: Agree on a “call for help by” time with your contact, separate from when you expect to finish. Then they know exactly when late means overdue, instead of guessing.
If the trailhead has a register, sign it. The Washington Trails Association recommends both habits: give your itinerary to a friend and sign in at the register. A register is an extra record, never a replacement for the person who’ll notice you’re late.
For a first trip on an unfamiliar trail, it helps not to go alone. The Forest Service advises against it, and two people at an unsigned fork can talk it through. If you’d like company but don’t know who to ask, there are practical ways to find a hiking partner.
If you do go alone, the trip plan matters even more.
What’s in your pack matters too. The Ten Essentials are a safety checklist that began with The Mountaineers, and hiking groups such as the American Hiking Society also publish it. Navigation comes first on the list, and the list is meant to be tailored to the trip.
My Ten Essentials list for day hikes shows what that looks like in a beginner’s pack.
These checks also tell you what kind of trip you’re planning, and that decides what else to carry. Before you pack, notice:
- How remote the trail is, because the further out you are, the longer help takes to reach you
- Whether there’s cell coverage, because a phone that can’t connect can’t call out
- Whether someone has your plan, since that’s where any search begins
- How much daylight you’ll have, since dark makes every junction harder to read
- Whether you can read the map you’re carrying, because a map only helps if it makes sense to you
The setup section below uses these to match your gear to the trip. Before that, two popular tips are worth clearing up, because they sound like they cover some of this.
Two Common Tips That Can Make Getting Lost Worse
Two tips still get passed around that agencies don’t treat as a plan. A dashboard note isn’t one: nobody reads it in time, and it tells strangers how long your car will sit empty. Following a stream downhill is a last resort the Forest Service warns could be very dangerous.
You’ve probably heard both from a friend or an old guidebook, and they sound sensible. They aren’t silly ideas. They just don’t hold up once you look at how lost hikers get found.
The Note on Your Dashboard
The habit is to leave a note on the dashboard saying where you’ve gone and when you’ll be back, and treat that as the safety plan. It feels responsible. The trouble is that nobody knows to read it until someone is already looking for you.
Great Smoky Mountains National Park advises against leaving one at all, and it’s easy to see why: it tells anyone walking past how long your car will sit empty. Give the plan to a person who will report you overdue instead, the way the trip plan above works.
Following a Stream Downhill to Find a Road
The folk tip goes like this: water flows toward towns, so if you’re lost, follow a stream downhill until you reach a road. The Forest Service calls following a drainage downhill a very last resort and warns it could be very dangerous.
Following water moves you away from your last known point, the place a search would start, and into rough ground. Working through the steps in the section on feeling lost keeps you findable instead.
Someone you know may swear by it, and for them it may have worked. The agency advice still puts staying findable first, because on the day it doesn’t work, you’re off the trail and further from help.
I’d take the plain alternatives every time: a person holding your plan, and staying put long enough to think. They’re less dramatic, but they keep you where someone will look. That leaves the question most people ask next, about the phone in their pocket.
Your Phone, a Paper Map or a Beacon: The Setup That Fits Your Trip
A downloaded phone map works without signal, but the phone needs battery, can break and often can’t call out. On most marked day hikes, a power bank, a paper map and a trip plan round that out. Beyond coverage, add a satellite SOS phone, a PLB or a messenger.
“My phone has maps” is the obvious reply to all of this, and it’s half right. A map you download before you go does work without signal. But the phone needs battery, it can break or get lost, and it usually can’t call for help where there’s no coverage.
The Mountaineers suggest assuming your phone won’t make calls in the backcountry unless you’re sure of signal, and that a physical map should back up any device that runs on batteries. The NPS gives the same advice about carrying a paper map, because the battery may not last.
Picture the moment one bar of signal drops to none and the battery reads 20 percent. The map on your screen still works for now, but the paper one in your pack is what you’ll trust for the rest of the day.
So for most day hikes on marked trails, the realistic setup is a phone with an offline map, a power bank and a paper map, plus a compass, which needs no battery at all. If you don’t own one yet, start with a compass that suits your hiking.
Battery is the part people forget. A phone that keeps searching for signal drains its battery faster, so airplane mode helps once you’re out of coverage, and dimming the screen helps too. Carry a charged power bank, which The Mountaineers call an important precaution.
When a trip goes beyond coverage, you need a way to reach help that doesn’t depend on a cell tower. The options fall into three types:
- Phone satellite SOS. Some newer phones can text emergency services by satellite. It works only when there’s no cell or Wi-Fi coverage, with a clear view of the sky, in supported countries, and trees or terrain can block it.
- Personal locator beacon (PLB). A device that sends a one-way SOS with your location. There’s no subscription and the battery lasts years, but it can’t send messages or cancel its own SOS. If you set one off by mistake, NOAA asks you to call the rescue coordination center to cancel the alert.
- Two-way satellite messenger. It sends an SOS and lets you send messages such as “running late but okay.” It needs charging and a subscription, and a blocked view of the sky can stop it getting through.
A PLB also needs registering. In the US, federal law requires 406 MHz beacons to be registered with NOAA, and registration is free.
NOAA asks owners to renew the registration every two years. Elsewhere, you register with your own country’s beacon authority, which the Cospas-Sarsat site lists by country.
Quick Tip: Before the trip, check whether your phone offers satellite SOS where you’re hiking, and run its demo outside, somewhere with open sky like a yard or a park. Then the first time you use it isn’t the time you need it.
The tradeoff is money. A beacon or a messenger means buying a device, and a messenger adds a subscription on top. A trip plan costs nothing, and on most day hikes on marked trails it covers the part that matters most: someone knows where to start looking.
Whatever you carry, learn it at home before you rely on it on the trail. None of these devices replaces knowing your route, either. The Mountaineers make the point that a communicator is no substitute for self-reliance.
On a marked day hike, I wouldn’t spend money on a device before the trip plan is written.
Once a trip leaves coverage, I’d choose by one question: do you want to be able to send “I’m late but okay”? If you do, that’s a messenger, and if you only want an SOS with no plan to pay for, a PLB fits.
Here’s how the five setups compare, from the free one to the ones that cost money.
Setup
What It Does
What It Costs
Keep in Mind
Trip plan with a trusted contact
Someone knows where you went and when to call
Free
Only works if they know when late means overdue
Phone with offline map, power bank and paper map
Shows where you are without signal
Gear many hikers already own
Needs battery and usually can’t call out without coverage, so the paper map is the backup
Phone satellite SOS
Texts emergency services by satellite when there’s no cell or Wi-Fi
Built into some newer phones
Supported phones and countries only, needs open sky, try the demo outside first
PLB
One-way SOS with your location
Device cost, no subscription, free NOAA registration
Can’t send messages, and an accidental SOS is canceled by phone
Two-way satellite messenger
SOS plus messages such as “late but okay”
Device cost plus a subscription
Needs charging, and dense cover can block it
Trip plan with a trusted contact
What It Does: Someone knows where you went and when to call
What It Costs: Free
Keep in Mind: Only works if they know when late means overdue
Phone with offline map, power bank and paper map
What It Does: Shows where you are without signal
What It Costs: Gear many hikers already own
Keep in Mind: Needs battery and usually can’t call out without coverage, so the paper map is the backup
Phone satellite SOS
What It Does: Texts emergency services by satellite when there’s no cell or Wi-Fi
What It Costs: Built into some newer phones
Keep in Mind: Supported phones and countries only, needs open sky, try the demo outside first
PLB
What It Does: One-way SOS with your location
What It Costs: Device cost, no subscription, free NOAA registration
Keep in Mind: Can’t send messages, and an accidental SOS is canceled by phone
Two-way satellite messenger
What It Does: SOS plus messages such as “late but okay”
What It Costs: Device cost plus a subscription
Keep in Mind: Needs charging, and dense cover can block it
On a marked trail with coverage, and with someone holding your plan, the phone setup is enough. On a remote trail or anywhere out of coverage, add one of the three ways to reach help.
Tonight, check whether your phone can text emergency services by satellite where you hike, then try its demo outside, with a clear view of the sky.
How to Avoid Getting Lost While Hiking Once You’re on the Trail
You choose a direction at junctions, so that’s where these habits count. Stop at every fork, check your map, note a landmark and look back at it, because the same junction looks different on the way home. Stay on the marked trail and set a turnaround time before you start.
At every fork, stop. Check your map and make sure the trail you’re about to take matches the route you planned. The NPS and the American Hiking Society both say the same: watch junctions, signs and landmarks, and check often that you’re still on your planned route.
Think of the fork with no sign, where nothing matches the photos in the app. Stopping there for a minute can feel like overkill, but it’s the cheapest moment in the whole hike to get it right, because every step past a wrong turn is a step you’ll walk back.
A compass is the backup that needs no battery. If you haven’t used one, my guide on how to use a compass walks through the basics in plain English.
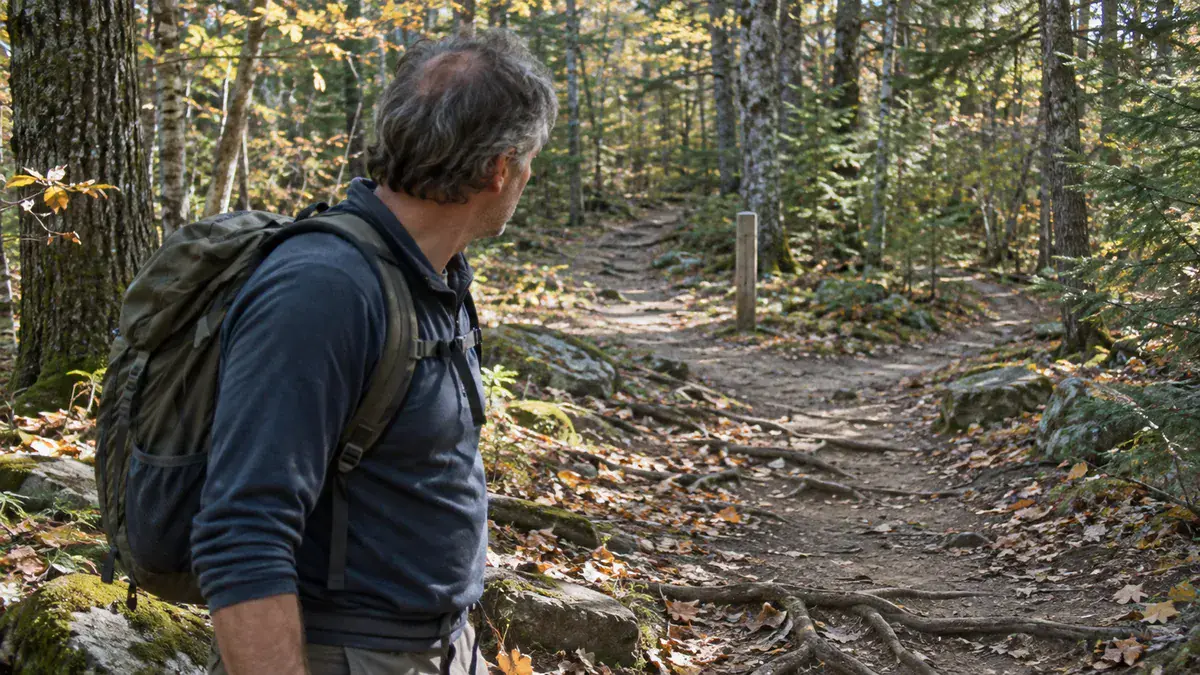
At each junction, pick out one thing you’d recognize again: a footbridge, a burned stump, a trail sign, a view down the valley. It gives you a checkpoint on the way back, so you know you’re on the right path before you’ve gone too far.
Then turn around and look at it. The same junction looks different in reverse, so a fork that was obvious on the way out can look like a choice on the way home. The American Hiking Society suggests turning around now and then for this reason, especially at junctions.
Stay on the marked trail. Cutting a switchback or following a side path that looks like the trail can put you on a path that isn’t on your map. There’s a trail-care side to this too, and it’s part of why staying on the trail matters in Leave No Trace.
If you’re in a group, stay together, as the NPS advises. A group that splits up at a junction can end up as two groups that don’t know where the other went.
Last, set a turnaround time before you leave the car and stick to it, planning to be back before sunset. The Washington Trails Association and the Appalachian Mountain Club both advise it. It works because you decide it while you’re fresh, before tired legs and “almost there” get a vote.
Of all the habits here, the turnaround time is the one I’d least want you to skip, because it’s the one that protects your daylight.
Quick Tip: Set your turnaround time as a phone alarm at the trailhead. When it goes off, the decision is already made, and all you have to do is turn around.
Feeling Lost? Stop First, Then Decide Whether to Retrace or Stay
When the trail stops making sense, stop, and work through the Forest Service’s STOP method: Stop, Think, Observe, Plan. Retrace your steps only when it’s safe, light and you’re sure of the way. Otherwise, call for help if you can and stay put, since moving makes you harder to find.
It usually starts with a jolt: the last ten minutes don’t look right. The urge is to walk faster until something looks familiar, and that feels like fixing it, but it carries you further from the last place you were sure of.
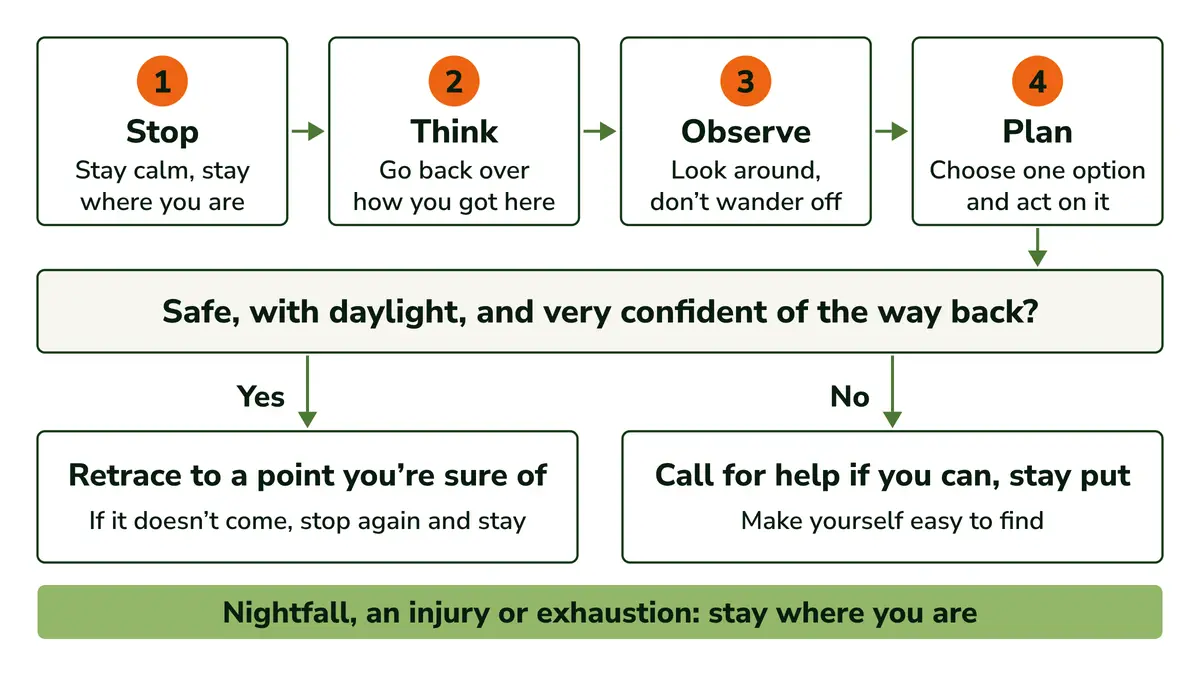
The Forest Service’s advice for when you get lost boils it down to four steps:
- Stop. Stay calm and stay where you are.
- Think. Go back over how you got here, and don’t move until you have a specific reason to.
- Observe. Look around. If you’re on a trail, stay on it, and don’t wander off to explore.
- Plan. Think through your options, choose one, and act on it.
Here’s the rule I’d keep in your head. Retrace your steps only when it’s safe, there’s daylight, and you’re very confident of the way back, and only as far as a point you’re sure of. If that point doesn’t come, stop again and stay.
Otherwise, call for help if you can and stay put. Nightfall, an injury or exhaustion all mean the same thing: stay where you are. The Forest Service gives the same advice when you’re not very confident of the route.
Staying put can feel like giving up, but it’s what makes the plan work. Searchers start from your plan and your last known point, and the NPS notes that changing location makes you harder to find, so staying where your plan points is what lets the plan do its job.
It’s also why “follow the water downhill” sits at the bottom of the list: it moves you away from where anyone will look.
The rule is short on purpose. When you’re rattled, you won’t remember a flowchart, but you can remember this much: stop, retrace only to somewhere you’re sure of, or stay.
How to Call for Help and Make Yourself Easy to Find
If you can call out, give your coordinates, trail, last known location, visible landmarks, clothing and any medical conditions, then stay put. Without signal, use satellite SOS if you carry it. A whistle, a flashing light and bright clothing help searchers find you, and help can take hours or days.
If you have signal, call 911, or the local emergency number outside the US. The National Park Service’s outdoor emergency plan lists what to tell them:
- Your coordinates, which your phone’s map can show you (find where it shows them at home, before you need them)
- The trail you’re on and your last known location, so they know where your route went
- Landmarks you can see, to narrow down where you are along it
- What you’re wearing, including colors, so searchers know what to look for
- The equipment you have and any medical conditions, so they know what you’ll need
Then stay where you are, and move only if your life is under immediate threat. With no signal, this is where a satellite SOS phone, a PLB or a messenger earns its place, if you’re carrying one.
Next, make yourself easy to see and hear. The NPS and the American Hiking Society suggest a few simple signals:
- A whistle: three blasts, a pause, then repeat. It saves your voice and energy, and three sharp blasts is widely recognized as a distress call.
- A light flashed in an SOS pattern, used sparingly so the battery lasts
- A mirror flashed toward aircraft, if you have one
- Bright clothing, worn where it can be seen
- Shelter or rocks laid out in a shape that aircraft can see from above
I’d keep the whistle where you can reach it without taking your pack off, such as clipped to a shoulder strap. If you’re tired or hurt, digging through a pack for it is one more thing you don’t need.
Sitting tight as the light goes is harder than it sounds. Help can take hours or days, the NPS says, so settle in: put on your extra clothes, use any shelter you carry, eat and drink what you have, and save your phone’s battery for calls.
Warmth comes first from clothes and shelter, not a fire. Build a small fire only where it’s allowed and fire danger is low, and never during a fire ban. The Forest Service suggests checking with the ranger district for fire warnings before you go.
Before your next hike, write the trip plan (the trail, your route, your return time, your car, and when to call for help) and send it to the person who’ll notice if you’re late.
Founder & Gear Research Editor
Sonia Zannoni
I’m Sonia, the founder of Best Trail Backpacks. I don’t test gear myself. For every pack I cover, I read the manufacturer’s specs and sizing charts and look for what owners report again and again.
Fit comes first, because a pack that doesn’t match your torso and hips will hurt no matter what it cost. My goal is to help you choose a pack that suits your body, your trip and your budget.
About the Founder
