What to Look For in a Water Bottle: The “Goldilocks” Guide to Hydration
The day I ruined my laptop was the day I stopped treating a water bottle like a fashion accessory. It was a Tuesday morning in a busy coffee shop, and I had a gorgeous matte-sage bottle with a bamboo lid sitting right next to my open MacBook. I reached across, knocked it, and watched the lid pop off like it had somewhere to be.
Water went everywhere: on the keyboard, the mouse, and my notebook. The bamboo cap had never sealed properly, and I had been so charmed by the color that I never bothered to check. That bottle cost me a repair bill that still makes me wince.
That morning taught me a tough lesson. A water bottle is a containment vessel, not a fashion statement. Knowing what to look for before you buy prevents a puddle in your bag and ensures hydration fits your actual lifestyle. You do not need to spend hours down Reddit rabbit holes to find a bottle that works for your life.
TL;DR: Water Bottle Buying Guide
Stop Listening to the Gallon Jug Crowd
Carrying gallon jugs with motivational timestamps has taken over gyms and trails alike. But carrying eight pounds of water can strain your wrist and rarely fits in standard cup holders or daypack side pockets. The “bigger is better” myth assumes you will never have access to trailheads or water fountains.
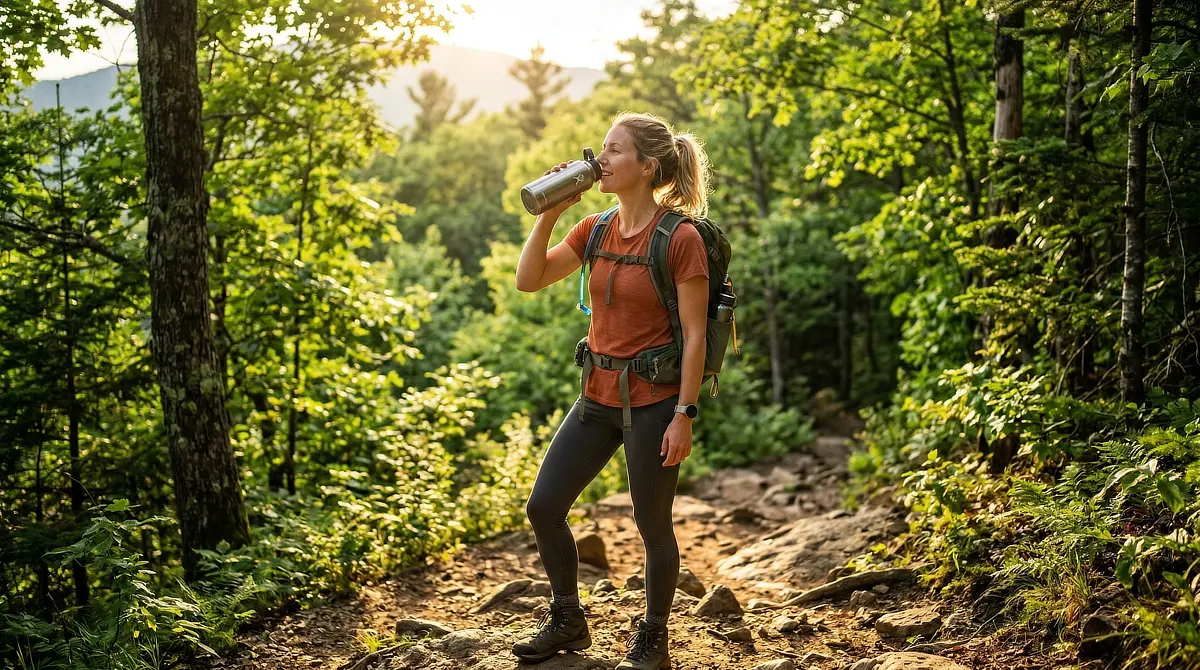
The real sweet spot lives in the middle, specifically between 24 and 32 ounces. This size is lightweight, lasts through a moderate hike, and fits comfortably in almost any backpack pocket. Hydration habits beat hydration math every single time.
Trail Story: The difference between carrying too much water and just enough is something you feel by mile three on a hot afternoon. I used to pack a massive, heavy insulated bottle because I wanted ice-cold water at the summit.
By the time I hit the steep switchbacks, my shoulder was aching from the lopsided weight in my side pocket. Switching to a lighter 24-ounce bottle that I could filter into along the way completely changed how comfortable I felt on the trail.
Step 1: The Material Test (Taste vs. Portability)

The material of your bottle affects both the taste of your water and your carrying comfort. Here is how the main options stack up:
Material
Best For
The Catch
Tritan Plastic (BPA-Free)
Hiking and travel
Water warms up fast; no insulation
Stainless Steel
Durability and daily carry
Heavier; can dent if dropped
Glass
Pure taste and desk use
Fragile; heavy in a backpack
Aluminum
Budget price points
Requires a liner that can degrade
Tritan Plastic (BPA-Free)
Best For: Hiking and travel
The Catch: Water warms up fast; no insulation
Stainless Steel
Best For: Durability and daily carry
The Catch: Heavier; can dent if dropped
Glass
Best For: Pure taste and desk use
The Catch: Fragile; heavy in a backpack
Aluminum
Best For: Budget price points
The Catch: Requires a liner that can degrade
Tritan Plastic:
This is the go-to for hikers because it is lightweight and highly durable under normal trail use. BPA is an industrial chemical once common in some plastics. A BPA-free bottle avoids that specific concern, which is one reason Tritan became popular for clear reusable water bottles. The main tradeoff is that cold water will reach room temperature by noon.
Stainless Steel:
The workhorse of the category. It is durable, hygienic, and resists holding onto flavors from electrolytes or tea. While it is heavier than plastic, a quality steel bottle can last for decades.

Field Notes: In freezing temperatures, metal threads on stainless steel bottles can seize or freeze shut, making them incredibly difficult to open with cold fingers. If you are winter hiking, plastic Tritan threads tend to perform better, or if you are carrying a non-insulated bottle, store it upside down in your pack so any ice forms at the bottom rather than freezing your cap threads shut.
Glass:
Glass offers a clean, pure taste and looks beautiful on a home office desk. However, it is a poor choice for a pack because it can shatter on impact and adds significant weight to your load.
Expert Analysis: Why We Generally Skip Aluminum
Aluminum itself is reactive, meaning it requires an interior liner to prevent direct contact with your water. If you use acidic drinks like electrolyte mixes or lemon water, that thin liner can degrade or crack over time, exposing your drinks to the bare metal. Opting for food-grade stainless steel eliminates this issue entirely.
Step 2: The Insulation Decision (The “Sweat” Factor)

Single-Wall Bottles
These are lighter and less expensive, but they offer zero insulation. They also tend to “sweat” heavy condensation when filled with cold water, which can easily soak the gear in your pack.
Double-Wall Vacuum-Insulated Bottles
A vacuum between two metal walls creates an excellent thermal barrier. Cold drinks stay cold for hours, and the outside of the bottle remains dry. This is cheap insurance if you carry electronics like laptops or cameras in your pack.
Field Note: The “Tap Test”
To verify vacuum insulation in-store, give the side of the bottle a light tap with your fingernail. A single-wall bottle will produce a high-pitched “ping,” while a true double-walled vacuum bottle yields a dull, solid “thud.” If the outside of your insulated bottle ever feels hot when filled with hot liquids, the vacuum seal has likely failed.
Step 3: Lid Architecture and Accessibility
The lid is where most bottles fail, yet it is the part you interact with most. Getting this wrong leads to daily annoyance.
Wide-Mouth Lids
These are easy to clean, simple to fill with ice, and compatible with most trail-ready water filters. The catch is that they are prone to splashing if you drink while walking.
Narrow-Mouth Lids
These provide a controlled sip with almost no spill risk. The downside is that they are much harder to scrub, which can lead to stale-tasting water if you do not clean them regularly.

Straw Lids
These are excellent for one-handed use while driving or hiking with trekking poles. However, the internal mechanisms can trap moisture and mold. If you choose this style, invest in a small wire cleaning brush to clean the straw properly.
Expert Analysis: The “Chug Cap” Alternative
A “chug cap” is an excellent hybrid. It gives you the wide opening of a wide-mouth bottle for easy ice-filling and cleaning, but includes a smaller, screw-on spout for a controlled, splash-free flow. Many major bottle brands sell these as aftermarket upgrades for their existing wide-mouth models.
Step 4: Hygiene and Maintenance

Fewer moving parts mean fewer crevices where bacteria and mold can hide. To keep your water tasting clean, disassemble the lid completely after every few uses and let the pieces air dry overnight. A bottle is only as clean as its gasket.
Field Note: The Denture Tablet Trick
If your plastic or steel bottle has developed a stubborn smell, drop one denture cleaning tablet into the bottle filled with warm water. Let it fizz for about 15 minutes, rinse thoroughly, and it can help lift stale odors from hard-to-clean bottles. This is a highly effective remedy that costs only a few cents.
Comparison at a Glance
Situation
Best Material
Best Insulation
Best Lid
Cup Holder Fit?
Commute
Steel
Vacuum
Chug Cap
Yes (24 oz)
Day Hike
Tritan
Single-Wall
Wide Mouth
Often No (32 oz)
Office
Glass or Steel
Either
Wide Mouth
Yes
Travel
Steel
Vacuum
Narrow
Yes (24 oz)
Commute
Best Material: Steel
Best Insulation: Vacuum
Best Lid: Chug Cap
Cup Holder Fit?: Yes (24 oz)
Day Hike
Best Material: Tritan
Best Insulation: Single-Wall
Best Lid: Wide Mouth
Cup Holder Fit?: Often No (32 oz)
Office
Best Material: Glass or Steel
Best Insulation: Either
Best Lid: Wide Mouth
Cup Holder Fit?: Yes
Travel
Best Material: Steel
Best Insulation: Vacuum
Best Lid: Narrow
Cup Holder Fit?: Yes (24 oz)
Note: Many vehicle cup holders fit bottles with a diameter of around 3 inches or less. Larger 32-oz wide-mouth bottles are often closer to 3.5 inches across, which is why they usually ride better in a backpack side pocket than in a car cup holder.
It is completely normal to feel overwhelmed by the sheer volume of gear choices, even for something as simple as a water bottle. Most of us have a cabinet full of discarded bottles that looked great in the store but failed on the trail. The key is to start with what fits your immediate needs and let your own hiking style guide your next upgrade.
The Final Verdict: Check Your Gear Tonight
Before buying a brand-new bottle, go to your kitchen cabinet and inspect your current favorite. Separate every piece, check the silicone gasket for dark spots, and give it a sniff. If it smells swampy even after a deep wash, it is time for a replacement.
You are now equipped to find a reliable hydration tool that fits your routine without risking your gear or your electronics.
Now that you know what to look for, take a look at our expert analysis of the Best Water Bottles for Hiking to see how the top models compare. If you are a commuter or hiker carrying tech, pairing your bottle with one of the Best Daypacks for Hiking is smart insurance to keep your laptop safe and dry.
Where do you stand on bottle style? Do you cover yours in travel stickers to show off where you have been, or do you keep it clean and minimalist? Let me know in the comments below!
Founder & Gear Research Editor

Sonia Zannoni
I’m Sonia, the founder and Gear Research Editor behind Best Trail Backpacks. I research hiking backpacks through a comfort-first lens, with a focus on fit, back pain, ventilation, practical trail use, and the small design details that can make or break a hike.
I do not pretend to personally test every backpack I cover. Instead, I compare manufacturer specifications, product details, verified buyer patterns, and practical fit guidance to help casual hikers make better buying decisions without getting buried in gear jargon.
My goal is simple: help you choose a backpack that fits your body, your trail plans, and your budget, without the usual overwhelm.
About the Founder
Great article you have here and thank you for sharing such an informative article. It’s great to know that a stainless steel water bottle outstands the other materials.
Would you also know any water purification methods that can be used while backpacking? I think of buying a stainless steel water bottle since they are reusable and would like to know more about the purification methods I can use along with my stainless steel bottle.
They are a few methods that you can use to purify the water in the wilderness. One of them involves using UV light to kill bacteria and viruses. If you are thinking about buying a stainless steel bottle, you can actually buy the LARQ bottle, which uses UV light to purify the water.
Another method to purify the water is to use tablets or drop (chlorine or iodine-based) into the water. This method takes longer and is cheaper than the UV light purification method.
One last method is a rustic one, boil the water before drinking it!
I hope I have answered your question. If you have other questions, don’t hesitate to leave them below, and I will get back to you ASAP!
Hi Sonia,
Your article caught my interest because I needed to know what factors or criteria should I consider when buying a water bottle. I tend to base my decision on how it looks, as well as the price.
I now know that other factors must be taken into account, such as the purpose of the water bottle, and consider adding some extra features like filters to ensure clean water.
I tend to drink a lot of water daily as it’s important to keep hydrated. I think a reusable water bottle is so important to help clean up our environment. I have a few of them in my home, but I enjoy the stainless steel ones the best.
Well, I am glad that you found value in my post. I also drink a lot of water instead of juices, not a big fan! Even though stainless steel bottles tend to be more expensive, I prefer them to plastic bottles as they keep my water cold for longer periods of time.