
How to Prevent Blisters When Hiking (and Treat a Hot Spot on the Trail)
Partway up the climb, the back of your heel starts to burn, and you limp the last miles down on a blister. The boots weren’t cheap and already have miles on them, so the next hike starts with a little dread.
Maybe a new pair is in your shopping cart, and you’re not sure it would fix anything.
In published studies, 29 to 95 percent of hikers get foot blisters, so getting them isn’t a sign you did something wrong, and it usually isn’t proof your boots are bad.
Learning how to prevent blisters when hiking starts with one question: is it your socks, your lacing, your habits on the trail or the boots? And when a hot spot starts anyway, you want to know what actually helps.
By the end, you’ll be able to read where and when your blisters show up, fix the cheap causes before you buy anything, and handle a hot spot or a blister the way Mayo Clinic, the American Academy of Dermatology and the NHS advise.
TL;DR: How to Prevent Blisters When Hiking
- Stop at the first hot spot and cover it with tape, a blister bandage or moleskin before it turns into a blister, as Mayo Clinic advises.
- Keep your socks dry and snug: moisture-wicking rather than cotton, no wrinkles or slipping, and a dry pair when the first one gets damp.
- Read the blister before you blame the boots. A heel blister after climbs points to heel lift and lacing, one after wet feet to moisture, and toe blisters on descents to toe room.
- If a blister forms, keep the skin on, keep it clean and covered, and watch for infection. The medical sources differ on whether to drain it yourself.
Why Hiking Blisters Form: Your Skin Stays Put While Your Foot Keeps Moving
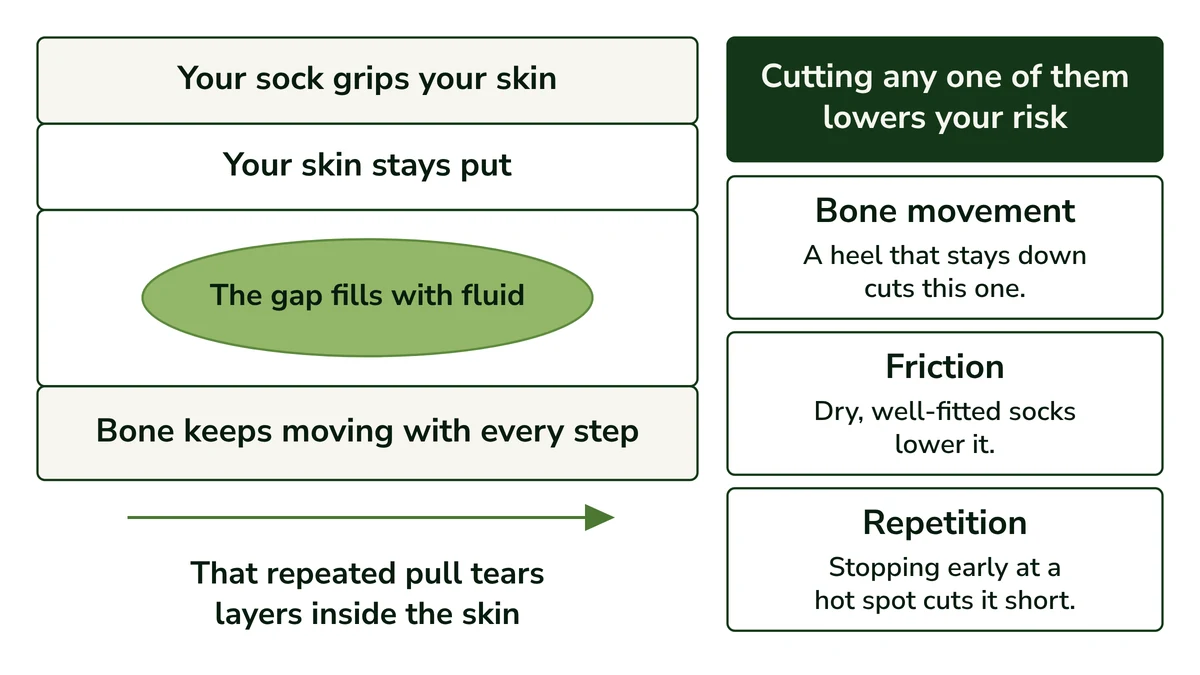
A blister isn’t a burn or simple rubbing on the surface. Your sock grips your skin while the bone underneath keeps moving with every step, and that repeated pull tears layers inside the skin. Bone movement, friction and repetition drive it, so cutting any one of them lowers your risk.
Picture the back of your heel on a climb. The outer skin stays pressed against the sock while the heel bone moves a little with every step. The layers in between take that pull step after step, until they tear apart and the gap fills with fluid.
That’s why a boot can feel fine at the trailhead and your heel can start to burn an hour into the climb. The boot didn’t change in that hour. The same small pull just kept repeating.
Rushton and Richie, writing in the Journal of Athletic Training in 2024, describe three things working together. They’re worth knowing, because every fix later in this post works on at least one of them:
- Bone movement. The more your foot moves inside the boot, the more the skin layers get pulled. A heel that stays down cuts this one.
- Friction. High friction between skin and sock is what holds the outer skin in place while the bone moves. Dry, well-fitted socks lower it.
- Repetition. Every step repeats the pull. Stopping early at a hot spot cuts it short.
Moisture matters because damp skin grips the sock harder than dry skin does. A sweaty foot on a hot climb or a wet sock after a creek crossing raises the friction without you noticing.
This is why I’d look at socks, lacing and trail habits before I’d look at new boots. All three work directly on those drivers, and all three cost far less than another pair.
Do Blisters Just Come With New Boots?
Partly. Feet adapt over the first days of a trip, and new boots need time on your feet before a long day. If yours are new, a staged plan for breaking in new boots comes first.
But if you blister in boots you’ve already worn for months, the cause is more often something cheaper: damp or ill-fitting socks, a heel the laces let lift, grit, or a hot spot you walked on for another hour.
Say your boots are good ones, you’ve already tried thicker socks, and the hot spot still turns into a blister halfway up. Break-in is long over by then, so something else is still letting the skin get pulled, and it’s usually one of those cheaper causes.
The same goes for “I already wear wool socks.” Fabric matters, and wool or a synthetic does better than cotton, but it’s one factor. How the sock fits, whether it gets damp during the day and whether you stop at the first hot spot all count too.
Sometimes it really is the boots, and I’d rather say so plainly. A few fit problems won’t go away however many miles you put on them, so check the fit signs that break-in won’t fix before you decide either way.
If your boots pass those checks, the cheaper fixes below are the place to start.
Read Your Blister: Where and When It Shows Up Points to the Cause
Where and when a blister shows up is your best clue to what caused it. A heel blister after climbs usually means heel lift, and one after a creek crossing or a hot afternoon points to moisture.
Toe blisters on descents point to toe room, and a sore spot that arrives with sand or trail dust points to grit. Three questions narrow it down:
- Where is it? Heel, toes, ball of the foot or between the toes. The spot tells you which part of the foot was moving or pressing.
- When did it start? On climbs, on descents, after wet feet, late on a hot day or in the first days of a trip. Timing tells you which driver was working hardest.
- What changed? New boots, new socks, wet weather or a longer day than usual. A blister that shows up right after a change usually traces back to it.
Heel and toes are the usual trouble spots, and a trial in multistage ultramarathon runners found the same pattern. So the rows below start there.
A heel blister that shows up on climbs usually means heel lift: the laces let your heel rise a little with each uphill step, and the skin there gets pulled every time. I get blisters on hikes too, and mine are usually on my heels.
Check your lacing first. If the heel still slips after you relace, that’s one of the fit signs from the section above, and the boots may be the real problem.
A blister after a creek crossing or late on a hot afternoon points to moisture. Wet or sweaty skin grips the sock harder, so the same step that was fine in the morning starts to do damage.
Toe blisters on long descents point to toe room. On the way down your foot tends to push forward, so the toes take the pressure at the front of the boot. Too little room there is another of the fit signs above.
A sore spot that arrives with sand or trail dust, often between the toes in mesh trail runners, points to grit. A small grain trapped against the skin becomes a pressure point that gets pushed into the same place with every step.
Blisters in the first days of a trip, in boots that are new to you, usually mean your feet and the boots are still getting used to each other. Shorter days at the start give both time to adapt.
Here’s the same reading side by side, so you can match your own blister to a likely cause.
Where and When It Shows Up
Likely Cause
What to Try First
Heel blister after climbs
Heel lift
Relace; if the heel still slips, see the fit signs above
After a creek crossing or a hot afternoon
Moisture
Dry socks, changed during the hike
Toe blisters on long descents
Toe room
See the fit signs above
Sore spot with sand or trail dust, often between the toes
Grit
Check socks and feet at each rest break
First days of a trip in new boots
Feet and boots still adapting
Shorter days first
Heel blister after climbs
Likely Cause: Heel lift
What to Try First: Relace; if the heel still slips, see the fit signs above
After a creek crossing or a hot afternoon
Likely Cause: Moisture
What to Try First: Dry socks, changed during the hike
Toe blisters on long descents
Likely Cause: Toe room
What to Try First: See the fit signs above
Sore spot with sand or trail dust, often between the toes
Likely Cause: Grit
What to Try First: Check socks and feet at each rest break
First days of a trip in new boots
Likely Cause: Feet and boots still adapting
What to Try First: Shorter days first
Once you know your likely cause, skip to the matching fix in the next section.
How to Prevent Blisters When Hiking: Socks, Lacing and Tape Before You Start
Start with socks that wick sweat and fit without wrinkles or slipping, lace so your heel stays down, and tape the spots that have blistered before. Mayo Clinic and the American Academy of Dermatology both favor moisture-wicking socks over cotton.
Liners have mixed evidence, and in lab studies a lubricant stops helping within a few hours, so neither one is a fix you can set and forget.
Here’s how I’d spend the money. Dry, well-fitted socks and an early stop at a hot spot have support across the sources. Liners, tape and lubricant are worth a try in the right spot, and below is what the evidence shows for each.
Socks That Stay Dry and Don’t Bunch
Fabric is the quick part: moisture-wicking synthetic or wool, not cotton. Cotton holds on to sweat and increases friction (the American Academy of Dermatology makes the same point), and that’s a big part of why cotton socks cause trouble on a long day.
Then check the fit, because the right fabric can still cause trouble. REI’s advice is that a sock that’s too large wrinkles, and one that’s too small creates pressure points and slips. A fold or a sliding heel puts friction right where you don’t want it.
If you’re replacing socks anyway, a 2024 review of blister prevention research found support for dense, padded synthetic socks. That’s one of the few sock choices with research behind it rather than just habit.
Liner Socks: Worth Trying, Not a Sure Fix
A liner is a thin sock worn under your main sock. NOLS suggests wearing two pairs to cut friction, and the American Academy of Dermatology suggests two pairs if one isn’t enough.
The research is less tidy. Results varied across three studies, and in one of them a single padded sock did better than a two-sock system.
So I’d treat a liner as something to try in boots that already fit, not a sure fix. A second layer takes up room inside the boot, so if your boots are already snug, it could squeeze your foot instead of helping.
Lacing That Keeps Your Heel Down
Heel lift is the bone movement driver at work. On every uphill step the heel rises a little, and the skin at the back gets pulled. Lacing that holds the heel down costs nothing to try.
Boot makers such as Timberland and Columbia name the surgeon’s knot in their lacing guides as a way to keep your heel from slipping in the boot.
If your heel still slips after you relace, go back to the fit signs in the section on new boots, because that’s the point where the boots themselves may be the problem.
Tape and Lubricant: Use Them Where You Know You Blister
Say you taped most of your foot before a long day and still came home with a blister. The research on tape suggests placement matters more than coverage.
In a 2016 trial in multistage ultramarathon runners, paper tape on each runner’s blister-prone spots cut blisters by 40 percent. An earlier trial by the same group taped the common blister sites on one randomly chosen foot, not each runner’s own trouble spots, and found no protective effect.
A 2017 systematic review in Wilderness and Environmental Medicine rated paper tape as the option with moderate-confidence evidence behind it. Put together, that means tape for the spots you know, not tape everywhere.
Lubricant works on the friction driver, but only for a while. A 2024 review of the evidence on blister prevention looked at lab studies on forearm and belly skin, none of them on feet.
In those studies, thick lubricants such as petroleum jelly lowered friction for about 90 minutes, and by about three hours friction was roughly 35 percent above where it started. So on a long day, reapply it rather than counting on one coat from the trailhead.
There are no prevention trials on moleskin. Mayo Clinic and the American Academy of Dermatology both list it for spots that tend to blister, but with no trials behind it, I’d keep it mainly for hot spot care in the next section.
Quick Tip: Tape the spots where you’ve blistered before, not your whole foot. The benefit in the ultramarathon trial came from taping each runner’s known trouble spots.
On the Trail: Stop at the First Hot Spot
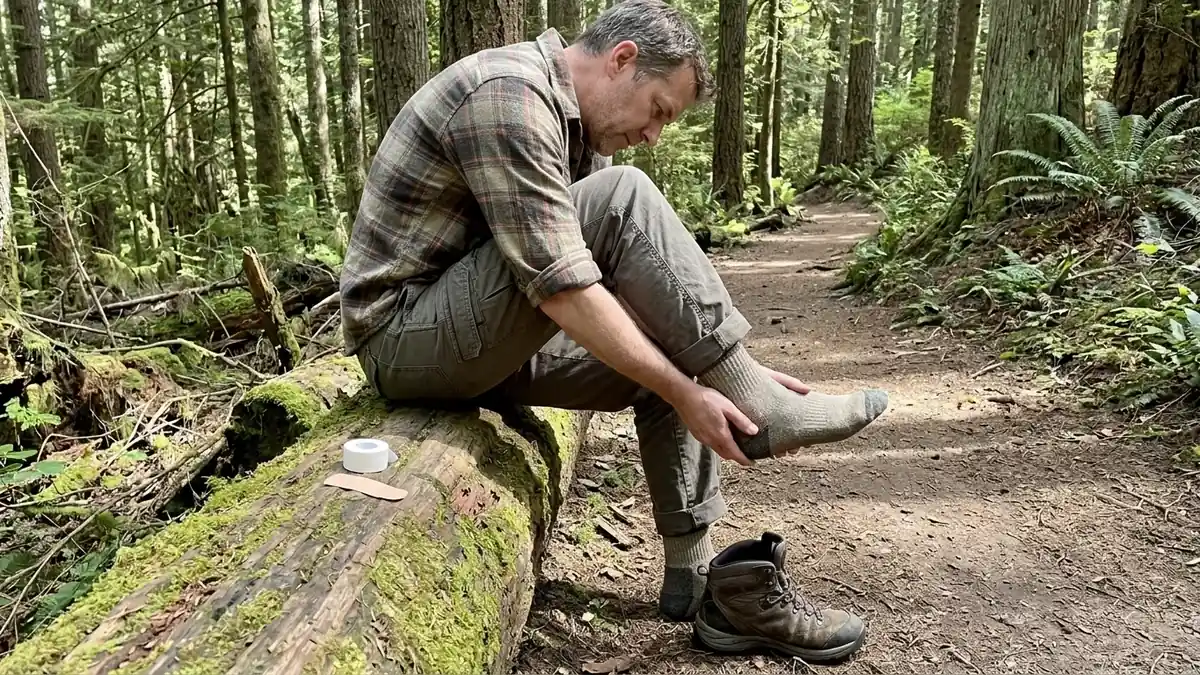
The moment you feel a warm, sore spot, stop and deal with it. In Mayo Clinic’s blister first aid advice, a hot spot is the sign a blister is forming, and it should be treated right away with tape, a blister bandage or moleskin.
A hot spot is a warm, sore or red patch on your skin before any bubble shows. It’s the pull from the first section already at work, and every extra step repeats it.
It’s tempting to push on to the viewpoint and deal with it there. But each step between here and the viewpoint pulls the same patch of skin again. I’d take five minutes at a hot spot over a blister that ends the day.
NOLS’s foot care advice and Mayo Clinic’s hot spot advice come down to the same few steps:
- Stop and take the boot and sock off, so you can see the spot properly.
- Dry the area, because damp skin grips the sock harder.
- Check the sock and your foot for grit and clear it out, since a trapped grain keeps pressing the same place.
- Cover the spot with tape, moleskin or a blister bandage, even if it’s only slightly red.
NOLS also suggests checking your feet at each rest break and keeping your socks free of debris, so a problem gets caught early.
Damp socks keep the friction driver working all day. Mayo Clinic says to change into dry socks as needed, and the NHS says to change them often if your feet sweat.
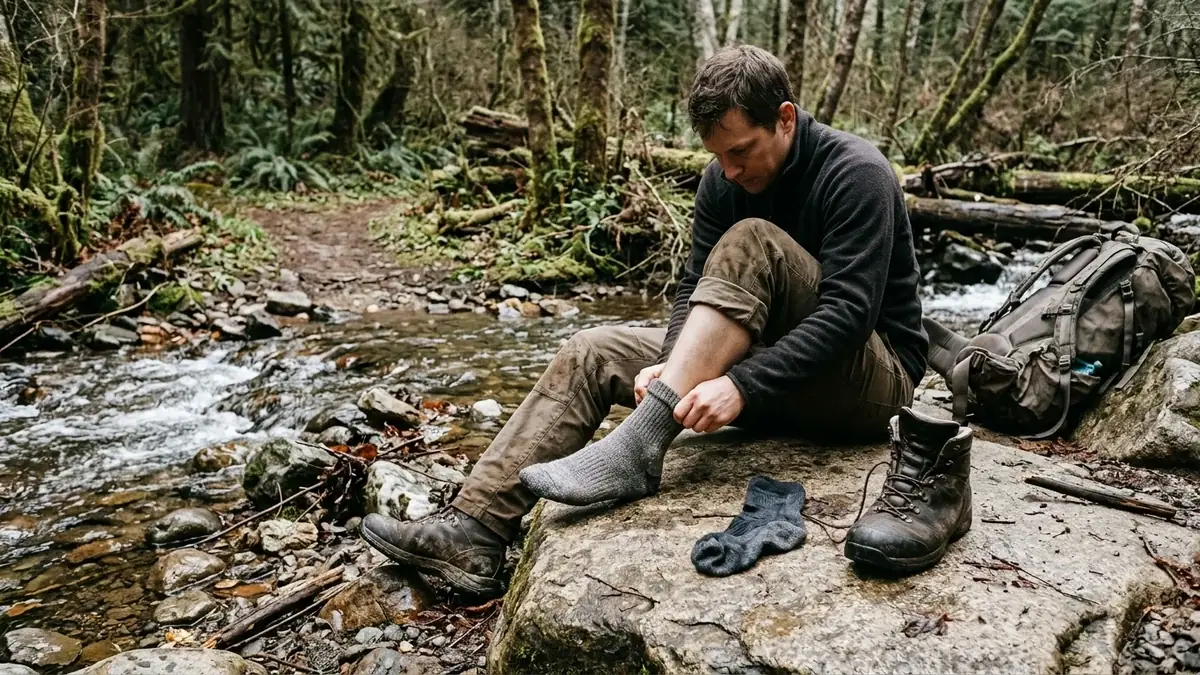
Quick Tip: Pack a dry pair of socks on any hike with a creek crossing, and change into them once you’re across. Mayo Clinic advises changing into dry socks as needed, and dry feet after the crossing mean lower friction on the miles that follow.
None of this works if the tape is back in the car. A few strips of tape, some moleskin or blister bandages, and a spare pair of socks are worth adding to a small first aid kit for day hikes, and they weigh almost nothing.
If you buy tape for this, paper tape (sold as surgical tape at pharmacies) is the kind used in the ultramarathon trials.
If a Blister Forms: What the Medical Sources Agree On and Where They Differ
Mayo Clinic, the American Academy of Dermatology and the NHS agree on the basics: keep the skin over the blister, keep it clean and covered, and watch for infection. Where they differ is draining.
The NHS says not to pop a blister yourself, while the AAD and Mayo describe how to drain a large or painful one with a sterilized needle. If you’ve read “never pop it” and “here’s how to drain it” on the same evening, that’s why.
The split makes sense once you see the tradeoff. Draining can ease the pain of a large, tense blister, but it opens the skin, and an opening is a way in for infection.
I’m not going to tell you which to do. I’ll lay the three positions side by side so you can decide.
Leave the Skin On and Cover It
Start with what all three agree on. The skin over a blister is a barrier against bacteria, so leave it in place, keep the area clean and cover it. Each source describes the cover a little differently:
- Mayo Clinic: a bandage or moleskin, with a hole cut the size of the blister so the pad sits around it rather than on it.
- The American Academy of Dermatology: a loose cover with the middle slightly raised, and a ring of padding around blisters on pressure areas such as the sole.
- The NHS: a soft, padded dressing. It adds that a hydrocolloid dressing, which it describes as a moist dressing, can protect the blister, ease the pain and help it heal faster.
If the blister has already burst, the NHS says to leave the loose skin alone rather than peel it. Peeling can feel like tidying up, but the AAD says to keep the blister’s roof on because it protects the raw skin underneath as it heals.
Quick Tip: Cut a hole the size of the blister in a piece of moleskin before you stick it on. Mayo Clinic’s advice is to let the pad sit around the blister, not on it.
Should You Pop It? The Sources Don’t Agree
The NHS is the most cautious: don’t pop a blister yourself, don’t peel the skin of one that has burst, and don’t pick at the edges.
The American Academy of Dermatology also says to avoid popping, with one exception. Its advice on draining covers only a blister that’s large and very painful: sterilize a needle with rubbing alcohol, pierce one edge, wash with soap and water, apply petroleum jelly and keep the roof on.
Mayo Clinic describes draining a painful blister while leaving the skin in place. Wash your hands and the blister, use an antiseptic, sterilize a needle and make several pricks near the edge, then apply petroleum jelly or an antibiotic ointment and a nonstick bandage.
Mayo also says to take extra care if you have diabetes, poor circulation or a tendency to get infections. If any of those apply to you, that caution is worth taking seriously before you reach for a needle.
Here are the three positions side by side.
Source
Drain It Yourself?
If You Do
Shared Ground
NHS
No: don’t pop it, don’t peel or pick
No draining steps given
Keep the skin on, keep it clean and covered, watch for infection
American Academy of Dermatology
Only if large and very painful
Sterilized needle at one edge, wash, petroleum jelly, keep the roof on
Keep the skin on, keep it clean and covered, watch for infection
Mayo Clinic
A painful one may be drained
Wash, antiseptic, sterilized needle near the edge, ointment, nonstick bandage; extra care with diabetes or poor circulation
Keep the skin on, keep it clean and covered, watch for infection
NHS
Drain It Yourself?: No: don’t pop it, don’t peel or pick
If You Do: No draining steps given
Shared Ground: Keep the skin on, keep it clean and covered, watch for infection
American Academy of Dermatology
Drain It Yourself?: Only if large and very painful
If You Do: Sterilized needle at one edge, wash, petroleum jelly, keep the roof on
Shared Ground: Keep the skin on, keep it clean and covered, watch for infection
Mayo Clinic
Drain It Yourself?: A painful one may be drained
If You Do: Wash, antiseptic, sterilized needle near the edge, ointment, nonstick bandage; extra care with diabetes or poor circulation
Shared Ground: Keep the skin on, keep it clean and covered, watch for infection
What all three agree on is the part that protects you either way: the skin stays on, the spot stays clean and covered, and you keep an eye on it.
Signs of Infection and When to Get Help
Whichever way you go, check the blister every day. The signs of infection the three sources name overlap:
- Redness or a color change around the blister, which Mayo describes as spreading out from it, and which the AAD and the NHS also list
- Pain that gets worse instead of better, from Mayo and the AAD, and swelling, from the AAD
- Pus, which the NHS describes as green or yellow
- Skin that feels warm or hot around the blister, from Mayo and the NHS
REI adds one more sign to watch for: red streaks running from the blister up the leg.
The NHS’s blister advice also notes that redness can be harder to see on brown or black skin. If that’s your skin, the warmth, pain, swelling and pus on that list are worth watching just as closely.
The NHS suggests getting help when a blister is very painful, keeps coming back, shows signs of infection, or when several blisters appear for no clear reason. In any of those cases, see a doctor.
Looking After It at Home or at Camp
Healing takes a while. The American Academy of Dermatology says most blisters heal in one to two weeks, and the NHS says often within a week.
Both advise patience in the meantime: the AAD says to avoid the activity that caused the blister until it heals, and the NHS says not to wear the shoes that caused it.
If it happens on a first overnight, keep the blister covered and clean, and give your feet a dry pair of socks once you’re in camp. There’s more on dry feet and fresh socks at camp in my guide to staying clean on your first nights out.
Before your next long hike, think back to where your last blister was and when it started, then try the matching fix on a short walk first. Pack a dry pair of socks and a strip of tape for the spot you already know.
Founder & Gear Research Editor
Sonia Zannoni
I’m Sonia, the founder of Best Trail Backpacks. I don’t test gear myself. For every pack I cover, I read the manufacturer’s specs and sizing charts and look for what owners report again and again.
Fit comes first, because a pack that doesn’t match your torso and hips will hurt no matter what it cost. My goal is to help you choose a pack that suits your body, your trip and your budget.
About the Founder
