
How to Break In New Hiking Boots Before Your First Long Hike
The new boots are by the door, they weren’t cheap, and the big hike is already on the calendar. One walk around the block later, the heel is rubbing and your little toe feels pinched. Do they go on a trail this weekend, or back in the box?
It’s normal not to know, because stiff new boots and boots that will never fit feel much the same on day one. It’s also fair to worry that every mile outside could cost you the refund.
So here’s how to break in hiking boots without gambling the return, and how to tell when to stop. You’ll get a plan counted back from your hike date, by boot type, that keeps the fit checks indoors while the boots can still go back.
After that, the boots move outside in stages, with a clear point where you either keep going or send them back.
TL;DR: How to Break In Hiking Boots
- Makers describe little or no break-in for trail shoes and light synthetic boots, about one to three or four weeks for most hiking boots, and longer for stiff leather and mountaineering boots.
- Wear them indoors first, in the socks you’ll hike in, until you’re sure of the fit, because some stores take back only unworn footwear, and others give only store credit for worn pairs.
- Then go outside in stages: errands, a short easy trail, then a loaded rehearsal of the big hike.
- A heel that keeps lifting after relacing, or toes that keep hitting on descents, is a fit problem break-in won’t fix, so send them back while you can.
Do New Hiking Boots Still Need Breaking In?
It depends on the boot. Makers describe little or no break-in for trail shoes and light synthetic boots, about one to three or four weeks for most hiking boots, and longer for stiff leather or mountaineering boots. Count back from your hike date, since stiffer boots need an earlier start.
Here’s how the makers’ ranges line up by footwear type. Treat them as their guidance rather than a promise, because your feet and your boots set the real pace.
Footwear
How much break-in makers describe
When to start before your hike
Trail shoes and light synthetic boots
Little or none
A few indoor wears to confirm the fit, then a short outing or two before a long hike
Most hiking boots
About one to three or four weeks
At least two to three weeks ahead, more for a long or hard trip
Stiff leather, backpacking and mountaineering boots
Longer, often several weeks
Well ahead of the trip, and never straight onto a multi-day hike
Trail shoes and light synthetic boots
How much break-in makers describe: Little or none
When to start before your hike: A few indoor wears to confirm the fit, then a short outing or two before a long hike
Most hiking boots
How much break-in makers describe: About one to three or four weeks
When to start before your hike: At least two to three weeks ahead, more for a long or hard trip
Stiff leather, backpacking and mountaineering boots
How much break-in makers describe: Longer, often several weeks
When to start before your hike: Well ahead of the trip, and never straight onto a multi-day hike
The reason stiffer boots take longer is simple. Stiff leather and a rigid sole flex less with each step, so it takes more wear before the upper and footbed soften to your foot. A light synthetic boot bends easily from the start, which is why it often feels right sooner.
If the boots are just out of the box and the hike is a few weeks away, it’s fair to ask whether that’s enough. I’d count back from the hike date first. Mammut suggests starting at least two to three weeks ahead, and more for a longer or harder trip.
You may have heard that modern boots don’t need breaking in at all. For trail shoes and many light synthetic boots, that’s true, and makers say so. Hanwag notes that many modern hiking boots can be hiked in almost straight away, especially by people with standard-shaped feet.
Stiffer boots are a different story, and they still need weeks. I’ve broken in a pair of leather hiking boots myself, and I’d give a leather pair that time rather than expect it to feel like a trail shoe straight away.
Even a boot that feels fine on day one needs the indoor check before it leaves the house, because that check is what protects your return.
So the first two things to weigh are how stiff your boots are and how many days you have left. Before anything else, count back from your hike date and pick the day the boots come out of the box.
Why Breaking In Won’t Fix a Boot That Doesn’t Fit
Breaking in works because wear softens the upper and footbed until they take your shape, and your foot’s warmth and moisture speed that up. It can’t change the boot’s length, heel shape or volume, so pain that never eases between wears needs a fit check, not more miles.
Many hikers believe pain is just part of breaking in, and that enough miles will sort it out. It’s easy to see why, since new boots often feel stiff at first. The trouble is that the belief mixes up stiffness, which eases, with a poor fit, which doesn’t.
Hanwag’s break-in guide describes break-in as the final stage of fitting, where the boot material softens with the warmth and moisture of your foot. Hanwag is also clear that weeks of break-in won’t fix a boot that fits poorly.
The reason is the last, the foot-shaped form a boot is built around. The last sets the boot’s length, heel shape and volume. Softening changes how the leather or fabric bends, but it doesn’t change the size or the shape the boot was built on.
That’s why some signs stay the same however many walks you put in:
- A heel that keeps lifting after you’ve relaced, because the heel pocket takes its shape from the last and doesn’t soften into a different one.
- Toes that keep hitting the front on descents, because that points to length, and length is fixed.
- Pinching across the width that’s still there wear after wear, because the boot’s volume was set when it was built.
If you’re asking yourself whether to keep going or give up on these, it’s often because a second pair isn’t in the budget. The way the softening works gives you a fair way to decide.
Stiffness that eases a little each time is worth working through. Pain that stays the same from one wear to the next comes from the boot’s shape, and more miles won’t move it. Keep those signs in mind, because they’re what you’ll watch for at every stage.
Start Indoors, While the Boots Can Still Go Back
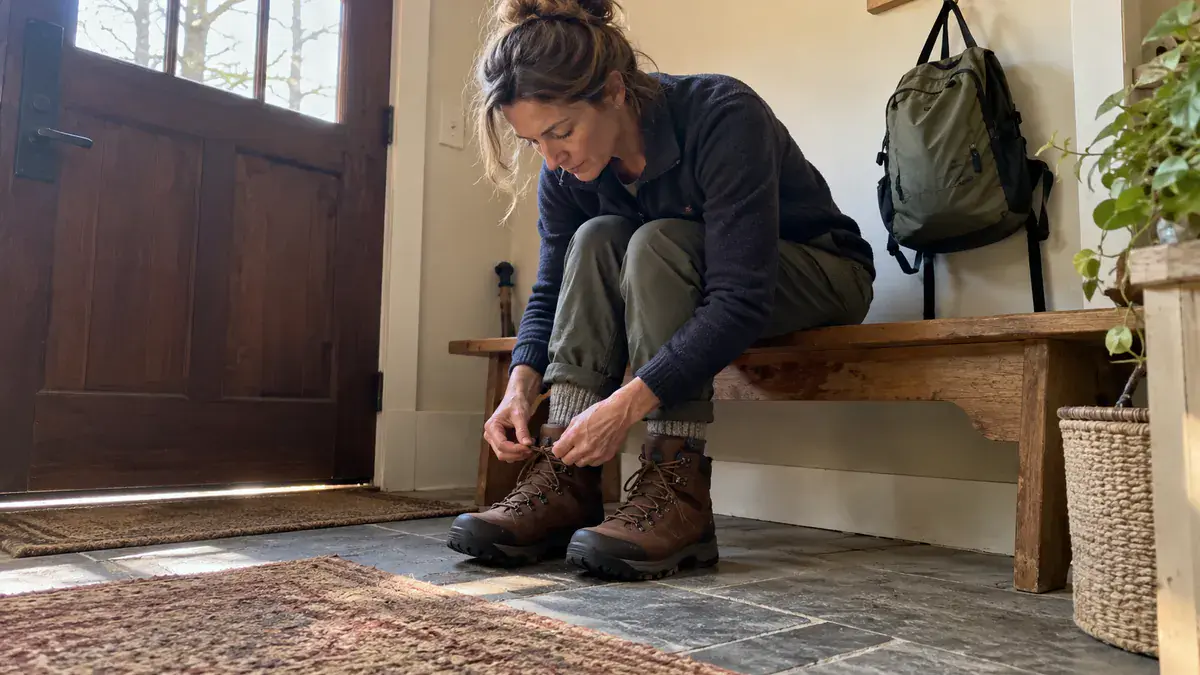
Wear new boots around the house first, in the socks you’ll hike in, for no more than two to three hours at a time, as Mammut suggests. Indoor wear is where the fit problems that never go away show up, and some stores take footwear back only unworn.
This stage starts once the pair has passed the store and home try-on checks in my guide on how to choose hiking boots that fit. If you haven’t run those yet, do them first, since there’s no point breaking in a boot that was the wrong size in the store.
At home, lace them snug with the tongue centered, and wear the socks and insoles you’ll hike in.
Mammut’s break-in advice ties indoor wear to keeping the option of a return if the size or fit is wrong. That matters because some stores take footwear back only unworn, and others accept gently used pairs on tighter terms, such as a shorter window or store credit.
Backcountry shows how much terms can differ. When I checked its return policy in October 2026, unused gear could go back within 90 days of delivery for a full refund, as received with the original box and tags. Used, undamaged gear had 30 days, for store credit only.
Its policy also said that gear dirty or damaged from ordinary wear, or that looked used in any way, wasn’t accepted. Terms change from store to store and over time, so your own store’s page is the one that counts.
Quick Tip: Before the boots leave the house, read your store’s return policy for worn footwear and keep the box and tags. Some stores take back only unworn pairs, and others give only store credit for used ones.
It’s a fair worry that wearing them only indoors won’t tell you how they feel on a trail. Indoors catches the fit problems that never go away. The outdoor stages are for the softening, and only a boot that already fits needs that.
That leaves a real tradeoff. Indoor wear keeps your return option, but it can’t show how the boots behave on rock and descents. Outdoor miles can, and depending on the store, they may cost you the full refund or leave you with store credit.
I’d treat the house as the last fitting room, where the boots earn their first outdoor walk. It’s tempting to get it over with on a trail this weekend. If they turn out not to fit, a pair with trail dirt on the soles may not go back at all.
How to Break In Hiking Boots Outdoors, One Stage at a Time
Once the fit passes indoors, move outside in stages: errands and walks around town with some hills, then a short, easy trail, then a rehearsal hike with your big day’s load. Add distance and weight gradually, moving on only when each stage feels at least as good as the last.
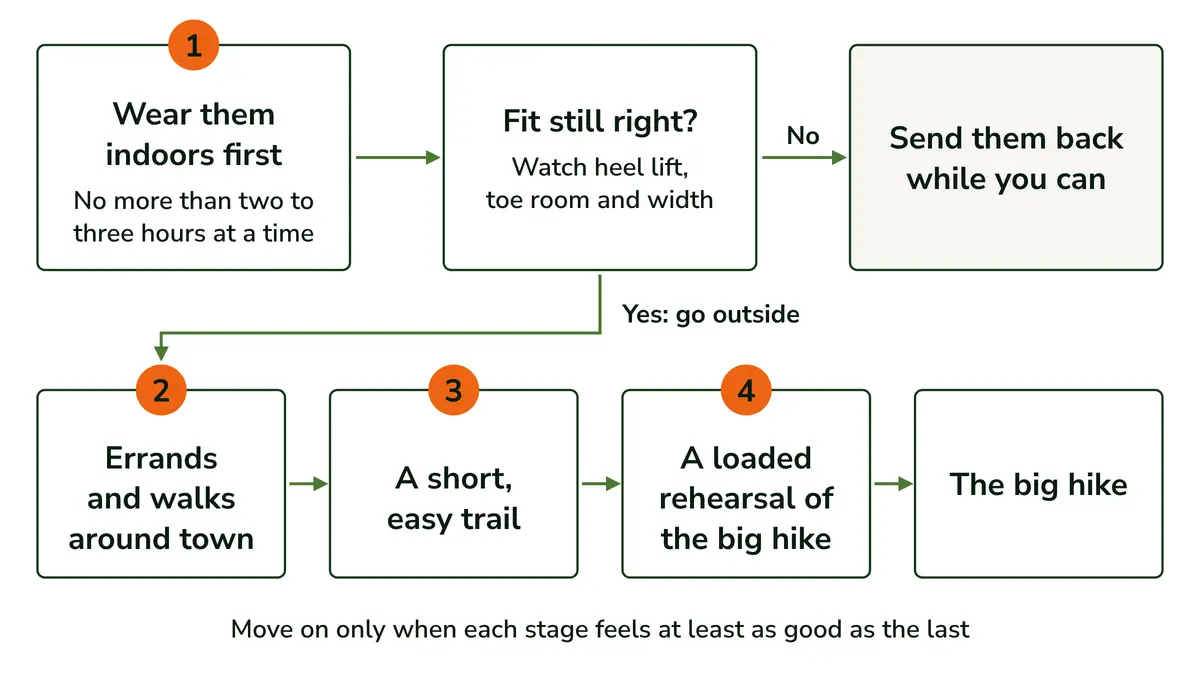
That gradual build is how Columbia’s break-in guide lays it out: home first, then around town, then short, easy trails, with the distance built up gradually. Hanwag and Mammut both warn against starting with a long or hard route.
Two habits carry through every stage. Wear the socks you’ll hike in, and if a hot spot starts (the warm, rubbing patch that comes before a blister), stop and take the boots off.
Socks, tape and hot spot care are a subject of their own, so I’m keeping them out of this post.
If your boots are leather, a walk on a dewy lawn or in light rain is useful, since Hanwag and Mammut both note that moisture helps leather mold to your foot. There’s more on wet leather below, because it’s an easy idea to take too far.
Quick Tip: When one spot pinches, change the lacing or its tension over that spot before you add miles, as Hanwag and Mammut both suggest.
Errands and Walks Around Town
Start with walks you’d take anyway: to the store, around the neighborhood, to pick something up. Columbia suggests gradually longer walks around town, then steeper hills, so the boots meet a slope before they meet a trail.
A hill on the walk to the store is a small preview of a descent. Notice whether your toes creep toward the front going down, and whether your heel stays put on the way back up.
What to watch most here is whether the stiffness eases from one walk to the next. If each outing feels easier than the last, the boots are doing what they should, and the next walk can be a little longer.
A Short, Easy Trail
The first trail outing should be short and easy. Merrell suggests first outings of about an hour, and Columbia describes easy hikes of about one and a half to two hours or less.
Mammut and Merrell both suggest carrying a spare, worn-in pair in your pack, so you can swap if the new ones start to hurt. An old pair of trail shoes you trust is enough.
This is where the ground tests the fit in ways the house can’t. Watch for heel lift and toe room on the first descents, and for pressure points as the ground gets uneven.
Descents matter most because your foot tends to slide forward going downhill. A boot that’s a little long, or laced too loosely, usually shows it there first.
A Loaded Rehearsal of the Big Hike
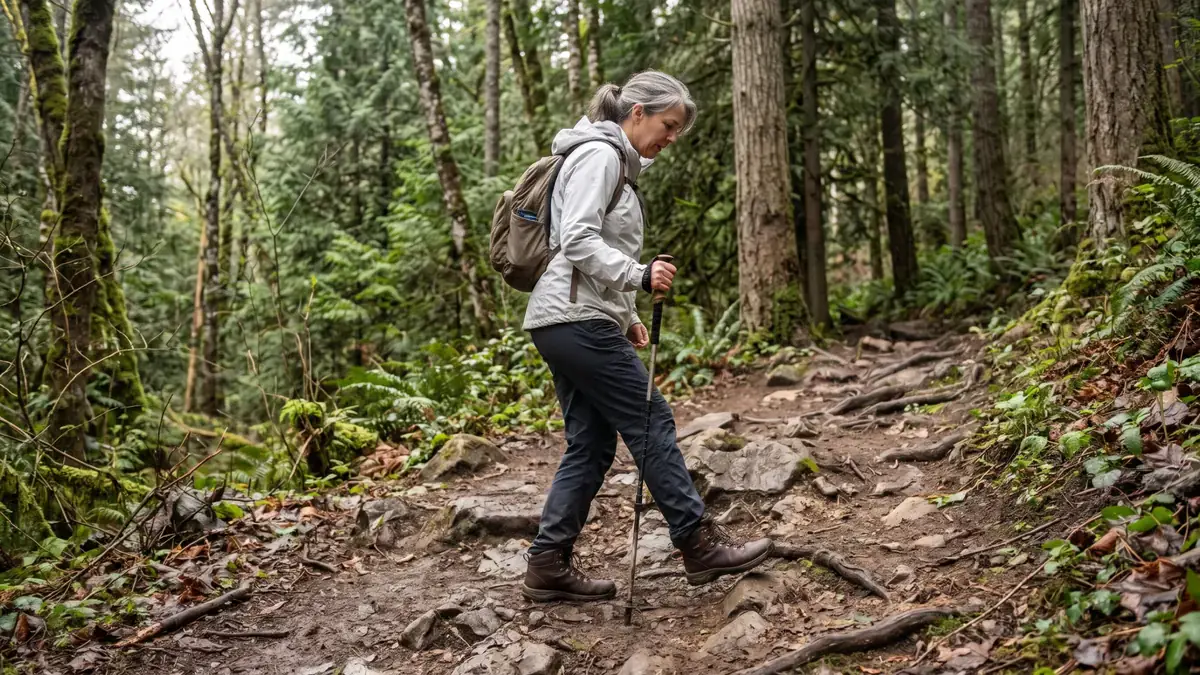
Now add the weight. Columbia suggests wearing a pack on these trail hikes to add some weight, so by the big day the boots have already carried the real load on real ground.
Work up toward the load your trip will actually ask for, which depends on how heavy your pack should be for a day hike or an overnight. A pack that’s lighter than the real thing tells you less about how the boots carry it.
Then pack exactly what the big day needs. For a day hike, I’d pack from what a day hike actually needs, so the boots carry the full kit before the hike that counts.
On this rehearsal, watch whether the boots still feel good late in the hike, on the climbs and on the descents. A boot that feels fine for an hour can still show a problem late in a long day, which is why this stage is worth doing in full.
Wet Leather, Soaking and Other Shortcuts: What the Makers Say
Walking leather boots through damp grass or light rain helps them mold, because moisture makes leather more pliable. Soaking them on purpose is different: Columbia advises against it, along with freezing and dryer heat. Leave heat-and-pressure stretching to a professional, as Mammut advises.
Say the hike is two weeks away and the boots still feel stiff. A bucket of water starts to look like a shortcut, and it’s easy to see why when damp leather is supposed to help.
The line is between ordinary wet walking and deliberate soaking. Hanwag and Mammut say walking in damp conditions helps leather mold, because moisture makes it more pliable while your foot does the shaping.
Columbia warns against soaking boots as a shortcut, along with freezing them or heating them in a dryer, which can damage them or make them wear out faster.
If counting back from your hike date doesn’t leave enough time, I’d wear the pair you already trust on the big hike and keep breaking the new ones in afterward. Hanwag advises against taking brand-new boots straight onto a multi-day trek, and a few rushed walks won’t change that.
Damp leather also needs careful drying afterward, as Hanwag points out. Drying and re-treating boots are a topic of their own, so I’ll leave them there.
A few other shortcuts come up often, and the makers advise against each one:
- Peeing in them to soften the leather, which Hanwag warns damages it.
- Lending them out, because Hanwag notes the boots then take on the other person’s feet instead of yours.
- Stretching them at home with heat and pressure, which Mammut says only a certified professional should do.
One more thing to hold off on: walking through a creek to see whether the waterproofing works. That test belongs after you’ve decided to keep the boots, because dirty or used-looking boots may not go back to the store.
Keep Breaking Them In, Change Something, or Send Them Back
Keep going when each wear feels easier and the pressure is general stiffness. Change the lacing when one spot pinches. Send them back while you can if the heel keeps lifting after relacing, your toes keep hitting on descents or the width still pinches, since break-in won’t change those.
Here’s how each of those calls looks in practice:
- Keep going when each wear feels a little easier than the last and the pressure is general stiffness rather than one sore spot. That’s the softening doing its job.
- Change something when one spot pinches. Try different lacing or a different tension over that spot, as Hanwag and Mammut suggest, and keep wearing the socks you’ll hike in so you’re judging the real fit.
- Send them back while you still can when the heel keeps lifting after relacing, your toes keep hitting on descents, or the width still pinches. Break-in won’t change any of those.
If the heel still lifts after you’ve relaced, I’d send them back. It’s disappointing when you’ve already pictured the hike in them, but the heel pocket won’t change shape, so the slip is likely to follow you onto every descent.
Make that call before the boots go past the stage your store will accept back. If your store gives a full refund only on unworn footwear, as Backcountry does, that means before the first outdoor walk, which is why the indoor stage matters so much.
If the Return Window Has Already Closed
If the boots can’t go back anymore, Hanwag and Mammut both suggest getting the fit checked rather than pushing through. Depending on the problem, there are a few options:
- A boot that pinches can be widened over a larger last, Hanwag says, though that may make it wear faster.
- A boot that’s too roomy can take a thin spacer under the footbed or a heel wedge, also according to Hanwag.
- Stretching with heat and pressure is a job for a certified professional, as Mammut advises, not something to try at home.
If pain or numbness lasts after the boots come off, that’s one for a clinician rather than a boot fitter.
If your boots are still new, tonight is a good place to start. Put on the socks you’ll hike in, lace the boots snug and wear them around the house for an hour or two, with the box and tags kept until you’re sure.
Founder & Gear Research Editor

Sonia Zannoni
I’m Sonia, the founder of Best Trail Backpacks. I don’t test gear myself. For every pack I cover, I read the manufacturer’s specs and sizing charts and look for what owners report again and again.
Fit comes first, because a pack that doesn’t match your torso and hips will hurt no matter what it cost. My goal is to help you choose a pack that suits your body, your trip and your budget.
About the Founder
