
Easy Camping Meals for Your First Nights Out: A One-Pot Plan for One Burner
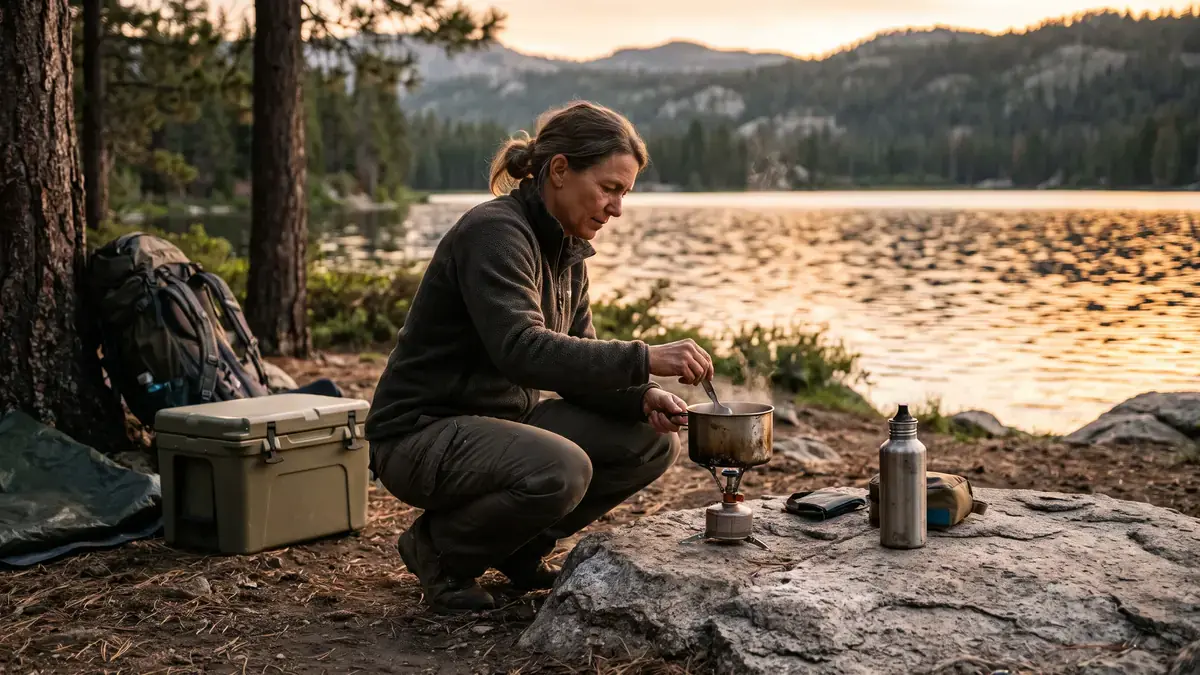
You’ve saved recipe after recipe for easy camping meals, and most of them turn out to need two burners, a campfire or a Dutch oven. What you’ll actually have is one small stove and one pot.
Read those recipes closely and it’s easy to picture dinner going wrong in the fading light: rice welded to the bottom of the pot, noodles gone soft while the sauce is still cold, and a nagging worry about how long the chicken in the cooler has been warm.
That’s a normal place to land, and it doesn’t mean you can’t cook. Most camp recipe lists assume a car camping setup with room to spread out, so the advice was written for different gear than the gear you’ll carry.
What you need for a first overnight is a short plan for one or two nights on one burner, something you can shop for and pack before the weekend.
By the end you’ll know what to cook on night one, what to save for night two, what to prep the evening before, and the order that keeps one pot from scorching.
TL;DR: Easy Camping Meals on One Burner
- Eat the perishable food on night one, while the cooler is at its coldest, then switch to shelf-stable food on night two, as USDA FSIS advises for multi-day trips. With no cooler, plan shelf-stable food from the first night.
- Trust a food thermometer, not your hand: FoodSafety.gov says the cooler should read 40°F (4°C) or below.
- Do the chopping, mixing and pre-cooking at home. It saves fuel and time at camp, at the cost of cooler space.
- On one burner, the slowest ingredient goes in first and anything pre-cooked goes in last, with the flame low and a spoon moving.
What Makes Easy Camping Meals Work on One Burner and One Pot
An easy camping meal on one burner cooks at one heat level, has one slow ingredient at most, can be partly cooked at home, fits the food safety window for its night and leaves little to pack out. Those checks cut a long recipe list down to two real dinners.
I’d run every dinner idea past these five before it goes on the shopping list:
- It cooks at one heat level. One flame gives you one heat at a time, so a dish that needs a hard boil and a gentle simmer at once won’t work.
- It has one slow item at most. Slow items like rice or pasta burn fuel and time while everything else waits.
- It can be partly cooked at home. Any work done in your kitchen is work the stove doesn’t have to do at camp.
- It fits the food safety window for its night. The cooler warms as the trip goes on, so perishable food belongs on night one and shelf-stable food on night two.
- It leaves little to carry out. Every leftover and scrap rides home in your pack.
If most of your saved recipes need two burners, a campfire or a Dutch oven, this is where they drop off the list. What’s left is short, and it suits the gear you’ve actually got.
Part of you is probably weighing whether to skip all this and pack freeze-dried pouches instead. They’re a valid choice, and REI’s meal planning advice suggests packing an easy just-add-water meal for the days when you may be too tired to cook.
This plan is for the nights you’d rather cook real food. Real food has honest costs, and they’re worth knowing up front: more planning, more cooler space and more care with food safety.
Why a Cooler That Still Feels Cold Isn’t Proof Your Food Is Safe
A cooler can feel cold to your hand while the food inside sits above 40°F, where USDA FSIS says bacteria grow rapidly. FoodSafety.gov’s check is a food thermometer in the cooler reading 40°F (4°C) or below. If the ice has melted, FSIS says to throw the perishables out.
The belief behind the cold-hand check is easy to understand: if the cooler feels cold and the chicken smells fine, it must be fine. What it leaves out is that touch and smell don’t measure temperature, and temperature is what decides how fast bacteria grow.
USDA FSIS’s food safety advice for camping puts the risky range between 40°F and 140°F, where bacteria grow rapidly. Food can become unsafe after about 2 hours in that range, or 1 hour at about 90°F or above, and direct sun can push temperatures higher.
On the second evening you lift the lid, the ice is mostly water, and the chicken package still feels cool to the touch. Your hand can’t tell you whether that package is at 40°F or a few degrees above it, and those few degrees are the whole question.
People have camped with coolers for a long time without thermometers, and plenty of their dinners were fine. The trouble is that nobody can tell from the outside which side of 40°F the food is on, so luck ends up doing the job a small thermometer would do.
That’s why I’d trust the thermometer over my hand. It turns a guess into a reading you can act on.
FoodSafety.gov’s advice is to check it with a food thermometer in the cooler and make sure it reads 40°F (4°C) or below. It also notes that meat and poultry can go in still frozen.
USDA FSIS adds the backup rule. If the ice has melted or the gel packs are no longer frozen, the perishables are thrown out, and leftovers are kept only if the cooler still has ice.
Keeping the cooler cold in the first place comes down to a few habits from FSIS and FoodSafety.gov:
- Keep it closed, shaded and covered with a blanket, tarp or poncho, because sun on the lid warms everything inside. FoodSafety.gov adds that a light-colored cover reflects heat.
- Use several inches of ice, ice blocks or frozen gel packs. FSIS notes that blocks last longer than cubes, which matters on a two-night trip.
- Chill or freeze the food overnight before you leave, then fill the cooler with cold or frozen food, so the ice isn’t spent cooling food that went in warm.
- Pack in reverse order, so the first foods packed are the last ones you use and you’re not digging through everything on night one.
- Use watertight containers, because meltwater collects at the bottom and soaks into anything loosely wrapped.
- Pack only the perishables you need, since every extra item is one more thing to keep cold and possibly throw out.
There’s no day count here for how long a cooler stays safe, because coolers, ice and weather vary too much for one number. The check is the thermometer and the ice.
Quick Tip: Pack raw meat below ready-to-eat food, or in a cooler of its own, so it can’t drip onto food you won’t cook. If you can, keep drinks in a second cooler so the food cooler stays shut, as USDA FSIS suggests.
If a food thermometer isn’t on your packing list yet, add it now, before the rest of the list fills up.
What to Eat on Night One and What to Save for Night Two
Plan the two nights around the cooler rather than the recipe. USDA FSIS advises eating cold, perishable food first on a multi-day trip, then switching to shelf-stable food. So night one gets whatever needs the cooler, and night two runs on rice, dried noodles and pouched tuna or chicken.
That also settles the worry about the chicken. If it’s on the menu, it belongs on night one, when the cooler is at its coldest, instead of riding through a second warm day.
Night two runs on food that doesn’t need the cooler at all. FSIS lists the kind that holds up: dried noodles and soups, pasta, rice, powdered mixes, canned tuna and chicken, peanut butter in a plastic jar, jerky, dehydrated food, dried fruit and nuts.
Pouched tuna and chicken work the same way and are lighter to carry. One catch, also from FSIS: once a can is opened, it needs refrigeration.
On a night-two menu, I’d pick a can or pouch size you’ll finish in one meal, because by then there’s nowhere cold left to keep the rest.
Raw meat is where I’d be most careful. On a first overnight I’d keep it off the menu, or cook it on night one, because it’s the main food safety risk on one burner. Pre-cooking at home, in the next section, is the easier route.
If you’re not bringing a cooler, food rides in your pack and the plan is shelf-stable from the first night. It also changes how you pack, so check where the stove and food go in your pack to keep the load balanced and the canister from knocking around.
Lunch and trail snacks sit outside this dinner plan, so they’re not covered here.
Quick Tip: If raw meat or poultry is on the menu, cook it on night one and check it with a food thermometer. USDA FSIS gives 160°F for ground meat and 165°F for poultry, because color isn’t a reliable sign that meat is done.
Here’s how the evening before and the two nights fit together, with the one check that matters at each point.
When
What Goes in the Pot
Why It Belongs Here
Check Before You Cook
The evening before you leave
Nothing yet: pre-cook a meal, premix dry food
FSIS advises chilling or freezing food overnight before leaving
Cooked food chilled or frozen before it goes in the cooler
Night one
Perishables and the home-cooked meal
The cooler is at its coldest
Thermometer at 40°F or below, ice still there, reheat to 165°F
Night two
Shelf-stable food
No cooler needed
Finish an opened can or pouch in one meal
The evening before you leave
What Goes in the Pot: Nothing yet: pre-cook a meal, premix dry food
Why It Belongs Here: FSIS advises chilling or freezing food overnight before leaving
Check Before You Cook: Cooked food chilled or frozen before it goes in the cooler
Night one
What Goes in the Pot: Perishables and the home-cooked meal
Why It Belongs Here: The cooler is at its coldest
Check Before You Cook: Thermometer at 40°F or below, ice still there, reheat to 165°F
Night two
What Goes in the Pot: Shelf-stable food
Why It Belongs Here: No cooler needed
Check Before You Cook: Finish an opened can or pouch in one meal
What to Prep at Home the Evening Before You Leave
Most of the work behind an easy camp dinner happens in your own kitchen. Chopping, mixing and pre-cooking at home means the stove only reheats or finishes the meal, which saves fuel and time at camp. The cost is cooler space and more care with temperature.
Picture the evening before you leave, with a shopping list and one counter of space. This is where I’d put the effort, because every step done at home is cooking time the stove doesn’t have to spend at camp.
Here’s what that evening looks like:
- Premix the dry ingredients and repackage food at home in meal-sized bags, out of the store boxes, so there’s nothing to measure at camp and less packaging to carry.
- Cook a chili, stew or curry, then chill or freeze it overnight. FSIS advises chilling or freezing food before you leave and filling the cooler with cold or frozen food.
- Plan to reheat it at camp to 165°F, the temperature FSIS gives for reheating leftovers, and check it with the thermometer.
Home prep does have a cost. It fills the cooler, and cooked food in a cooler makes the thermometer and ice checks matter more, which is why FSIS’s advice to pack only the perishables you need fits this step so well.
Prep only what you’ll actually eat, too. Fewer leftovers means less to carry home, and that keeps the cleanup at the end of the evening short.
The Cook Order That Keeps One Pot From Scorching
With one burner you get one heat level at a time, so add ingredients by how long they take: the slowest first, quick-cooking ones next, and anything pre-cooked at home last. Keep the flame low and stir, because a small burner puts most of its heat in one spot.
Before you light the stove, a few points that stove makers’ instructions repeat:
- Set it on a solid, stable, even surface, so a pot full of hot food can’t tip.
- Never use it in a tent, vestibule, car or other enclosed space, because the instructions warn about carbon monoxide.
- Never leave it unattended while it’s burning or still hot, since a pot can boil over or tip with no one there to catch it.
- Keep the fuel canister away from other heat sources, because heat builds pressure inside a canister.
- Use a pot no wider than the stove is rated for, since that’s the cookware size the stove was built to support.
Then your hands: soap and water, or a sanitizer with at least 60% alcohol when water isn’t available, as USDA FSIS advises. FSIS also says not to drink, cook or clean with untreated lake or stream water, so bring water or treat it first.
One flame means one heat level at a time, so the order ingredients go in does the job a second burner would. The slowest ingredient goes in first, quick-cooking ones follow, and anything pre-cooked at home goes in last, only long enough to heat through.
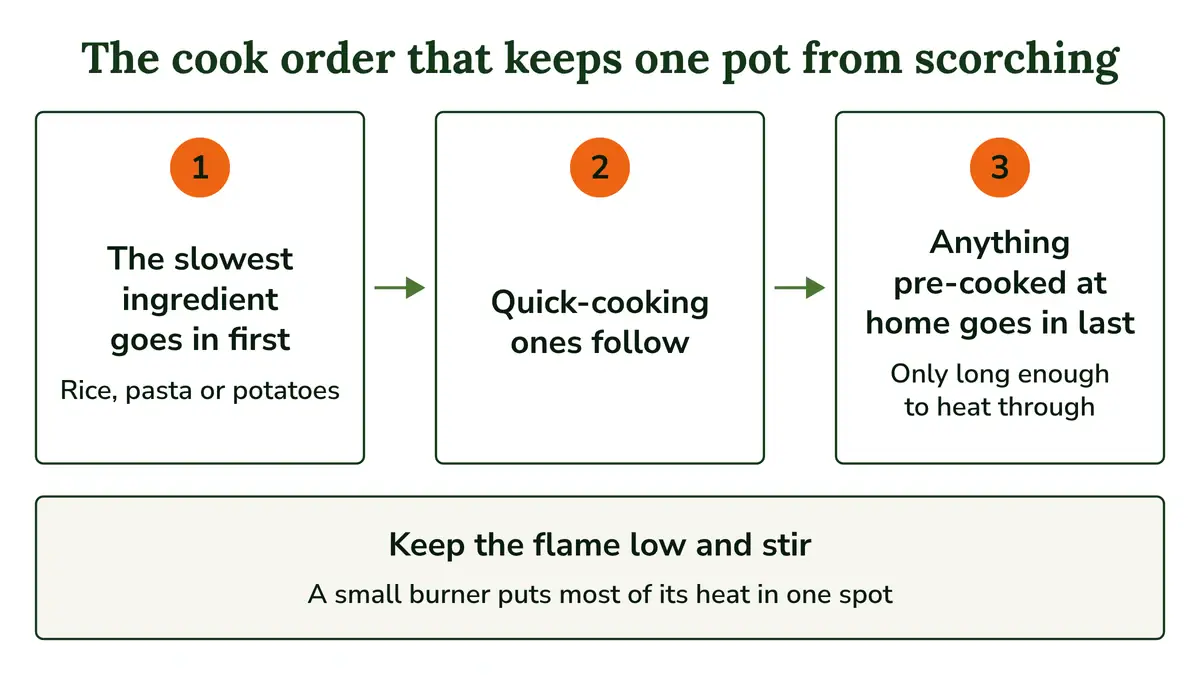
That order is what prevents the two one-pot failures people worry about most: rice welded to the bottom while the top is still hard, or noodles gone soft while the sauce is still cold. Both happen when everything goes in together and one part finishes long before another.
Scorching has a cause of its own. A small burner puts most of its heat in one spot under the pot, and food right above that spot can scorch before the rest is hot.
Stove makers point the same way. One maker describes its broader burner head as giving better heat distribution and simmering, and another maker’s instructions say to stir often when you heat anything other than water. Turn the flame down with the adjuster valve and keep a spoon moving.
Some small stoves are built mainly to boil water, so check your stove’s instructions for whether it can turn down to a simmer.
Starches are where the fuel goes. REI’s meal planning advice notes that pasta, potatoes, rice and quinoa take a deceptively long time to cook and use more fuel, so plan your fuel around them.
Quick-cooking versions, or portions you cook at home, save both fuel and time. For a first overnight I’d pick quick-cooking starches, because that takes the slowest, hungriest step out of a cook order you’re still learning.
Quick Tip: Never run the stove inside a tent or vestibule, even when it’s raining, because stove instructions warn about carbon monoxide in enclosed spaces.
One-Pot Meal Ideas for Two Nights, Plus a Short Cleanup
The easiest one-burner dinners lean on what you did at home or on shelf-stable food: a chili or stew made at home for night one, and a rice or noodle pot with pouched tuna or chicken for night two. Cook only what you’ll eat, so there’s less to pack out.
These are ideas to build your own two dinners from rather than recipes with measurements, so there are no quantities. Each one comes with the reason it suits one burner.
Night One Ideas
- A chili, stew or curry made at home, frozen, then reheated at camp to 165°F. It’s the idea I’d start with, because it cooks at a single heat level and leaves nothing to chop at camp.
- Pasta with a sauce made at home. The pasta goes in first as the one slow item, and the sauce goes in last, just long enough to heat through. The pasta is the fuel-hungry part, so it’s the one to plan your fuel around.
Both of these depend on the cooler. If your food rides in your pack, use the night-two ideas on both nights.
Night Two Ideas
- Rice or dried noodles with a powdered sauce or soup mix, with pouched tuna or chicken stirred in at the end to warm through. It’s all shelf-stable, and there’s one slow item, so it fits the second night well. Pick a pouch size you’ll finish in one meal.
- A just-add-water dehydrated or freeze-dried meal, which REI suggests as a fallback for a tired evening. On a second night when you’re worn out, that’s a perfectly good dinner, and it’s still just one pot of boiling water.
Morning coffee is outside this dinner plan, so it isn’t covered here.
A Short Cleanup
Cooking only what you’ll eat keeps cleanup short. Anything left, peels and scraps included, goes home with you, which is why it pays to pack out every scrap. Washing your pot and storing food overnight are their own short routine.
A first overnight on one burner comes down to two dinners, a cooler you check with a thermometer, and some work done at home before you go.
So write down your two dinners now: one for night one that uses the perishables, and one shelf-stable meal for night two. Then do the home prep the evening before you leave.
Founder & Gear Research Editor
Sonia Zannoni
I’m Sonia, the founder of Best Trail Backpacks. I don’t test gear myself. For every pack I cover, I read the manufacturer’s specs and sizing charts and look for what owners report again and again.
Fit comes first, because a pack that doesn’t match your torso and hips will hurt no matter what it cost. My goal is to help you choose a pack that suits your body, your trip and your budget.
About the Founder
