How to Measure Your Torso for a Hiking Backpack (Step-by-Step Fitting Guide)
The size chart on a hiking backpack asks for a number most people have never measured. It isn’t your height or your waist size. It’s your torso length, the stretch of your back from the base of your neck to the top of your hip bones.
If you guess it from your height, you can pay for a pack that puts the hip belt on your stomach and the weight on your shoulders, then pay again for a second one that hurts the same way.
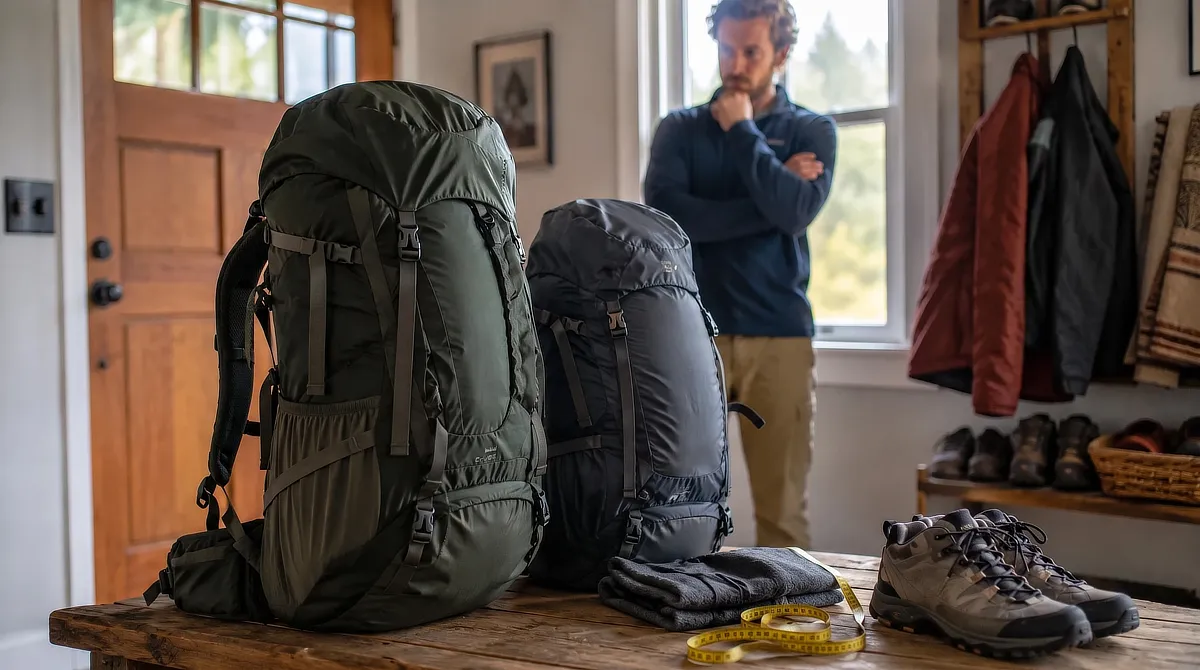
Learning how to measure your torso for a hiking backpack takes a soft tape measure, a helper if you have one, and a few minutes. You find two bones, measure the distance between them along your spine, and then read that number against the size chart for the pack you’re looking at.
Home measurements are a little rough, even when professionals take them, so I’ll also show you how to try a pack on with some weight inside, because that’s the real test of fit.
TL;DR: Measuring Your Torso for a Hiking Backpack
Why Your Height Doesn’t Tell You Your Pack Size
Two people of the same height can be built very differently. One gets most of their height from long legs, the other from a long trunk, and only the trunk matters to a backpack. Deuter, which sizes many of its packs by back length, says it directly on its fit page: people of almost the same height can have different back lengths.
Height and torso length do go together loosely, which is why a height-based guess sometimes works. When it doesn’t, the frame sits at the wrong place on your back, and no amount of strap tightening moves the hip belt back onto your hip bones.
So a tall hiker with long legs and a short back might need a small or medium frame, while a shorter hiker with a long trunk might need the large. Gregory’s advice is to size a pack the way you size shoes, by the part of you it actually has to fit, and for a pack that part is your back.
What Happens When the Torso Size Is Wrong
A hiking pack’s frame and hip belt are there to move most of the weight off your shoulders and onto your hips. REI’s fitting guide puts the goal plainly: the majority of the load should rest on your hips, and the shoulder straps should wrap closely without carrying much weight. That only works when the hip belt sits on the top of your hip bones, and the torso size is what puts it there.
When a pack is too long for your back, the hip belt lands below the top of your hip bones and the shoulder straps attach above your shoulders, leaving a gap. With nothing holding the top of the pack against you, it sways, and you spend effort steadying it with every step.
If your hip belt keeps creeping up toward your belly button and your shoulders ache by the second hour, a pack that’s too short for your torso is a likely cause. The belt rides above your hip bones, where there’s nothing for it to rest on, so the weight slides back onto the shoulder straps.
When the shoulder straps carry too much weight, they also press on nerves. The brachial plexus, the bundle of nerves that runs from your neck down into your arm, passes right under them.
A 2016 review by Knapik and colleagues in the Journal of Special Operations Medicine describes rucksack palsy, a compression or stretch injury to those nerves caused by pack straps, which can show up as numbness or tingling and weakness in the arm.
It’s mostly reported with heavy loads such as military packs, and the same review lists a hip belt and well-adjusted, padded straps among the things that may reduce it.
Mayo Clinic advises seeing a healthcare provider for weakness in the hand or arm, or for symptoms that don’t go away quickly, so if your arm or hand stays numb or weak after you take the pack off, get it checked.
Carrying a pack also changes the way you walk. A 2016 review of 54 studies by Liew and colleagues in the Journal of Applied Biomechanics found that a backpack tips your trunk further forward, and it listed hip belt use among the things that changed the results. That’s one more reason to get the hip belt sitting where it should.
Once a loaded pack is on, the load lifters give you a quick check. These are the short straps running from the top of the shoulder straps back to the pack.
REI says they should angle back at roughly 45 degrees, and Osprey gives a wider range of 30 to 60 degrees. If they point straight up or lie almost flat, the torso length is probably off, even if the hip belt feels fine.
Locate Your Landmarks: Finding the C7 Vertebra and the Iliac Crest
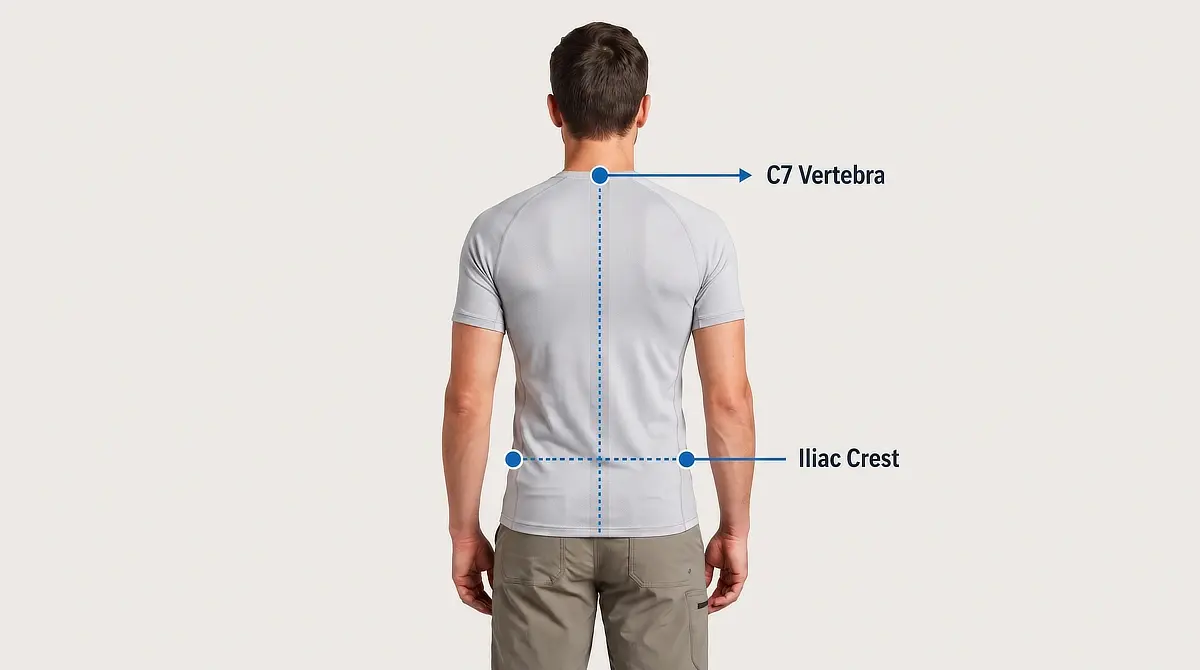
The measurement runs between two bones, one at the base of your neck and one at the top of your hips. Take a minute to find each one carefully, because if either point is off, your number will be off too.
The Top Point: Your C7 Vertebra
Tilt your head forward and bring your chin toward your chest. Run a finger, or better, have a helper run theirs, down the back of your neck to the bump that sticks out the most, about where the slope of your shoulders meets your neck. That bump is the usual marker for C7, the last bone of your neck, though in some people the most prominent bump is the one just above or below it.
Once you’ve found it, lift your head back to a normal, upright position before anyone measures. Measuring with your chin still tucked moves that top point and throws the number off.
The Bottom Point: Your Iliac Crest
Put your hands on your sides and slide them down over your ribs until you feel the top edge of your hip bones. That ridge is the iliac crest. Point your thumbs backward toward your spine and your fingers forward, as if you were resting your hands on your hips.
Your helper then pictures a level line across your lower back between your two thumbs. That line is the bottom of the measurement.
Don’t expect pinpoint precision here. In a 2012 study in Manual Therapy (Kilby and colleagues), nine physiotherapists who locate bones by touch for a living were off by about 1.5 to 2 cm on average when finding bony points on the lower back.
That’s roughly half an inch to three-quarters of an inch, which can be enough to move you from one row of a size chart to the next, so measure twice, and if the two numbers disagree, measure a third time.
Do this over a thin shirt rather than a jacket or a hoodie. Bulky layers hide your hip bones and can push your number toward the wrong size.
A hip belt that isn’t on your hip bones has nothing firm to rest on, so once the pack is loaded it can slide, twist or dig into the soft part of your waist. That’s why the final check happens with weight in the pack, not in a store aisle with an empty one.
While your hands are on your hip bones, take one more measurement. Some packs come with hip belts in separate sizes, and Osprey says to measure for those around your hips at the iliac crest, not around your waist.
REI points out that this line sits a little higher than your beltline, so your pant size won’t match it. Wrap the tape around your body along the line your thumbs found.
How to Measure Your Torso Length
With both points found, the measuring takes about a minute. The easiest way is with a helper and a soft tape. If you’re on your own, the wall method below gets you close.
No soft tape measure? A piece of string or twine works. Lay it along your back from C7 down to the line between your thumbs, following the curve of your spine, mark the two points, then lay the string flat and measure it with any tape or ruler.
If you’d like to see the landmarks and both methods in action, here’s a short video that walks through the same steps.
The Helper Method
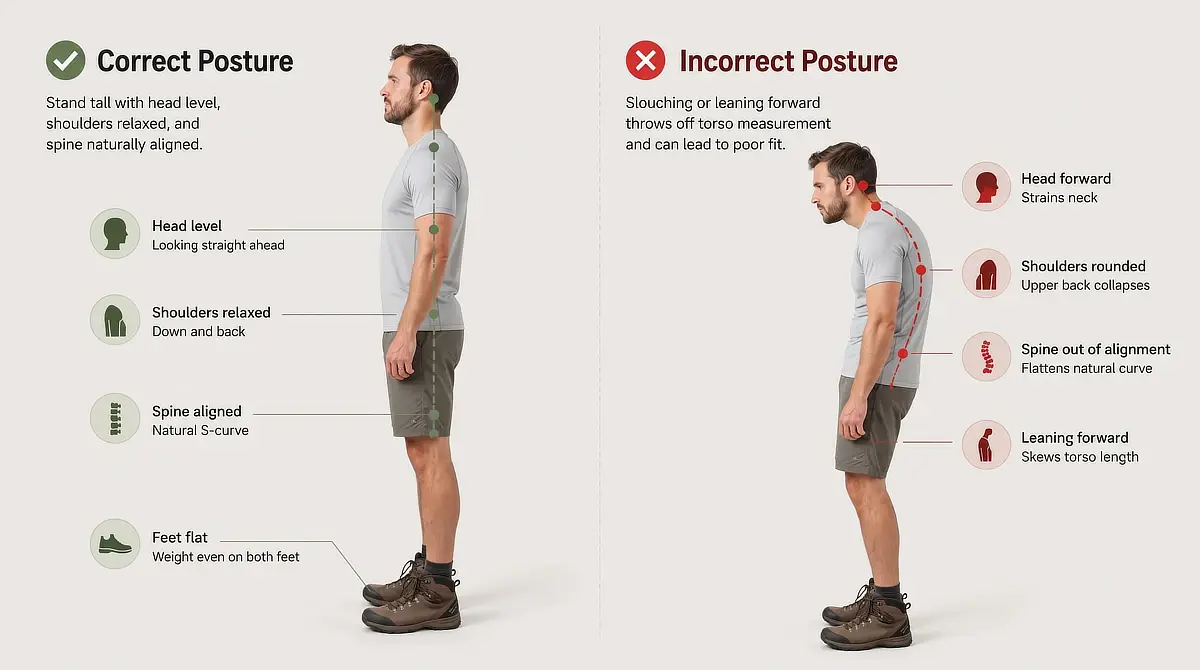
Stand up straight in a relaxed, natural posture, not slouched and not arched. Your helper puts the zero end of a soft tape measure on your C7 vertebra.
The tape runs down your back, lying flat along the curve of your spine rather than pulled tight in a straight line. Your torso length is the number where the tape crosses the imaginary line between your thumbs.
The Solo Method
No helper? Stand with your back against a wall, with your heels, shoulder blades and the back of your head lightly touching it. Mark the wall with a pencil at your C7, then again at the height of the line between your thumbs. A hardcover book held flat against the wall can help you keep each mark level. Step away and measure between the two marks.
The wall gives you a straight line between two points, while your spine curves. That straight line can read a little shorter than a tape following your back, so if your result lands near the edge of a size, treat both sizes as possible and let the loaded try-on decide.
Three mistakes can throw the number off. A rigid metal tape can’t follow the curve of your back and reads short. Keeping your chin tucked after finding C7 moves the top point. And letting the thumb line tilt instead of staying level shifts the bottom point. Once you know about them, you can avoid all three.
Matching Your Torso Number to a Brand’s Size Chart
Once you have your number, the size chart for the pack you’re looking at turns it into a size. Brands don’t all use the same ranges, though, and they don’t all organize their sizes the same way, so here’s how three common systems work.
How much the number matters depends on the pack. Deuter says back length matters less for daypacks than for the bigger packs used on multi-day trips, and many daypacks come in a single size that covers a wide range of torsos.
Osprey’s chart, for example, lists its Hikelite 18 and 26 as one size for torsos of 15 to 22 inches. If you’re buying a larger pack, or your torso falls near the short or long end, the chart for the exact model is where to look.
Gregory Sizing
Gregory’s fit guide sizes its packs by torso length and uses the same size scale for men’s, women’s and unisex packs, so a medium is a medium. According to Gregory, its women’s packs differ in shape instead: a hip belt angled for women’s hip bones, a harness shaped to work with the bust, and smaller torso sizes for shorter backs.
Gregory also makes plus-size packs that keep its standard torso sizing, with longer shoulder straps and a hip belt that fits up to a 60-inch waist. Torso ranges still vary from pack to pack, so check the chart for the exact model rather than relying on a general rule.
Osprey Sizing
Osprey takes a different approach, with separate men’s and women’s packs and adjustable harnesses (the shoulder strap system, which slides up or down the back panel) whose size ranges overlap.
On Osprey’s size chart, the men’s Aether packs, the Aether 65 included, put 17 and 18 inch torsos in the S/M, 22 and 23 inch torsos in the L/XL, and anything from 19 to 21 inches in either size.
The women’s Ariel packs, the Ariel 55 included, run shorter: the chart puts 13 to 15 inch torsos in the XS/S, 18 to 20 inch torsos in the M/L, and 16 or 17 inches in either size.
Osprey’s women’s packs pair that shorter torso range with a narrower harness and a hip belt shaped for women’s hips. For larger bodies, its Extended Fit packs use the standard torso sizes with longer shoulder straps and hip belts that fit hips up to 70 inches.
If you’re comparing women’s packs across brands, my roundup of hiking backpacks for women is built around fit.
Deuter Sizing Profiles
Deuter sorts many of its packs into fit profiles instead of S, M and L. Regular is built for a back length of about 46 cm (18 inches). SL, its slim line, is built for about 42 cm (16.5 inches), with narrower, S-shaped shoulder straps and hip fins (the padded wings of the hip belt) shaped for women’s hips. EL, extra long, adds 6 to 9 cm (about 2.5 to 3.5 inches) to the back length for taller hikers.
Deuter’s packs are adjustable as well, so the profile gets you close and the back adjustment does the fine-tuning. Deuter’s own advice is that trying a pack on is the only sure test.
When You Land Between Two Sizes
If your number falls between two sizes, or right where Osprey’s ranges overlap, don’t guess. REI’s advice is to try both, and that’s what I’d do too. Put 10 to 20 pounds in each, the range Osprey and Gregory both suggest for a try-on, and keep the one where the hip belt padding sits on your hip bones and the load lifters angle back toward the pack.
Landing between sizes doesn’t mean you measured wrong. I’d treat a home measurement as a starting point and let the try-on make the final call.
If you want to know what else to check while the pack is on, my tips for choosing a pack that fits cover the hip belt, the load lifters and the sternum strap.
Before You Buy: Try It Loaded
Your torso number tells you which size to look at on the chart. To know whether the pack actually fits you, you have to put it on with some weight inside.
Once you have the number, the rest of choosing a pack gets a lot easier. My beginner’s guide to hiking backpacks covers capacity and the features actually worth paying for.
Before you commit to a pack, put 10 to 20 pounds in it, roughly what you’d carry on a real hike, and wear it around the house for a while. Walk up and down the stairs a few times and check that the hip belt stays on your hip bones.
Keep the tags on until you’re sure, so you can still return it within the store’s return window if something rubs or slips.
If the hip belt keeps sliding off your hip bones, I’d send it back and try the other size, because no amount of strap adjusting makes up for the wrong torso size.
Founder & Gear Research Editor
Sonia Zannoni
I'm Sonia, the founder of Best Trail Backpacks. I don't test gear myself. For every pack I cover, I compare the published specs and sizing charts, read what independent testers found, and look for what owners report again and again.
Fit comes first, because a pack that doesn't match your torso and hips will hurt no matter what it cost. My goal is to help you choose a pack that suits your body, your trip and your budget, and to tell you plainly where the evidence runs out.
About the Founder