
How to Clean a Moldy Hydration Bladder and Keep It Clean Between Hikes
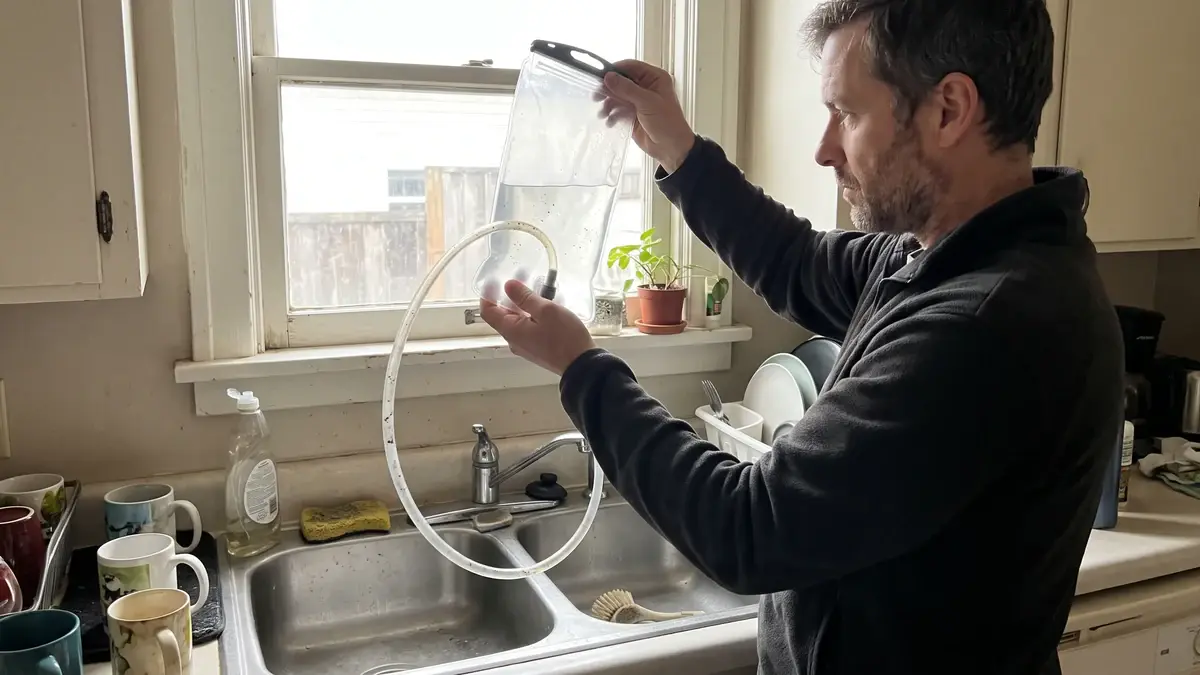
You got the hydration bladder out for the first warm weekend and found black specks inside the tube and a musty smell under the cap. Now it’s in the sink while you decide: back in the pack, or in the trash.
It’s a frustrating spot, and it isn’t your fault. Every tip you find contradicts the last: bleach it, never bleach it, boil it, freeze it, bin it. Part of the reason is that the makers themselves give different rules.
You want to know if it can be saved, and how to clean a hydration bladder without ruining it or worrying about the next sip.
By the end you’ll know whether to keep it, replace one part or replace the whole bladder, what your own maker allows, and how to dry and store it so the specks don’t come back.
TL;DR: How to Clean a Hydration Bladder
- Black specks don’t automatically mean the trash: the bag, tube, bite valve and cap each have their own fix, and tubes and bite valves are often sold as separate parts.
- Check who made it before you pour anything in: Osprey says no bleach and no boiling water, Platypus gives a bleach dose, and HydraPak uses chlorine-free tablets.
- Soak it, brush the tube, then dry it completely, because leftover moisture is what lets mold come back.
- Replace it if growth or a musty smell returns after a full clean and dry, or if it leaks.
Can You Save a Moldy Hydration Bladder? Check Each Part First
Often, yes: black specks don’t mean it’s finished, because the bag, drink tube, bite valve and cap each have their own fix. Clean and dry everything first. If growth stays in the tube or bite valve after brushing, replace that part, and keep the rest.
So start with the specks you found in the tube and the smell under the cap, and look at where the growth actually sits. A hydration bladder is really four parts, and each one gives you a different problem:
- The reservoir (the bag). The widest part and the easiest to reach, so growth here usually comes out with a soak and a brush.
- The drink tube. Narrow and dark, so the growth clings to the wall, and a soak alone often leaves specks behind.
- The bite valve. Its silicone cover holds water against the valve, so it needs to come off to get clean.
- The cap and its O-ring. This is the seal that stops leaks. A crack or a damaged O-ring is a repair or warranty question, not a cleaning one.
Four things decide what happens next: who made it, which part shows the growth, whether it comes back after a full clean and dry, and whether that part is sold on its own for your exact model. The rest of this post keeps coming back to them.
My own call would be to try a full clean, and replace the tube or bite valve if it needs it, before buying a whole new system. Replacing one part means you keep the rest of a system that still works.
What the Black Specks Mean for Your Health
You’ll find both ends of this online: people calling it toxic, and people who say they’ve drunk through a speckled tube for years. Neither one is a good reason to skip the clean. HydraPak and CamelBak both treat mold as a drying problem, something to clean out and dry away.
The EPA’s page on mold and health notes that breathing in or touching mold may cause allergic reactions in sensitive people, but it’s written about mold indoors, not about drinking from a container.
My take is to treat the specks as a cleaning job and let the result decide. If a full clean and dry clears them for good, you have your answer. If they keep coming back, the next section covers what to replace.
Save It, Replace a Part, or Replace the Bladder
Once everything is cleaned and dried, what’s left tells you what to do. Each part has its own trigger, so you only replace what’s actually failing.
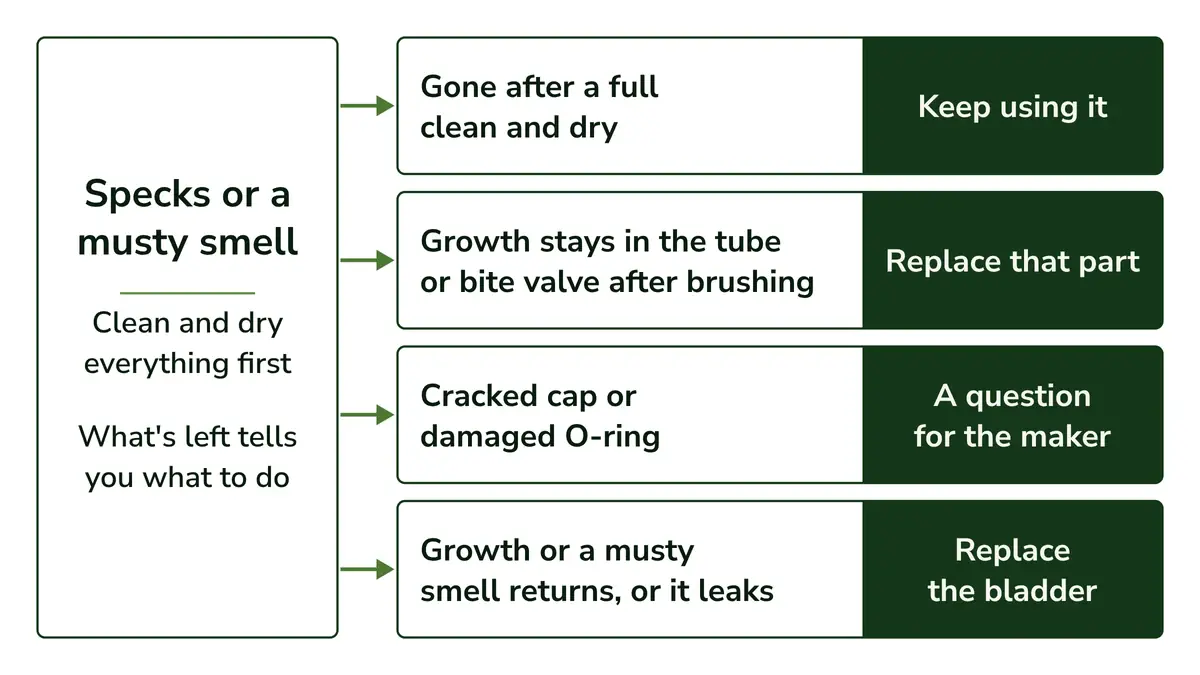
- Tube or bite valve: replace it when growth stays after a proper brushing. CamelBak sells the bite valve, drink tube and Quick Link adapter as replacement parts, so a stubborn tube doesn’t mean a new system. Check that the part is listed for your exact reservoir model before you order.
- Cap or O-ring: a cracked cap or a damaged O-ring is a question for the maker. CamelBak handles these through its Warranty Department, and HydraPak’s guarantee covers products that fail from manufacturing or material defects, though its warranty excludes damage from mold.
- The bladder itself: replace it when growth or a musty smell returns after a full clean and dry, or when it leaks.
“When in doubt, replace” is fair advice for real doubt: growth or a smell that keeps coming back, or a part the brush can’t clear.
A faint mark that stays after cleaning is harder to call. HydraPak treats stubborn stains with a second tablet soak, so I’d give it one more soak and brush, then decide by whether the smell or growth comes back.
The catch with swapping one part is a little homework, because you need the exact model name to find a part listed for it.
Before you reach for any cleaner, find the maker’s name on your reservoir or cap. The next section shows why that name decides what you can safely pour in.
Why “Just Use Bleach” Is Right for One Bladder and Wrong for Another
There’s no one method for every bladder, because the makers disagree. Osprey rules out bleach and boiling water, and says boiling water voids its guarantee. Platypus gives a bleach dose of 2 to 5 drops per liter, left overnight, and HydraPak uses chlorine-free tablets and allows the dishwasher’s top rack.
The tip assumes one method fits every bladder. The four makers whose care pages I read give different rules on bleach, boiling water and the dishwasher, so the same advice can follow one maker’s instructions to the letter and break another’s.
What matters is the brand on your reservoir, because its care rules and its guarantee go together. Osprey’s reservoir care page rules out bleach and boiling water, and says boiling water can damage the reservoir and voids its guarantee.
A reservoir that came with your pack may have been built by HydraPak, and HydraPak’s warranty covers the ones it made for other brands, so check the back or bottom for a HydraPak logo. If two names appear, I’d follow the stricter of the two care pages.
Here’s what each maker’s own care instructions say on the three points people argue about most.
Maker
Bleach
Boiling water
Dishwasher
Osprey
No
No: it can damage the reservoir and voids the guarantee
Not mentioned on Osprey’s care page
Platypus
Yes: 2 to 5 drops of unscented bleach per liter, left overnight
Not stated; rinse with hot water
Not stated
HydraPak
Not mentioned; its cleaning tablets are chlorine-free
No: rated for water up to 140°F (60°C)
Yes: top rack, most models turned inside out
CamelBak
Not in its reservoir care steps; follow your reservoir’s own instructions
Its care page says warm, not boiling, water
Not stated on its care page
Osprey
Bleach: No
Boiling water: No: it can damage the reservoir and voids the guarantee
Dishwasher: Not mentioned on Osprey’s care page
Platypus
Bleach: Yes: 2 to 5 drops of unscented bleach per liter, left overnight
Boiling water: Not stated; rinse with hot water
Dishwasher: Not stated
HydraPak
Bleach: Not mentioned; its cleaning tablets are chlorine-free
Boiling water: No: rated for water up to 140°F (60°C)
Dishwasher: Yes: top rack, most models turned inside out
CamelBak
Bleach: Not in its reservoir care steps; follow your reservoir’s own instructions
Boiling water: Its care page says warm, not boiling, water
Dishwasher: Not stated on its care page
CamelBak and HydraPak make their own tablets, and the other two point you to a type of cleaner:
- CamelBak Cleaning Tabs use an oxygen-based bleaching agent and enzymes. CamelBak warns not to swallow a tablet or drink water that has one in it, so rinse well before you refill.
- HydraPak Bottle Bright tablets are chlorine-free. Follow the tablet’s own directions for how many to use.
- Platypus suggests a chlorine-free, hydrogen peroxide-based bleach alternative if you’d rather not use bleach.
- Osprey suggests purifying tablets from time to time, alongside its regular warm-water wash.
Bleach is a strong disinfectant where the maker allows it. Platypus gives a bleach dose for its reservoirs, followed by three rinses with hot water. It needs that thorough rinsing, and it’s off-limits for an Osprey reservoir.
I’d follow your maker’s page over any general tip, including the ones in this post. Theirs is the one your guarantee depends on.
How to Clean a Hydration Bladder, Step by Step
Empty it, pull it from the pack and take apart what your maker says comes apart. Wash it in warm soapy water, then soak it in a cleaner your maker allows, pinching the bite valve so the solution fills the tube. Brush it and rinse until nothing smells of cleaner.
The order is the same for every maker. Only the cleaner in step 3 changes, depending on the name on your reservoir.
1. Empty It, Take It Out of the Pack and Take It Apart
Pour out what’s left and pull the bladder out of the pack. If it leaked or sat damp, the sleeve it lived in may smell musty too, so plan to wash the pack itself while the bladder dries.
Then take off whatever your maker says comes off. HydraPak’s tube disconnects and its bite valve’s silicone sheath and post come off, Osprey removes the hose and the valve cover, and CamelBak’s tube disconnects at the Quick Link, the click-in connector where the tube meets the bag.
Separate parts are easier to scrub and dry, because you can reach the tube from both ends and air can get into every piece.
2. Wash It in Warm, Soapy Water
Half fill the reservoir with warm water and a little mild soap, close it and shake. Then hold it so the tube port is at the bottom and pinch the bite valve, so the soapy water runs through the tube and out the valve.
That’s CamelBak’s method. Osprey’s is similar, with warm water and a mild washing-up liquid.
HydraPak adds an option: most of its reservoirs turn inside out for washing, or go reversed on the top shelf of the dishwasher. That’s a HydraPak instruction only, so don’t assume another brand’s reservoir can take it.
3. Soak It With a Cleaner Your Maker Allows
This is where the name on your reservoir comes in. Pick the soak your maker allows:
- The maker’s own tablets. Follow the tablet’s directions. HydraPak’s Bottle Bright soaks for 15 to 30 minutes in warm water.
- Baking soda and lemon juice (Platypus). Per liter, Platypus mixes 1/4 cup of baking soda into 3/4 cup of water, shakes for 30 seconds, then adds 1/4 cup of lemon juice, shakes for 10 seconds and vents it away from your face. It repeats the shaking and venting three times, then soaks for 20 minutes.
- Bleach, only where the maker allows it. Platypus uses 2 to 5 drops of unscented household bleach per liter, swirled for 10 seconds and left filled overnight. Never use it on an Osprey reservoir.
Whatever you use, pinch the bite valve while it soaks, so the solution fills the tube and the valve as well as the bag.
If you’re not sure which one to start with, I’d use your maker’s own cleaner, or plain warm soapy water if you can’t tell who made it.
One rule applies to every bladder. The CDC’s guidance on cleaning with bleach says never to mix it with ammonia or any other cleaner. So don’t stack bleach, vinegar and baking soda in one soak.
Quick Tip: Platypus warns that baking soda and lemon juice fizz and build pressure in a closed reservoir. Vent it away from your face every time you shake it.
4. Brush the Inside and Rinse Until Nothing Smells of Cleaner
Brushing is what lifts growth off the wall, which is why Osprey and HydraPak both have you brush the interior. If yours has baffles (inner walls that keep the bag flat) that don’t separate, like HydraPak’s Contour, a bottle brush, the tablets or both will reach what your hand can’t.
Then rinse until nothing smells of soap or cleaner. Platypus rinses three times with hot water, Osprey with cool water, and HydraPak until no soap residue is left. If you can still smell the cleaner, rinse again.
Getting the Black Specks Out of the Tube and Bite Valve
Soaking alone often leaves specks in the tube, because it’s narrow and dark and the growth clings to the wall. Disconnect it and scrub it with a tube brush and warm soapy water. Clean the bite valve with its cover off, and replace any part that still shows specks.
You’ve rinsed it over and over, the bag looks fine, and the black specks are still sitting in the tube. Maybe the mouthpiece won’t come off either. That’s the most stubborn part of the whole job.
A rinse runs past growth that’s stuck to the wall of a narrow tube. HydraPak and Osprey both build brushing into their cleaning, and CamelBak sells reservoir and tube brushes for the same job.
For the tube, disconnect it from the reservoir and run a tube brush through it with a little soap and warm water, then rinse. That’s HydraPak’s method, and Osprey also has you remove the hose and brush it.
The bite valve’s silicone cover holds water against the valve, so it needs to come off. HydraPak removes the silicone sheath and the post underneath, cleans them and puts them back together. Osprey removes and cleans the valve cover.
You’ll see brand cleaning kits with a brush sized for the tube and a hanger for drying. They’re convenient, but optional, because every maker’s method works with a brush and household items.
I’d say a kit earns its place if you use the bladder every week. If you don’t, you can skip it.
If specks stay after a proper brushing, that’s the trigger from earlier: replace the tube or the bite valve, and check that the part is listed for your exact reservoir model.
Quick Tip: In its bottle care notes, CamelBak warns that forcing a brush through the Big Bite Valve’s slit can tear the silicone, and its reservoirs use the same valve. Take the cover off instead, as HydraPak and Osprey describe.
Dry It Completely So the Mold Doesn’t Come Back
Mold needs moisture and leftover residue, so drying is what keeps it from coming back. Hang the reservoir upside down or prop it open so air gets inside, and dry the tube and bite valve separately somewhere airy. Don’t store it until no water is left inside.
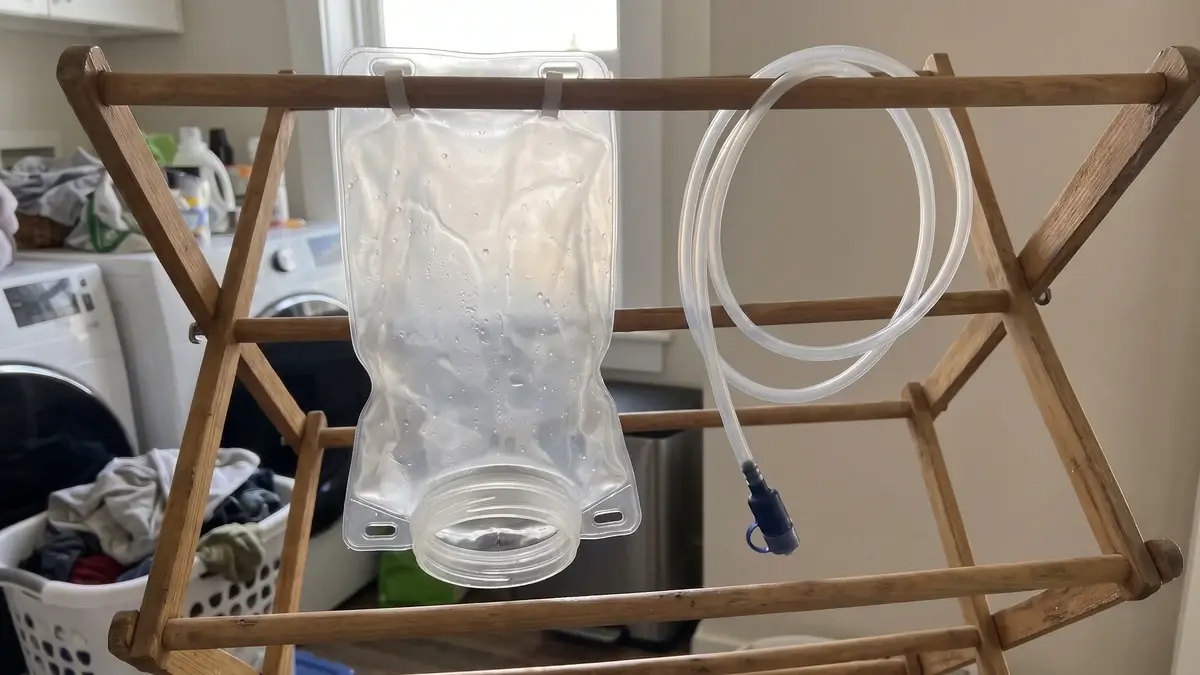
If you remember one step from this post, I’d make it this one. HydraPak ties mold and odor to storing a reservoir damp, and CamelBak’s method ends with air drying so no moisture is trapped inside.
Think back to how it was put away after the last hike of the season. A bladder that went into a drawer still a little damp is exactly that kind of storage.
Each maker dries it a little differently:
- HydraPak: hang it upside down, or turned inside out on reversible models, so the inside is open to the air.
- Osprey: hang the reservoir on its drying rack, and dry the hose and valve in a ventilated area.
- Platypus: air dry it after the three hot-water rinses.
- CamelBak: air dry it with its Reservoir Dryer accessory.
Dry the tube and bite valve apart from the reservoir, as Osprey and HydraPak both do, so air can get through the narrow parts. Before you store anything, check that no water is left inside, including in the tube.
Storing It Between Hikes, and a Quick Check Before the Next One
Store it clean and fully dry. The freezer suits a clean bladder that isn’t overfilled, but no maker says freezing removes growth already there. Clean it soon after anything but water, and before the next hike, run water through it, smell it and check the cap seal and O-ring.
Osprey and HydraPak both say to store it clean and dry. A damp bladder sealed in a closet undoes all the work of the last section.
The freezer comes up a lot, and the makers do support it for a clean bladder. HydraPak suggests storing it clean and empty in the freezer, or somewhere dry and cool, if you live somewhere humid. Platypus says freezing it with water in it is OK.
The thing to avoid is a full one. Osprey warns that an overfilled reservoir can be damaged as the water expands, and HydraPak says to avoid freezing one completely full.
Freezing isn’t a clean, it’s a storage habit for a bladder that’s already clean. Platypus says a rinsed reservoir kept in the freezer can occasionally skip a routine clean. No maker says freezing removes growth already there, so a moldy bladder still needs the soak, the brush and the dry.
Anything other than plain water, like drink mix, electrolytes or a sugary drink, means a prompt clean afterward. Osprey says to rinse after each use, especially after sugary drinks, and HydraPak says to deep clean whenever anything other than water went in.
That’s why I’d keep the bladder for water. Mix your drinks in a separate bottle, such as a soft bottle for drink mix carried alongside it, so the bladder only ever holds water.
That bottle has its own care routine, like cleaning a bottle lid and gasket, which is a separate job from the bladder.
Before the first hike of the season, run the check CamelBak describes:
- Fill it and run clean water through the reservoir and the tube.
- Look inside and smell it. If it looks or smells off, give it a full clean again.
- Give each end of the tube a firm tug. If it pulls off too easily, the end may be stretched: CamelBak says to trim an inch off that end and press the part back in.
- Check the cap seal and the O-ring, since they’re what keeps it from leaking into your pack.
Quick Tip: Do the fill-and-run check in your kitchen a few days before the first hike of the season. A leak or a damaged O-ring shows up at home, with time to get a part, instead of at the trailhead.
Before your next hike, find the maker’s name on your reservoir or cap, check what that maker allows, and give it the soak, the brush and a full dry.
Founder & Gear Research Editor

Sonia Zannoni
I’m Sonia, the founder of Best Trail Backpacks. I don’t test gear myself. For every pack I cover, I read the manufacturer’s specs and sizing charts and look for what owners report again and again.
Fit comes first, because a pack that doesn’t match your torso and hips will hurt no matter what it cost. My goal is to help you choose a pack that suits your body, your trip and your budget.
About the Founder
