
How to Clean, Dry and Store a Tent (and What to Do About Mildew)
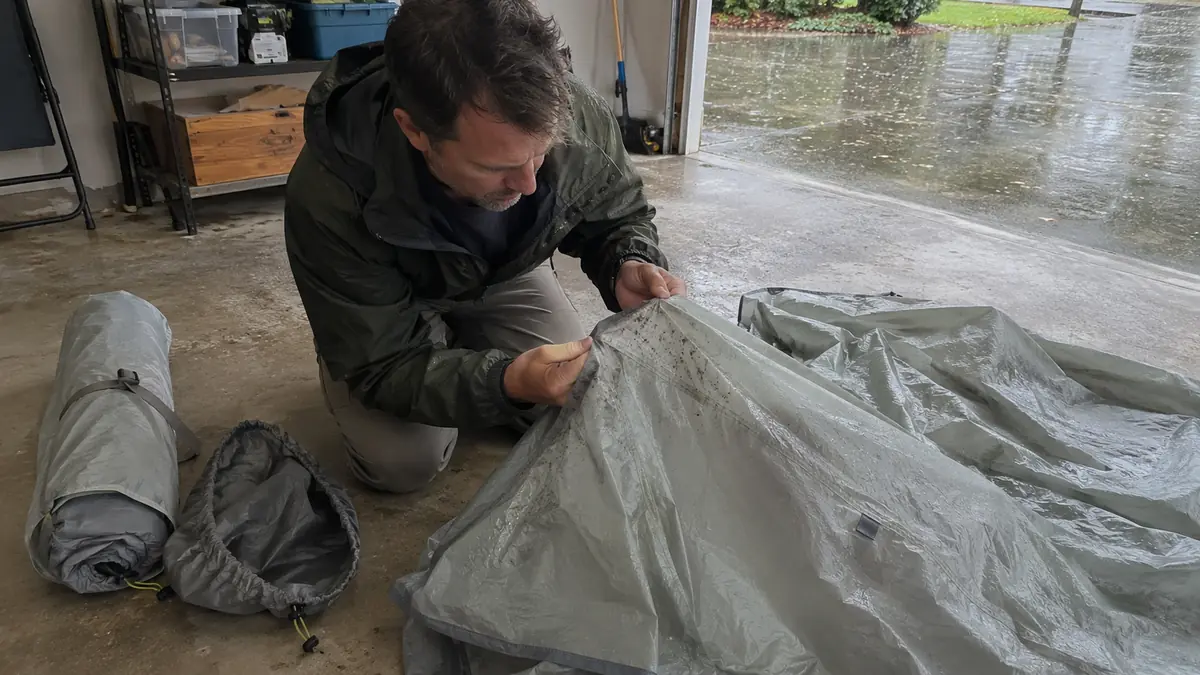
Your tent went into the garage damp after a rainy trip, and now it’s unrolled on the floor smelling like a basement, with black dots on the fly. It wasn’t cheap. Do you scrub it, throw it out, or pack it next time and hope it doesn’t leak?
This happens to a lot of campers, and it isn’t carelessness. Condensation collects under the floor and inside the fly even on a dry night, so a tent often comes home damp, and a busy week does the rest.
You want to know how to clean a tent without stripping its waterproof coating, and whether this one is even worth the effort. A few minutes of checks will tell you which of three states it’s in.
From there, you can clean, dry and store it the way the makers who built it say to, so your next trip starts with a dry tent.
TL;DR: How to Clean a Tent
- Sort it first: a smell alone washes out, and dark mildew spots are permanent stains, so the job is drying it fully, not scrubbing. A soft, sticky or flaking coating is breaking down: recoat a flaking fly, ask the maker about a replacement for a sticky one, and replace the tent if the floor is failing.
- Wash by hand only, with a non-detergent soap or a tech wash in warm (never hot) water. No washing machine, no dryer, no bleach.
- Dry it completely, in shade, as soon as you’re home: MSR says a tent stored wet for as little as 24 hours in warm weather is likely to start mildew.
- Store it loose in a breathable bag in a cool, dry place, not in its stuff sack.
Can a Musty or Spotted Tent Be Saved? Sort It Into One of Three States
Whether a musty tent is worth saving depends on its state. If it only smells, wash and dry it; if it has dark spots, accept the stains and dry it well.
If the coating feels soft, sticky or flaky, recoat a flaking fly or look into a replacement for a sticky one, but a failing floor means replacing the tent.
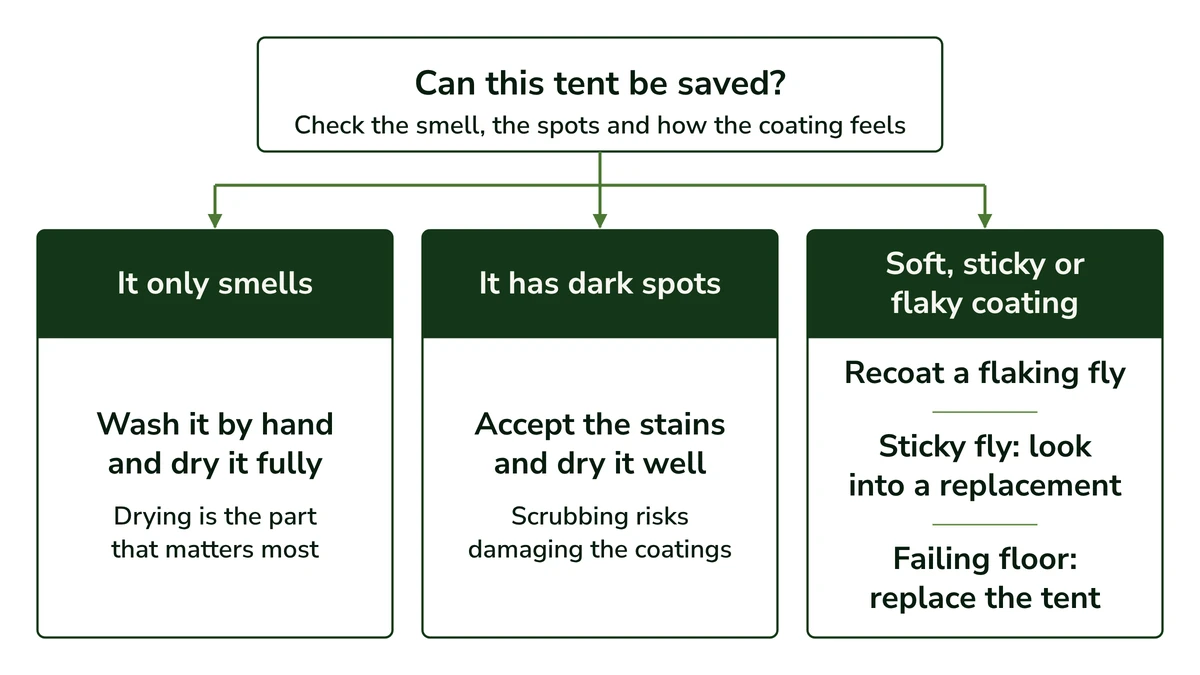
Looking clean isn’t the test. What matters is whether the tent still keeps water out, and that’s the job of its waterproof coating. So the checks worth your time are smell, spots and how the coating feels, because together they tell you what’s happening to that coating.
With the tent unrolled on the garage floor, put your nose close to the fabric and look along the seams for dark dots. Then run your hand slowly over the inside of the fly and the floor, feeling for anything soft, tacky or flaking.
It helps to know the money side before you start. MSR and Big Agnes both say mildew damage isn’t covered under warranty, so whatever happens to this tent, the cost is yours.
That turns this into a plain decision: clean it, just dry it, or put the money toward recoating or replacing the fly, or replacing the tent. The three states below tell you which.
It Only Smells
A musty smell with no spots and a coating that still feels normal is the best case. Wash the tent by hand, dry it fully, and add an odor eliminator only if the smell hangs on (more on that in the mildew section).
The drying is the part that matters most. MSR’s repair shop says washing doesn’t remove mold that has already grown, and its approach is drying the tent fully after every trip.
If your tent only smells, the cleaning and drying sections below are all it needs.
It Has Dark Spots
MSR is blunt about this: mildew stains are permanent, and trying to scrub them out risks damaging the coatings, so the spots stay.
What you can do is wash the tent gently and dry it fully, the same as a tent that only smells.
Big Agnes adds that mildew can make a tent smell, leak or delaminate, meaning the coating starts to separate from the fabric. That’s why spots deserve a closer look: run your hand over the spotted areas and check them for the coating signs below.
The Coating Feels Soft, Sticky or Flaky
This state decides whether the tent can still keep you dry. MSR calls it hydrolysis, which simply means the coating breaking down because moisture has sat on it too long. It ends up soft, sticky and no longer waterproof, and MSR says damp storage speeds it up.
REI’s advice splits by where it’s happening. A flaking fly can be recoated with a thin layer of paint-on polyurethane sealant, but a floor that’s failing calls for a new tent.
If the fly’s coating has turned gooey rather than flaky, REI’s advice is to check whether the tent’s maker sells a replacement rainfly.
A recoat is a repair, so don’t expect the fly to come back as good as new. It’s a way to keep a tent with a sound floor in use.
Here’s what I’d do with each. A tent that only smells, I’d wash, dry and keep using without a second thought. With spots, I’d accept the stains and get serious about drying, as long as the coating under them still feels sound.
A flaking fly on a tent with a good floor is worth a recoat, and a sticky fly is worth asking the maker about a replacement. A sticky or flaking floor is where I’d stop putting money into it.
How to Clean a Tent by Hand Without Stripping the Waterproofing
Clean a tent by hand, never in a machine. Spot clean first, then sponge or soak the whole tent in warm, not hot, water with a non-detergent soap or tech wash, and rinse. MSR and Big Agnes rule out bleach, and NEMO and Big Agnes say detergents can harm the coating.
Not every tent needs a full wash after every trip. MSR says to clean it only when it smells or is heavily soiled. Its repair shop adds a few more reasons: water no longer beading on the fabric, or time spent in sand, salt air, campfire smoke or strong sun.
REI’s rule of thumb is similar. Wash it after a long trip, especially one with sand, fine dust, bird droppings or sap, or about once a season if you take lots of short trips.
Spot Clean First, Then Wash the Whole Tent
REI’s guide to cleaning a tent and MSR follow the same basic order. They differ only in how the main wash is done.
- Spot clean the dirty patches. Work on mud, sap or droppings first, so the main wash isn’t fighting them. REI uses a small amount of mild, fragrance-free dish soap here, though MSR and Big Agnes rule dish soap out (the next section covers that split).
- Wash the whole tent in warm, not hot, water. MSR sets the tent up and goes over it with a sponge and a mild, non-detergent soap. REI soaks it in a tub with a gear cleaner such as Nikwax Tech Wash, in cool to lukewarm water. Big Agnes also says warm and never hot, so whichever method you pick, keep the water on the cool side.
- Rinse it well. Use clear water until no cleaner is left in the fabric, so nothing is sitting on the coating while it dries.
- Dry it fully before it goes into any bag. This is the step that does the real work against mildew, and the drying section below covers it in full.
Setting it up works well if you have the yard space, because every surface is easy to reach with a sponge. The tub suits a smaller tent on a rainy day.
Which Cleaner to Use, and Where the Makers Disagree
The makers agree on more than they disagree, but the differences matter if you’re about to buy a cleaner. Here’s what each one recommends and what it rules out.
Maker
What they recommend
What they rule out
NEMO
A technical fabric wash
Detergents, washing machine, dryer
MSR
Mild non-detergent soap, castile soap or a tech wash; warm water and a sponge on the pitched tent
Dishwashing liquid, detergent, bleach, machine washing or drying, dry cleaning
Big Agnes
Warm water and a waterproof gear cleaner such as Nikwax Tech Wash
Hot water, bleach, liquid detergents, dishwashing liquid, machine washing, dry cleaning
REI
A little mild, fragrance-free dish soap for spot cleaning, then a gear cleaner such as Nikwax Tech Wash in cool to lukewarm water
Describes a hand method only
NEMO
What they recommend: A technical fabric wash
What they rule out: Detergents, washing machine, dryer
MSR
What they recommend: Mild non-detergent soap, castile soap or a tech wash; warm water and a sponge on the pitched tent
What they rule out: Dishwashing liquid, detergent, bleach, machine washing or drying, dry cleaning
Big Agnes
What they recommend: Warm water and a waterproof gear cleaner such as Nikwax Tech Wash
What they rule out: Hot water, bleach, liquid detergents, dishwashing liquid, machine washing, dry cleaning
REI
What they recommend: A little mild, fragrance-free dish soap for spot cleaning, then a gear cleaner such as Nikwax Tech Wash in cool to lukewarm water
What they rule out: Describes a hand method only
The real split is dish soap. REI allows a little mild, fragrance-free dish soap for spot cleaning, while Big Agnes says never to use dishwashing liquid and MSR says to avoid it.
MSR’s repair shop also warns that laundry detergents and Woolite can leave oils, fragrances or softeners behind. That rules out the bottle most of us already have by the washing machine.
If the names on the shelf are new to you, a tech wash is a cleaner made for synthetic outdoor fabrics, and MSR’s repair shop says it leaves some of the water-repellent finish in place. For a non-detergent soap, the shop’s technician names castile soap, such as Dr. Bronner’s.
If you’re not sure what to buy, I’d start with a tech wash, because all four name it and none rules it out. A non-detergent soap is the other safe pick for an MSR tent, and either way, your tent’s own care label has the last word.
Quick Tip: Before you buy any cleaner, check the care label sewn into your tent and its maker’s own care page. The makers don’t all agree, and the one that built your tent knows its fabric and coating.
Why the Washing Machine and the Dryer Are Off the Table
If you’re standing in front of the washing machine with a tent that won’t fit in the sink, the machine looks like the obvious answer. NEMO, MSR and Big Agnes all say no, and REI describes a hand method only.
NEMO’s tent care page says a washing machine will likely tear the fabric and mesh, and that a dryer is out too, because heat can melt technical fabrics. MSR adds that dry cleaning, machine washing or machine drying can each remove the waterproof coatings.
Big Agnes rules out dry cleaning and machine washing too. So the tub or the yard it is. It’s more work, but the coating is what keeps you dry, and MSR’s point is that a machine can strip it.
How to Dry a Tent Completely, Even One You Packed Up Wet
Dry your tent as soon as you get home, even if it looked dry when you packed it. Set it up, or hang it over a shower rod or drying rack out of direct sun, and turn it inside out until the seams and floor underside are bone dry.
Drying is the real fix, more than the wash. MSR’s mildew guidance says a tent stored wet for as little as 24 hours in warm weather is likely to start mildew, and its repair shop says washing doesn’t remove mold once it has grown.
A tent doesn’t need rain to come home damp. REI notes that even a well-ventilated tent collects condensation, often under the floor and inside the fly.
Stopping condensation at camp means less to dry later. REI’s advice is still to dry the tent before you pack it each day when you can, and if you have to pack it wet, to dry it as soon as you’re home.
This is how a tent you dried carefully can still come out of a winter in the garage with dark spots. The fly looked dry, but moisture was sitting under the floor and inside the folds, where condensation collects and where it’s easy to miss.
Where you dry it depends on the weather and the space you have:
- In the yard on a dry day, set up as you would at camp, which REI suggests. Pick a shady spot, because NEMO says to dry a tent in indirect sunlight.
- Over a shower rod or a drying rack, which MSR’s repair shop prefers to hanging a tent by its corners. One of the shop’s technicians flips his tent inside out and gives it at least five days to get bone dry.
- In a garage or a room without carpet when it’s wet outside, as REI suggests.
- Laid flat or on a line, in indirect light, as NEMO says.
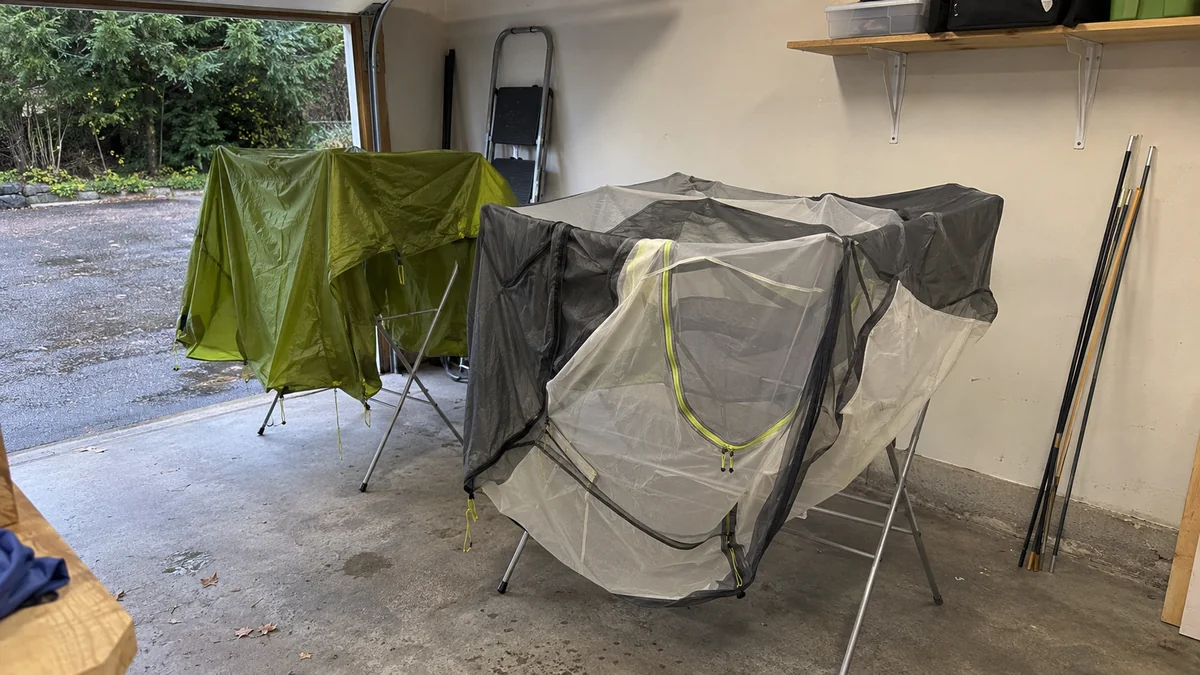
The shade matters because sunlight works against the fabric. Big Agnes says long exposure to direct sun can compromise waterproofing, and REI says UV degrades canopy and fly fabric. REI also notes that polyester flies resist UV better than nylon ones.
When you think it’s dry, check again. Big Agnes says to triple check that a tent is completely dry before it’s stored, and the seams, corners and floor are where to look.
Setting the tent up at home takes yard space and a dry day, and not everyone has both. Hanging it in the garage or a spare room and turning it over for several days costs time but no money.
Either way, it’s cheaper than a mildewed tent the warranty won’t cover. If I had to choose, I’d take the drying rack in the garage, because it doesn’t depend on the forecast.
Quick Tip: Before you bag it, unfold the floor and the fly and feel the underside and the inside of each fold. That’s where condensation collects, and it’s the easiest moisture to miss.
How to Store a Tent Loose So the Coating and Seam Tape Last
Store a clean, bone-dry tent loosely in a breathable bag, such as a large cotton sack, mesh duffel or old pillowcase, not its stuff sack. Long compression can damage the fabric and seam tape. Keep it somewhere cool, dry and dark, and vary the fold each time.
If your tent has lived in its stuff sack on a garage shelf since the last trip, it’s been squeezed tight the whole time. NEMO says long compression can damage tent materials and seam tape, and REI calls the stuff sack a poor choice for long-term storage.
What the makers suggest instead is anything roomy that breathes. NEMO uses a breathable storage sack, MSR suggests an oversized cotton bag, a mesh duffel or a pillowcase, and REI an old pillowcase or a mesh bag.
MSR’s comparison is to store a tent the way you’d store a sleeping bag. If a sleeping bag shared the same wet trip, it needs its own care, and how to wash a down sleeping bag is a job with rules of its own.
Where it lives matters too. NEMO and MSR say cool, dry and out of the sun, and REI and Big Agnes warn against damp basements, hot attics and car trunks. If damp storage can’t be avoided, REI suggests a fully dry tent in a sealed plastic bin.
Big Agnes also says to fold and roll the tent a different way each time, so it isn’t creased along the same lines every time it’s stored.
Of all the makers’ options, the simplest one I’d pick is an old pillowcase on a closet shelf indoors. It costs nothing, it breathes, and a closet is the cool, dry, dark spot most homes already have.
Mildew and Odor: What Helps, and Why Bleach and the Sun Aren’t the Fix
Bleach and direct sun are the two mildew fixes tent makers warn against: bleach is ruled out of tent care, and UV breaks down fabric and coating. For a smell that lingers, an enzyme odor eliminator helps, though its maker says it removes the odor, not necessarily the mold.
Search how to get rid of mildew and most of what comes up is advice for homes, usually built around bleach. On a tent, though, Big Agnes says never to use bleach, and MSR lists it among the cleaners to avoid.
Even the CDC’s cleanup advice that uses bleach is written for homes, not for coated tent fabric.
The other common advice is to leave the tent in the sun to kill the mildew. The makers point the other way: Big Agnes, REI and NEMO all warn that sunlight damages tent fabric or its waterproofing over time, which is why they dry tents in shade.
You’ll also find vinegar, baking soda and power washers suggested online. None of the makers’ care pages I read recommends any of them.
My rule here is to follow the people who built the tent over what’s popular. They make the coating you’re trying to protect, and none of them puts bleach, the sun or a power washer on their list.
What does help is the wash and the full dry above, and for a smell that won’t quit, an enzyme odor eliminator. REI names one for mildew, mold or odors, MiraZyme, which Gear Aid now sells as Revivex Odor Eliminator.
Gear Aid is clear about its limit: it’s designed to remove odors from mold and mildew, and it isn’t guaranteed to eliminate the mold itself. Gear Aid also says to let it air dry without rinsing and to keep it away from heat.
Gear Aid’s own tips page suggests the spray-bottle method for tents rather than a soak. If you do soak it, keep to the time on the bottle, because REI warns that soaking too long can risk hydrolysis, the same coating breakdown that makes a tent sticky.
If your backpack came home from the same trip smelling musty too, getting a musty smell out of a backpack has its own guide.
One more thing is worth knowing before you shake out a spotted tent in a closed room. According to the CDC’s page on mold, people with asthma or mold allergies may have severe reactions to mold.
The CDC adds that sensitive people may get a stuffy nose, a sore throat, a cough or wheeze, burning eyes or a rash.
If you’re sensitive to mold, I’d shake out and clean a spotted tent outdoors rather than in a closed room, and wear rubber gloves, which the CDC recommends for mold cleanup.
Small Repairs Before the Next Trip: Patches, Pole Splints, Seams and Zippers
Most small tent damage can be fixed at home. Patch holes with repair tape on a clean surface, splint a broken pole, reseal peeling seam tape from the outside and brush dirt out of the zippers. Bigger repairs go to the maker, cleaned first.
Maybe it’s the zipper on the door you use every night that’s started to stick, or a small hole near a stake loop. Both are worth sorting out before the next trip, while the tent is clean and dry on the floor anyway.
For holes and tears, NEMO suggests a repair tape such as Gear Aid Tenacious Tape on a clean area. It says to patch both sides of the fabric for extra strength, or for mesh.
REI adds a few details. Round the corners of the patch, leave about an inch of margin around the hole, and add an inside patch in high-tension spots. Then let it cure for a day before you pack the tent.
For a broken pole, Big Agnes says to slide a repair pole over the break as a splint and tape it in place. REI suggests a pole repair sleeve, or in a pinch, a tent stake taped alongside the break.
If seam tape is peeling, REI says to remove the loose sections and apply a sealer made for your tent’s fabric to the outside. Most sealers need about 24 hours. Big Agnes notes that its tents are factory seam taped, so liquid sealer is optional on them.
For a sticky zipper, start with the dirt. Big Agnes says to brush or vacuum it out before storing the tent, and NEMO suggests wiping the zipper with a wet cloth and lubricating it if needed. REI’s rule is never to force a stuck one.
For anything bigger, NEMO offers professional repair and REI works with repair partners. Big Agnes asks that tents sent in for repair be clean, which is one more reason to wash and dry it first.
My line is simple: tape, a splint or a zipper is a home job. A long tear or seams lifting in several places is where I’d send it to the maker rather than guess.
Quick Tip: Give a patch a full day to cure before you pack the tent, as REI advises, and allow about 24 hours for seam sealer too.
On the next dry day, pitch or hang the tent, run the three checks (smell, spots and how the coating feels), and keep it drying until the underside of the floor is bone dry before it goes back on the shelf.
Founder & Gear Research Editor

Sonia Zannoni
I’m Sonia, the founder of Best Trail Backpacks. I don’t test gear myself. For every pack I cover, I read the manufacturer’s specs and sizing charts and look for what owners report again and again.
Fit comes first, because a pack that doesn’t match your torso and hips will hurt no matter what it cost. My goal is to help you choose a pack that suits your body, your trip and your budget.
About the Founder
