Backpack Rain Covers: The “Love-Hate” Guide to Keeping Your Gear Dry
Affiliate Disclosure: I believe in honest, trail-tested gear reviews. When you purchase through links on my site, I may earn a small commission that helps keep Best Trail Backpacks running, at absolutely no extra cost to you. As an Amazon Associate, I earn from qualifying purchases.
There is a specific kind of misery that only hikers know. You are three miles from the trailhead, it is raining sideways, and your backpack rain cover has blown off for the third time. It is now hanging from a trekking pole like a soggy flag of defeat.
Worse, the bottom of your pack has turned into a small, personal swimming pool.
That “saggy diaper” look is not a gear failure. It is a user error, and I have made it more times than I care to admit. Most of us grab a backpack rain cover off a shelf, stuff it over our pack, and assume we are sorted. We are not.
The good news is that getting this right takes about five minutes of actual knowledge. By the end of this guide, you will know exactly how to keep your gear dry and when to ditch the cover entirely for a pack liner.
TL;DR: Backpack Rain Covers
The Rain Gear Cheat Sheet
Method
Best For
The Catch
The Rain Cover
Light rain and keeping the outside of the pack clean from mud.
Can blow away in high winds; water can seep down the back panel.
The Pack Liner
Torrential rain and deep river crossings
Harder to access gear quickly; does not protect outside pockets.
The Dry Bag
Electronics and sleeping bags (critical survival items).
Expensive to buy in multiple sizes; adds extra base weight.
The Rain Cover
Best For: Light rain and keeping the outside of the pack clean from mud.
The Catch: Can blow away in high winds; water can seep down the back panel
The Pack Liner
Best For: Torrential rain and deep river crossings.
The Catch: Harder to access gear quickly; does not protect outside pockets.
The Dry Bag
Best For: Electronics and sleeping bags (critical survival items).
The Catch: Expensive to buy in multiple sizes; adds extra base weight.
Stop Believing Your Pack Is Waterproof
I hear this one all the time. Hikers will say their pack is waterproof, so they do not need a cover. Let me be straight with you. That claim is doing a lot of heavy lifting for a piece of fabric covered in zippers, seams, and buckle attachment points.
“Water-resistant” and “waterproof” are not the same thing. Water-resistant fabric, which is what most trail packs use, holds up fine in a light drizzle. Put it through twenty minutes of a genuine downpour, and you are in trouble.
The Problem with DWR, Zippers, and Seams
Under sustained rain, the DWR coating (durable water repellent) can eventually wet out, and many newer treatments now use PFC-free formulas instead of older fluorinated chemistry. At that point, the fabric begins absorbing moisture rather than repelling it.
Zippers are the biggest offenders. Most trail backpack zippers are not sealed, which means water tracks right down the zipper teeth and into your main compartment. Even taped seams can fail under sustained pressure.
One sentence sums it up nicely. A wet sleeping bag at camp is not a gear problem you solve at camp.

Field Note: DWR coatings wear off with washing and UV exposure. The test is simple. Splash water on your pack. If it beads up and rolls off, your DWR is working. If it soaks in and darkens the fabric, it is time to re-treat with a spray-on DWR product.
Step 1: Sizing and the “Saggy Diaper” Effect
The “saggy diaper” effect usually stems from two main issues. Either you have a cover that is completely the wrong size for your bag, or your cover lacks a retention strap to anchor it. A loose cover billows in the wind, catches like a sail, and then pools water at the bottom instead of shedding it.
A cover that is too tight, on the other hand, compresses your sleeping bag’s loft and can split at the seams on a fully loaded pack.
Rain covers are sized by their liter capacity to match your pack’s volume. A 50-liter cover pairs with a 50-liter pack. Simple enough, except for one important exception.
When to Size Up
If you are strapping gear to the outside of your pack like a tent body, a closed-cell sleeping pad, or trekking poles, you need to size up. That external gear adds significant bulk that the cover has to stretch over.
In that case, grab a cover one size larger than your pack’s listed volume. The right fit hugs the pack without pulling, leaves no slack fabric flapping at the sides, and lets you cinch the draw cord securely.

Look for Retention Straps
High-quality rain covers come with a retention strap (a buckle or toggle that clips behind the shoulder harness or across the middle of the pack) to physically tether it to the bag. You should always look for covers with middle retention straps, not just elastic hems.
Field Note: Before you buy, check the brand’s sizing chart instead of just the liter range. Stretch varies wildly between brands. If you can, test it at home with your pack fully loaded before your trip.
Step 2: The Drainage Hack Nobody Talks About
Here is the physics problem with rain covers that most product descriptions quietly ignore. Rain hits your back and runs down. It gets between the cover and the pack’s back panel, and it has nowhere to go except down.
Without drainage, your cover becomes a bucket. That water finds the lowest seam it can and forces its way inside.
The fix is a drainage hole, called a grommet, at the bottom of the cover. Some covers have them, but many do not. If yours lacks one, water will collect and either pool at the bottom, seep through the drawstring gap, or soak directly into your hip belt padding.
When analyzing a rain cover for purchase, look for a small brass or plastic eyelet at the lowest point. It is genuinely the single feature I check first now.
Field Note (The Grommet Trick): If your existing cover lacks a drainage hole, leave the drawstring slightly loose on one side at the bottom during your next hike. It is not elegant, but it gives water a way out instead of letting it pool.
Step 3: Visibility vs. Stealth
Rain cover color is one of those choices that feels cosmetic until you are out in the elements. There are two camps, and they have genuinely different use cases.
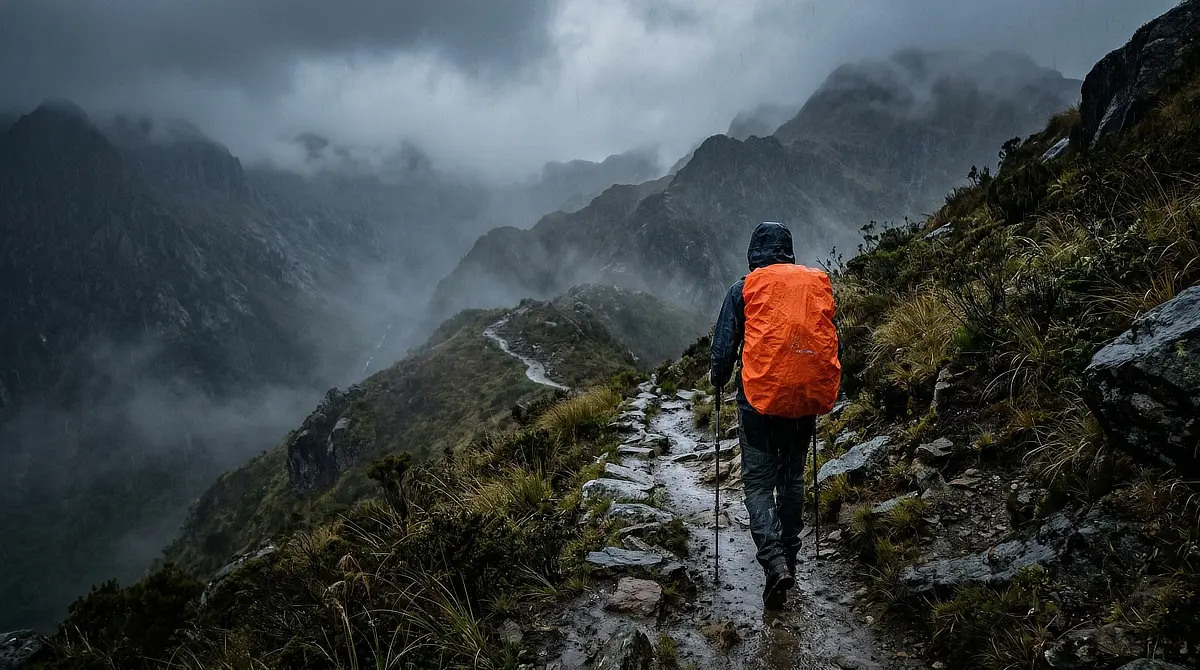
Bright colors (orange, yellow, neon green) are the right choice for most hikers. During hunting season, a bright cover prevents you from being mistaken for wildlife. In an emergency, it is something a search-and-rescue team can spot from the air. In heavy fog, it keeps you visible to mountain bikers sharing the trail.
Earth tones (green, brown, black) serve a specific niche. They are best for wildlife photographers, stealth campers, and anyone doing multi-day trips where standing out is not the goal.
For the everyday hiker looking for a peaceful day on the trail, bright orange is the pragmatic, safer choice every time.
Field Note: I always carry a neon orange cover. My reasoning is blunt. If I twist an ankle and need to signal for help, I want something highly visible from 200 feet up.
Step 4: Maintenance and Avoiding the Locker Room Smell
Rain covers are often treated with complete neglect because they seem indestructible. They are not. They are vulnerable to mildew, UV degradation, and elastic failure at the hem.
All three are accelerated by stuffing a wet cover into its storage pocket and leaving it there for a week.
The Post-Hike Routine
The routine after every wet hike takes two minutes:
- Pull the cover out of its pocket.
- Rinse it with clean water (no detergent, which strips the DWR coating).
- Shake it out and hang it to dry completely before storing.
Field Note: If you do need to reapply a DWR spray to your gear, look for modern PFC-free formulas. Many outdoor brands are moving away from traditional “forever chemicals” to drastically lower their environmental footprint.
Check Your Elastic
If the elastic at the hem starts to go limp and loose, the cover is past its useful life. A blown elastic means the cover will not stay on your pack in the wind, putting you right back at square one.
Finally, if your rain cover blows away on the trail, please go back and get it. A cheap plastic cover tumbling down a mountainside becomes litter. The Leave No Trace principles on waste disposal include your gear, not just food scraps.
Step 5: When to Ditch the Cover for a Pack Liner
There comes a point when a rain cover simply is not enough. If you are facing torrential, multi-day downpours, or if your route involves deep river crossings, a rain cover will inevitably fail to keep everything dry.
This is where you need a pack liner. While commercial dry bags and pack liners are great, experienced backpackers almost universally rely on the ultimate trail hack: the heavy-duty contractor trash bag.
For less than a dollar, a 3-mil contractor bag dropped inside your pack creates an impenetrable waterproof barrier. You stuff your sleeping bag, clothes, and sensitive gear inside, twist the top closed, and tuck it down.
It is lighter than a commercial liner, perfectly conforms to the inside of your pack, and completely removes the anxiety of a soaked sleeping bag. Save the rain cover for muddy trails and light showers, but trust the contractor bag when the skies truly open up.
Before Your Next Rain Hike: A Quick Check
Go find your rain cover right now. Put it on your pack and ask yourself:
- Does it fit without pooling at the corners?
- Does it have a grommet at the bottom?
- Does it have a secure retention strap?
- Is the elastic still firm?
- Does it smell like a gym bag?
The answers to those questions will tell you everything you need to know about your rain protection.
If you are shopping for a new cover or have realized yours is purely decorative, be sure to read our review roundup on the Best Backpack Rain Covers. Additionally, if your current pack is wetting out immediately, check out our guide to the Best Daypacks for Hiking to find modern options built with superior water-resistant materials.
Soggy gear is a solvable problem. You have the map now. Go use it.
Team Cover or Team Liner? Which side of the debate are you on? Have you had a rain cover fail on you in spectacular fashion, or found a setup that works perfectly? Share your experience in the comments!
GEAR EXPERT & FOUNDER

Sonia Zannoni
With over two decades of experience testing outdoor gear, I cut through the marketing noise to bring you honest, trail-tested reviews. My goal is to help you pack smarter and hike with confidence.
About the Founder
As an avid hiker, I know the thrill of exploring the great outdoors, but let’s face it, the weather can be unpredictable. That’s why I totally agree with you about the importance of having a reliable backpack rain cover to face any weather condition.
When I stumbled upon your post about backpack rain covers, I was so excited because I’ve been on enough rainy hikes to know the importance of having a good rain cover. It can differ between a wet and miserable hike and a comfortable and dry one.
I appreciate that you highlighted the significance of choosing the correct size for the rain cover. It’s often overlooked, but ensuring your belongings stay safe and dry is critical. Luckily, with the wide range of sizes and options available today, finding the perfect fit for your backpack is easier than ever.
I’ve had my fair share of being caught in rainstorms, and let me tell you, having good-quality gear is a lifesaver. Keeping your electronics dry and essentials protected from the elements is crucial for a successful outdoor adventure. So thank you for sharing your insights on backpack rain covers and happy trails!
As a fellow adventurer, I know the weather can sometimes be challenging. However, mother Nature likes to test our limits and see how much we can endure.
I couldn’t agree more with you about the importance of finding the correct size. It’s like trying to squeeze into a pair of shoes that are too small – it’s uncomfortable and doesn’t quite fit. An appropriately sized rain cover ensures that everything inside your pack stays nice and dry and that you can hike confidently, knowing you’re fully prepared for whatever weather comes your way.
Happy trails to you as well, and may your next adventure be dry and comfortable!
Thank you for sharing this informative post on backpack rain covers! As an avid hiker, I know firsthand how frustrating having a backpack filled with wet gear can be.
Your post gave me valuable insights on choosing the right rain cover for my bag. I appreciate the guidance on the best materials and the available price ranges.
In addition, the section about measuring my backpack to determine the appropriate size for the rain cover was beneficial. Overall, your post has equipped me with the knowledge to weatherproof my hiking adventure confidently. Thank you again!
I’m so glad you found my post on backpack rain covers helpful. I agree that nothing is worse than a backpack full of wet gear or dust and mud. It can really put a damper on a great hiking adventure! The right rain cover size ensures your equipment stays dry and protected.
It’s very good to know about backpacking, it makes your trip more easier and interesting, also having a good backpack rain cover will give you a good shelter during the raining weather and keeps backpack safe from the water. I like the fact that some backpacks are always made with this feature,it is really nice.
I find that a backpack rain cover is a must-have because the weather can change quickly! Even if my backpack is made of water-resistant material, I still want to fully waterproof my backpack, so I add a waterproof rain cover just to make sure that my gears stay dry.
This is a piece of excellent information, and now I see the importance of having a backpack rain cover since it is an important piece of equipment when going for a hike in the wilderness.
I have a question: Can you simply buy a waterproof bag over your backpack? Will it do the job effectively, or do I really need the backpack rain cover?
The thing is if you put a waterproof bag over your backpack, is it the same as a rain cover for your backpack? You have to make sure that the bag is really waterproof and not too small or too big to fit your backpack snugly.
Personally, I would buy a backpack rain cover as they are well-priced, between $15-50 depending on the size. I hope it helps.