
7 Hiking Backpack Tips to Check Before You Buy
The pack felt fine in the store. Two hours into your first long hike, the hip belt has crept up to your waist and your shoulders ache from carrying almost all of it.
That happens to a lot of hikers, and it usually isn’t your fault. A pack can be a good brand at a fair price and still be the wrong fit, because fit depends on your body, not the label.
What you want is a way to know a pack fits before the tags come off. These hiking backpack tips are the seven checks I’d run first, and most of them start with your own body rather than a brand.
Work through them and you’ll walk into the store, or open the box at home, knowing what to look for and when to send a pack back.
TL;DR: Hiking Backpack Tips
- Measure your torso and size the pack by that, not your height. Then check that the hip belt padding sits on top of your hip bones, so most of the weight rides there.
- Snug the load lifters and the sternum strap, but don’t crank them.
- Match the liters to the trips you take now, and choose the back panel, the access and the harness shape to suit your body and your weather.
- Before the tags come off, wear the pack loaded around the house for about half an hour.
Common Backpack Sizing Myths
It feels natural to pick a pack by your height, since that’s how most clothing is sized. A backpack doesn’t work that way. It’s sized by torso length, the distance from the bony bump at the base of your neck to the top of your hip bones.
Height and torso length only go together loosely. Deuter says it plainly on its fit page: people of almost the same height can have different back lengths. One hiker may get more of that height from the legs, another from the trunk, and a pack only cares about the trunk.
That difference shows up on the trail. A pack too short for your back puts the hip belt above your hip bones, where it can’t hold much, so the weight slides onto your shoulders. One too long drops the belt below them and leaves the shoulder straps floating.
The other advice you’ll hear is to buy big so you can grow into it. A 65 liter pack on a day hike mostly gives you room to fill with things you don’t need, and a bigger pack usually weighs more before you’ve packed anything.
A good fit is specific to your body and your trips. The seven tips below help you find yours.
Tip 1: Measure Your Torso Length, Not Your Height
Torso length is the number most size charts ask for. REI’s fit guide calls it the key measurement, ahead of your height. Many packs list the torso range each size fits, and the ranges vary from brand to brand.
You need a soft tape measure and a helper. The tape runs from that bump at the base of your neck down to a level line across the top of your hip bones, and my guide to measuring your torso for a backpack shows where it goes, step by step.
Many packs have an adjustable torso: the harness moves up or down the back panel, held by a hook-and-loop flap on some packs and a sliding buckle on others. That can save you a return when your number sits between two sizes, though the adjustment adds a little weight.
Quick Tip: Measure at home before you shop, over a thin shirt. If you don’t have a soft tape, lay a piece of string along your spine between the two points, mark them, then measure the string flat.
Tip 2: Let the Hip Belt Carry the Load
Your hips should carry most of the weight, and your shoulder straps should mostly keep the pack steady. REI explains why: your legs have some of the strongest muscles in your body, so the goal is the majority of the load resting on your hips.
For that to work, the belt has to sit on your hip bones, not your waist. The padding should hug the top of your hip bones, the bony ridge called the iliac crest. Cinched around your belly instead, the belt has nothing firm to rest on.
If you have a narrow waist, a standard belt may not tighten enough. REI wants at least an inch of clearance on each side of the buckle, and some packs offer interchangeable hip belts in smaller sizes, so check the belt sizing before you commit.
The opposite problem has a fix too. If the belt won’t close, or the padding stops short of your hip bones, look at extended or plus sizes, which Osprey and Gregory both make with longer hip belts and shoulder straps.
On a small daypack with a thin webbing belt, the belt mostly keeps the pack from swinging. REI notes that a hip belt starts to make a real difference once the pack weighs more than about 15 pounds, so don’t rule out a light daypack for a simple belt.
Load Lifters and the Sternum Strap
Load lifters are the short straps running from the top of each shoulder strap back to the pack. Snug them and the top of the pack comes in toward your back, so it doesn’t lean away and pull on your shoulders.
REI puts them at roughly a 45 degree angle and warns against cranking them, because too much tension can pinch your shoulder joints. Snug, not stiff, is the target.
The sternum strap clips across your chest about an inch below your collarbones. Tighten it just enough that your arms swing freely, since pulling it hard squeezes your chest and can restrict your breathing.
When you try a pack on in a store, ask to load it with about 15 pounds first, the weight REI uses to set the straps. With nothing inside, you can’t tell where the belt will sit once there’s weight behind it.
Setting these straps in the right order is a skill of its own, and my guide on how to adjust hiking backpack straps walks through it once the pack is yours.
Tip 3: Match the Capacity to the Trips You Actually Take
It’s tempting to buy a big pack just in case. Maybe you’ll do an overnight someday, or want room for extra layers. The trouble is that spare room tends to fill up with things you won’t use, and every one of them rides on your hips and shoulders.
Pick the liter size for the trips you take now. If your hiking grows into overnights later, a small daypack stays useful for day hikes beside the bigger pack, so starting small isn’t money wasted.
Pack Size by Trip Length
Trip
Typical length
Pack size
Short hike
1 to 2 hours
10 to 15 liters
Full-day hike
4 to 8 hours
20 to 30 liters
Weekend backpacking
1 to 3 nights
30 to 50 liters
Multiday backpacking
3 to 5 nights
50 to 80 liters
Short hike
Typical length: 1 to 2 hours
Pack size: 10 to 15 liters
Full-day hike
Typical length: 4 to 8 hours
Pack size: 20 to 30 liters
Weekend backpacking
Typical length: 1 to 3 nights
Pack size: 30 to 50 liters
Multiday backpacking
Typical length: 3 to 5 nights
Pack size: 50 to 80 liters
The day hike sizes follow my guide to what size and features matter in a hiking backpack, and the overnight ranges are REI’s. Between two sizes, I’d go with the smaller one, because a smaller pack keeps you honest about what you carry.
If budget is part of the decision, my roundup of the best hiking backpacks under $100 sorts its picks by trip, from a daypack to a first overnight pack.
Tip 4: Check the Back Panel for Airflow (and Avoid a Sweaty Back)
If you hike in summer or run warm, look at the back panel early. A flat foam panel sits right against your back, so the sweat has nowhere to go, and on a warm day your shirt can be soaked well before the top.
A suspended mesh back works differently. As REI describes it, the pack bag rides a few inches away from your back while you rest against a stretched sheet of mesh, which leaves a gap for air to move.
Some packs take a middle road: a foam panel with ventilation channels cut into it, which gives sweat a little more room to escape.
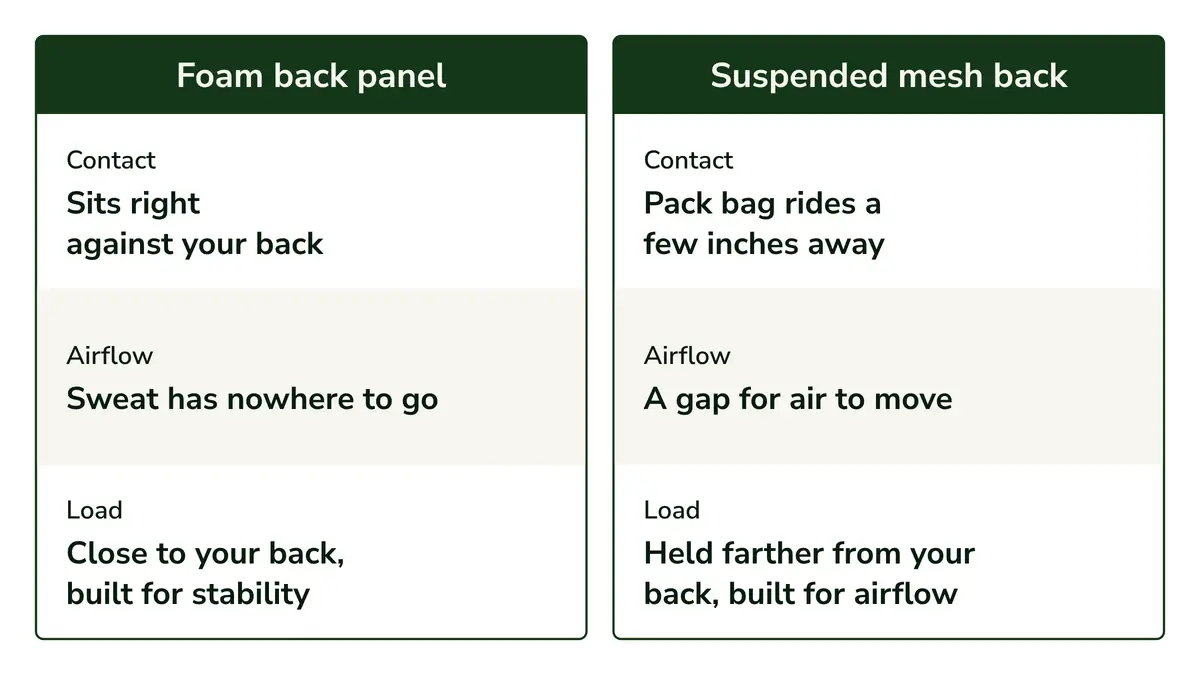
The tradeoff is where the weight sits. Because the load rides a few inches off your back, mesh can feel less steady under a heavy load. That fits how Osprey describes its designs: close to the body for stability, suspended mesh for airflow.
For day hikes and moderate loads, I’d put the airflow first. If you carry heavy overnight loads, try both kinds with weight inside and see which you’d rather wear for a long day.
Try packs on over a thin shirt rather than a jacket. A bulky layer changes how the back panel and the hip belt sit, so you won’t get a true read.
Tip 5: Check How You Get Into the Pack (Panel Access vs Top-Loading)
Top-loading packs, which open only at the top, are still the standard design. Their one real limitation is reach: to get at anything below the top layer, you dig down through everything above it.
Panel-access packs solve that with a U-shaped or J-shaped zipper that opens the main compartment from the front. You can see your gear at once and grab what you need without unpacking.
That convenience has a small cost. REI notes that extras like panel access tend to add a little weight and cost, so it’s worth it mainly if you’ll use it often.
For a beginner still working out how to pack, front access is the easier one to live with. Rain is where you notice it most: with a top-loader, a rain shell buried under food and spare layers takes a while to reach.
Where things go inside matters as much as how you get to them, and my guide on how to pack a hiking backpack covers the order.
Quick Tip: With a top-loader, keep your rain jacket and anything you reach for often in the top lid pocket, so you can grab it without opening the main compartment.
Tip 6: Try a Women’s-Specific Pack If Unisex Straps Don’t Sit Right
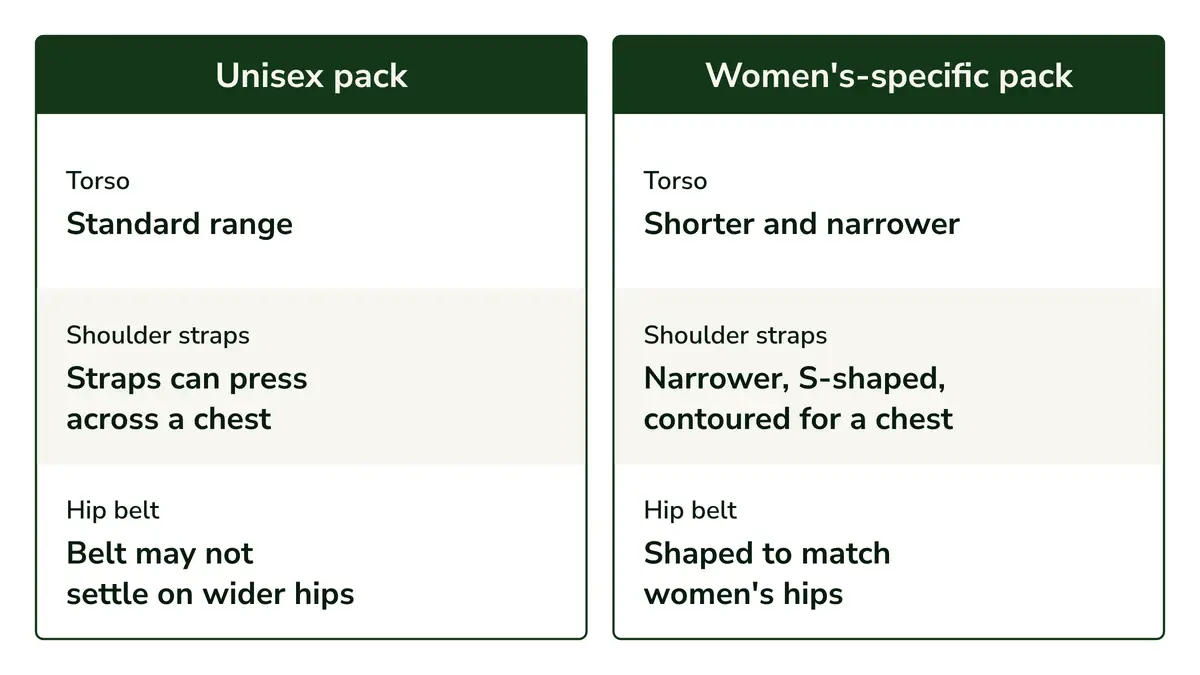
Women’s-specific packs aren’t just smaller or a different color. REI describes their torsos as generally shorter and narrower, with shoulder straps and hip belts contoured for a chest and wider hips.
Deuter’s women’s SL packs show what that looks like in practice: a shorter back, narrower S-shaped shoulder straps and hip fins (the padded wings of the hip belt) shaped to match women’s hips. Deuter adds that the SL fit can also suit men with narrow shoulders or a slim frame.
So if unisex straps press across your chest or the belt never settles on your hips, the shape may be the problem rather than the weight. A women’s-specific pack is worth trying before you decide packs just aren’t comfortable for you.
While you have one on, check that the sternum strap slides to a height that sits comfortably across your chest. On a pack shaped around a chest, that height matters more.
For packs built around these fit points, my roundup of the best hiking backpacks for women compares them side by side.
Tip 7: Do the Living Room Test With Real Weight
An empty pack tells you very little about how it will feel on the trail, because the fit changes once there’s weight in it. Straps that felt right can start to dig, and a belt that felt snug can slide.
Before you cut the tags, load the pack with roughly what you’ll carry on a real hike. Books and full water bottles work well, wrapped in a blanket or towel so the load has some bulk and doesn’t settle into one hard lump at the bottom.
Wear it around the house for about 30 minutes. Walk up and down the stairs, lean forward and twist side to side, the way you would on a rocky trail.
Watch three things: where pressure builds, whether the pack shifts, and whether the hip belt stays on your hip bones.
If the belt creeps toward your waist, tighten it and ease the shoulder straps a little. If it still climbs, the torso size is likely off, and that’s far easier to find out now than two hours into a hike.
If you’re buying in a store, ask the staff to help with the fitting, because someone standing behind you can see where the belt and straps sit in a way a mirror can’t.
Keep the tags on and the packaging until you’re sure, so you can still return the pack within the store’s window if something rubs or slips.
One Last Thought Before You Buy
The right pack isn’t the priciest one or the one with the longest feature list. It’s the one that fits your torso and suits the trips you actually take.
If you’re replacing a pack that already hurt you once, my roundup of the best hiking backpacks for back pain looks at packs chosen for how they put the load on your hips.
Start with the tape measure. Measure your torso, check it against the size chart for the pack you like, then do the loaded walk around the house before the tags come off.
Founder & Gear Research Editor
Sonia Zannoni
I’m Sonia, the founder of Best Trail Backpacks. I don’t test gear myself. For every pack I cover, I read the manufacturer’s specs and sizing charts and look for what owners report again and again.
Fit comes first, because a pack that doesn’t match your torso and hips will hurt no matter what it cost. My goal is to help you choose a pack that suits your body, your trip and your budget.
About the Founder
